Endpoints
Manage external system endpoints and connections
On this page
#About Endpoints
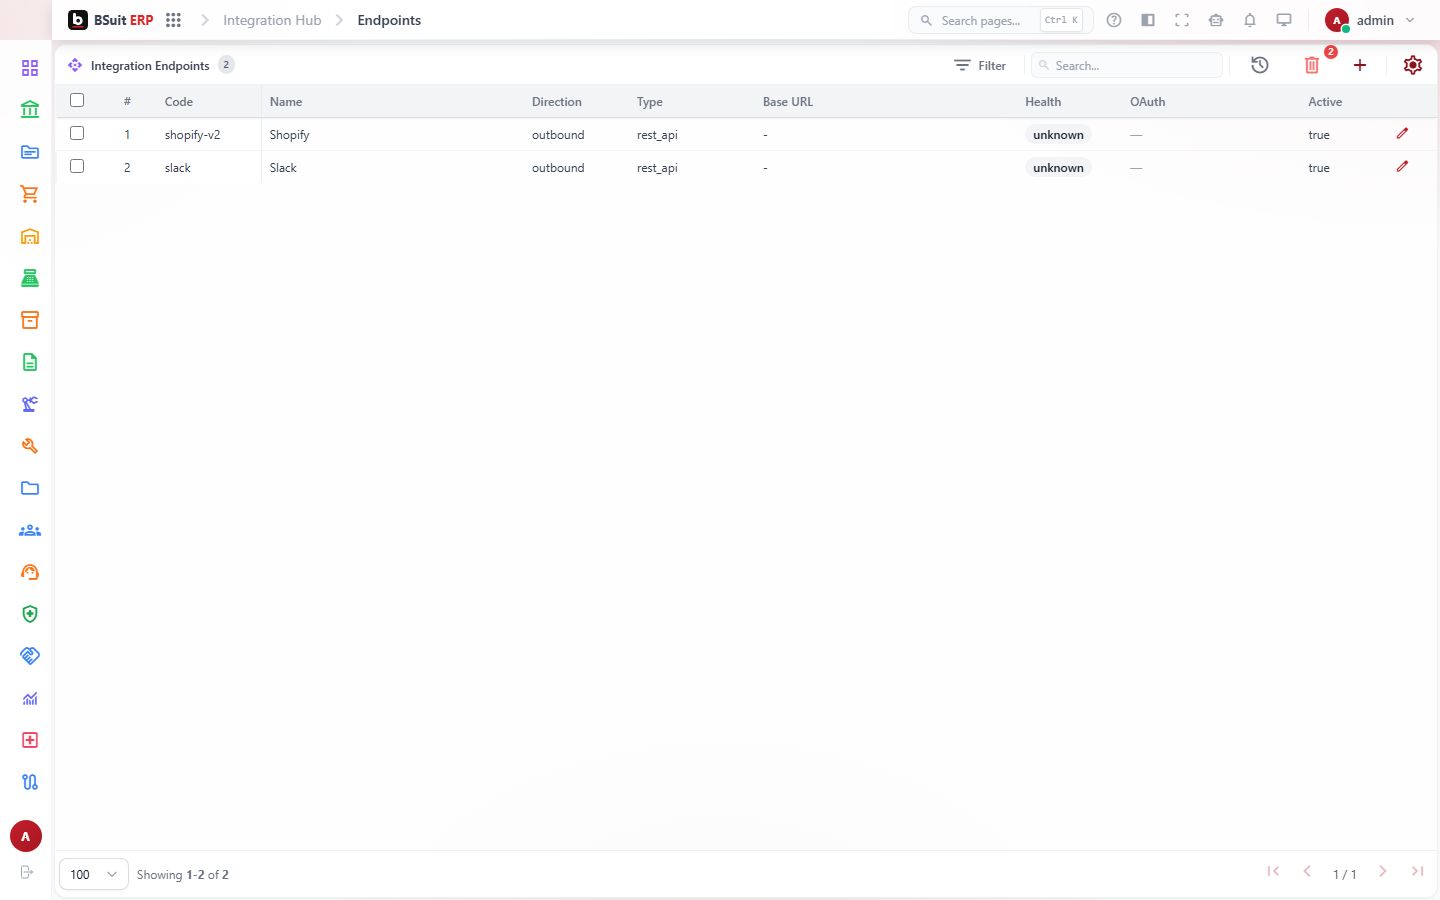
Manage external system endpoints and connections. This is a working page: a list or workspace where you find and act on records in BSuit ERP (Integration). It is used by staff (internal users). What you can see and do depends on your role and permissions.
#How to open it
In BSuit ERP, open Integration and choose “Endpoints”, or go directly to the address /integration/endpoints.
#What you can do here
These controls are present in the page’s implementation. Whether you see a given one also depends on your permissions and on the data shown.
- Add new records — a form opens for the details.
- Change existing records.
- Delete records (you are asked to confirm).
- Bring records in from a file.
- Export what you see to a file.
- Print or save as PDF.
- Attach or upload files.
- Search within the page.
- Filter the data shown.
- Sort by a column.
- Page through long lists.
- Open dialogs or drawers for detail and confirmation.
#Fields
When you enter or change an endpoint, these fields are on the form. Required fields must be completed before you can save.
| Field | Type | Required | Details | Refers to |
|---|---|---|---|---|
| Code | text | Yes | — | — |
| Name | text | Yes | — | — |
| Description | textarea | No | — | — |
| Direction | select | No | One of: Inbound, Outbound. | — |
| Endpoint Type | select | No | One of: REST API, Webhook, File, SFTP, File drop (local), Database, SOAP, GraphQL. | — |
| Base URL | text | No | — | — |
| Auth Type | select | No | One of: None, Basic, Bearer Token, API Key, OAuth 2.0. | — |
| API Key Header Name | text | No | Header the provider expects the key on, e.g. X-Shopify-Access-Token. Defaults to X-API-Key. Example: X-API-Key. | — |
| OAuth Grant Type | select | No | Client Credentials = machine-to-machine. Authorization Code = user consent (use the Connect button). One of: Client Credentials, Authorization Code. | — |
| Token URL | text | No | Example: https://provider.example.com/oauth/token. | — |
| Authorization URL | text | No | Example: https://provider.example.com/oauth/authorize (authorization_code only). | — |
| Client ID | text | No | — | — |
| Client Secret | password | No | Stored encrypted; never displayed. Leave blank on edit to keep the existing value. Example: Leave blank to keep the stored secret. | — |
| Scope | text | No | Example: space-separated scopes. | — |
| Redirect URI | text | No | Register this exact URL with the provider for the Authorization Code grant. Example: https://<your-host>/api/integration/oauth/callback (authorization_code only). | — |
| Connection Config (JSON) | textarea | No | SFTP / File drop endpoints: host, credential references (env:BSUIT_INTEGRATION_SECRET_NAME or a value you type, stored encrypted), pinned host key, directories and file format. REST endpoints: optional {"csrf":{"fetch_path":"/service/"}} fo Example: {. | — |
| Timeout (s) | number | No | — | — |
| Retry Count | number | No | — | — |
| SSL Verify | checkbox | No | Default: true. | — |
| Active | checkbox | No | Default: true. | — |
#What the list shows
The list displays these columns; use search and filters to narrow it.
- Code
- Name
- Direction
- Type
- Base URL
- Health
- OAuth
- Active
#How to add an endpoint
Steps follow this page’s form. You need permission to create records here.
- Open Integration › Endpoints from the menu.
- Choose the Add button (a plus icon) above the list. The form opens in a dialog.
- Complete the required fields: Code, Name.
- Some fields offer a fixed list: Direction: Inbound, Outbound; Endpoint Type: REST API, Webhook, File, SFTP, File drop (local), Database, SOAP, GraphQL; Auth Type: None, Basic, Bearer Token, API Key, OAuth 2.0; OAuth Grant Type: Client Credentials, Authorization Code.
- Save. The new record appears in the list; use search or the filters to find it again.
- To change it later, open the record from the list and edit it.
- Deleting asks you to confirm. Records that other records refer to may be refused or may affect them (see “Where … is used as a reference”).
#Observed on a running system
On 2026-09-21 this page was opened in a browser as a test administrator. This is what was visible on screen. Your own view can differ with your role, data and settings.
| Button |
|---|
| Filter |
| History |
| Add (plus icon) |
| Settings (cog icon) |
| Code |
| Name |
| Direction |
| Type |
| Base URL |
| Health |
| OAuth |
| Active |
| Edit (pencil icon) |
#If something is missing or fails
- No data: confirm the company or context selected in the top bar, and any filters or date range in use.
- An action is hidden or disabled: it usually needs a permission your role does not have. Ask an administrator to check your effective access.
- An error message appears: note the message, the page address and what you were doing, and contact support with those details (never include passwords).
#About this guide
This guide was generated from the page’s implementation. It has not yet been reviewed by a person against a running system, so treat it as a reference for what the page contains rather than a complete procedure.
About this guide
- Status
- Partially reviewed
- Application
- BSuit ERP
- Audience
- Staff (internal users)
- Owner
- BSuit documentation team
- Reviewer
- Not yet reviewed
- Last verified
- Never
- Checked against
- Generated from source revision a36c7a086 on 2026-10-02
- Seen on a running system
- 2026-09-21
- Help version
- 2026.0.0-preview
- Guide ID
erp:/integration/endpoints