BSuit User Guide

Help version 2026.0.0-preview · content generated 2026-10-02. Use your browser’s Print (or Save as PDF).

Back to contents

Part 1. Getting started

  1. Welcome to BSuit ERP
  2. Navigation and global search
  3. Work with lists and records
  4. Approvals and workflow tasks
  5. Getting started with BSuit Smart
  6. Campus Portal: one sign-in for students, teachers and parents

Part 2. Administration and set-up

  1. Setting up BSuit for a new organisation

Part 3. Business processes

  1. Procure to pay: from requisition to supplier payment
  2. Order to cash: from opportunity to collected payment
  3. Inventory operations: transfers, adjustments, counts and batches
  4. Service and support: tickets, SLAs, changes and warranties
  5. Record to report: journals, month-end and year-end close
  6. Hire to retire: recruitment, onboarding, attendance, leave and exit
  7. Payroll: running, approving, posting and releasing payslips
  8. Travel and expenses: claims, approval and reimbursement
  9. Campus: academic set-up, admissions, teaching, results and fees
  10. Healthcare: from registration to billing
  11. Plant maintenance: preventive plans, work orders and technicians
  12. IoT: onboard devices, ingest readings, alerts and commands
  13. Transport: book, rate, dispatch, deliver, settle trips and bill freight
  14. Agriculture: fields, crop cycles, livestock, automation, costing and harvest revenue
  15. Restaurant: floor set-up, reservations, orders, kitchen tickets and billing
  16. Oil & Gas JV: wells, partners, AFEs, joint interest billing and cash calls
  17. Hospitality: rooms, rate plans, bookings, check-in, folio and check-out
  18. Insurance: products, policies, premiums, claims and reinsurance
  19. Legal Practice: matters, time, billing, collections and client trust
  20. Plan to produce: BOMs, MRP, production orders and quality
  21. Real Estate: listings, inquiries, viewings, offers and deals
  22. Developer Studio: custom entities, forms, change requests, rules, notifications and audit
  23. Idea to project close: intake, planning, delivery and billing
  24. Contract lifecycle: draft, sign-off, signature, milestones and payments
  25. License Management: plans, license requests, signed keys and the license lifecycle
  26. Lead to won deal: leads, pipeline, quotes and forecast
  27. Master Data Management: duplicate review, golden records, quality and relationships
  28. Document control: folders, versions, approval, transmittals and retention
  29. Employee Engagement: kudos, awards, pulse surveys and suggestions
  30. Performance: goals, appraisal cycles, manager reviews and feedback
  31. Workflow automation: templates, assignments, approvals and monitoring
  32. Integration setup: endpoints, flows, mappings, schedules and monitoring
  33. Product catalog: from taxonomies to a published product
  34. Library operations: catalogue, circulation, reservations and fines
  35. HSE: permits to work, incidents and corrective actions to closure
  36. Reports and analytics: build, review, publish and schedule reports
  37. BSuit AI and AI Studio: set up, train, chat and extend

Part 4. Roles and access

  1. Roles and access: how permissions work
  2. Permission Manager
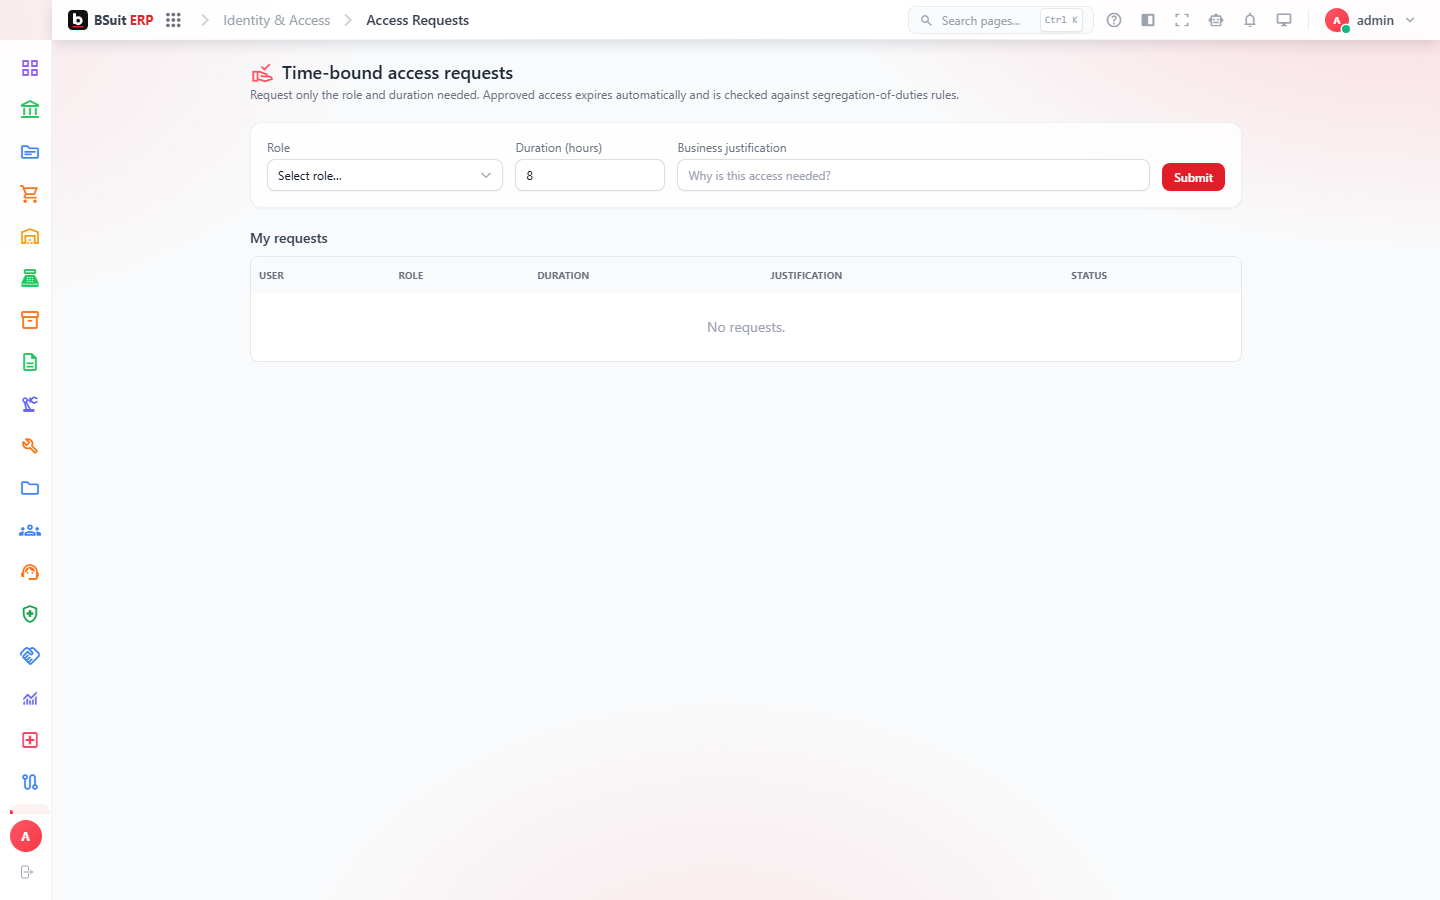
  3. Request temporary access

Part 5. Reference

  1. Glossary
  2. Page, report and data reference
  3. Missing data, pages, or actions

Welcome to BSuit ERP

Learn the workspace, navigation, search, and the safest way to begin working in BSuit.

On this page
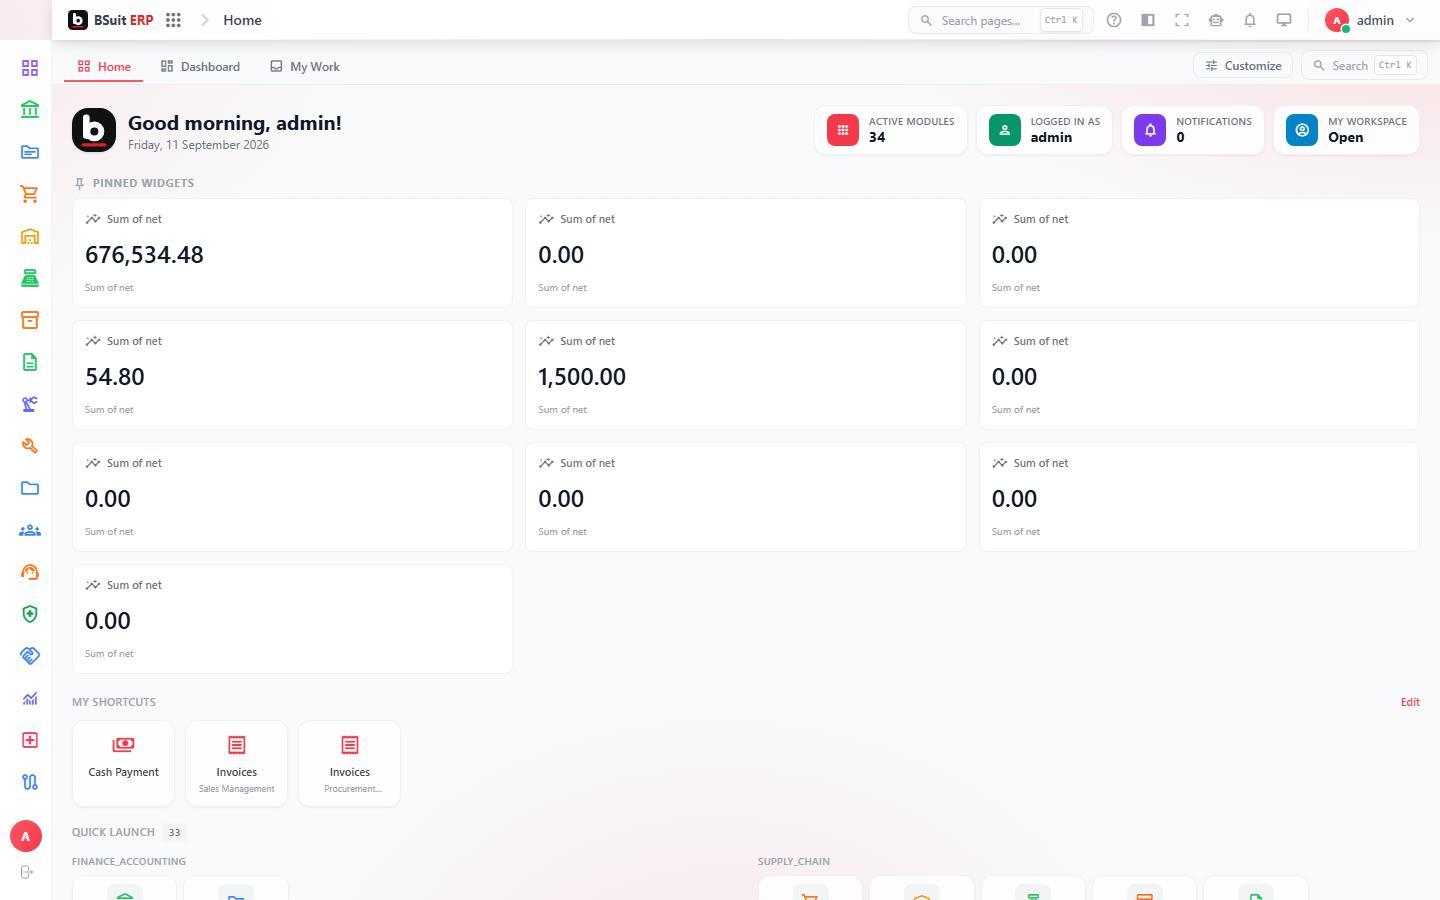
Screenshot of the Welcome to BSuit ERP page
The Welcome to BSuit ERP page in BSuit.

#Your workspace

BSuit organizes work by business module. The navigation menu shows only modules and capabilities enabled for your organization and role.

#Find your work

  1. Use the sidebar to browse by module.
  2. Press Ctrl+K (or Command+K) to find a page or record.
  3. Use notifications and My Tasks to return to work requiring your action.

#Before entering live data

Confirm the selected company, database, accounting period, and your user context. Your access and data scope can differ between companies.

About this guide

Status
Partially reviewed
Application
BSuit ERP
Audience
Staff (internal users)
Owner
BSuit documentation team
Reviewer
Not yet reviewed
Last verified
Never
Checked against
Generated from source revision a36c7a086 on 2026-10-02
Seen on a running system
2026-09-21
Help version
2026.0.0-preview
Guide ID
erp:/home
Need more help?If feedback above cannot be sent, email support and quote guide ID erp:/home.
Email support

Navigation and global search

Move quickly between modules, pages, and records with navigation and keyboard shortcuts.

On this page
Screenshot of the Navigation and global search page
The Navigation and global search page in BSuit.

#Open global search

  1. Press Ctrl+K on Windows or Command+K on macOS.
  2. Type a page, module, or supported record name.
  3. Use arrow keys to select a result and Enter to open it.

#Navigation modes

BSuit supports mega, standard, and dock navigation. Change the mode in Settings. Your choice is saved on this device.

#Contextual help

Select the question-mark action in the top bar from any page. BSuit Help opens the closest matching guide in a new tab, so your current work remains open.

About this guide

Status
Partially reviewed
Application
BSuit ERP
Audience
All BSuit users
Owner
BSuit documentation team
Reviewer
Not yet reviewed
Last verified
Never
Checked against
Generated from source revision a36c7a086 on 2026-10-02
Seen on a running system
Not yet
Help version
2026.0.0-preview
Guide ID
erp:article/getting-started/navigation-and-search
Need more help?If feedback above cannot be sent, email support and quote guide ID erp:article/getting-started/navigation-and-search.
Email support

Work with lists and records

Search, filter, create, edit, export, and safely manage records across BSuit.

On this page
Screenshot of the Work with lists and records page
The Work with lists and records page in BSuit.

#Find records

  1. Use search for a quick text match.
  2. Open filters for field-specific criteria.
  3. Save a view when you will reuse the same columns and filters.
  4. Clear filters if expected records are missing.

#Create or edit

Required fields are marked. Field help, validation messages, and related-record selectors guide data entry. Save as draft when the business process supports it.

#Protected actions

Delete, post, approve, and bulk operations may require extra permission or confirmation. Posted business documents are normally corrected through reversal or cancellation rather than direct editing.

About this guide

Status
Partially reviewed
Application
BSuit ERP
Audience
All BSuit users
Owner
BSuit documentation team
Reviewer
Not yet reviewed
Last verified
Never
Checked against
Generated from source revision a36c7a086 on 2026-10-02
Seen on a running system
Not yet
Help version
2026.0.0-preview
Guide ID
erp:article/working-with-data/lists-and-records
Need more help?If feedback above cannot be sent, email support and quote guide ID erp:article/working-with-data/lists-and-records.
Email support

Approvals and workflow tasks

Submit records, act on approval tasks, and understand status changes and audit history.

On this page
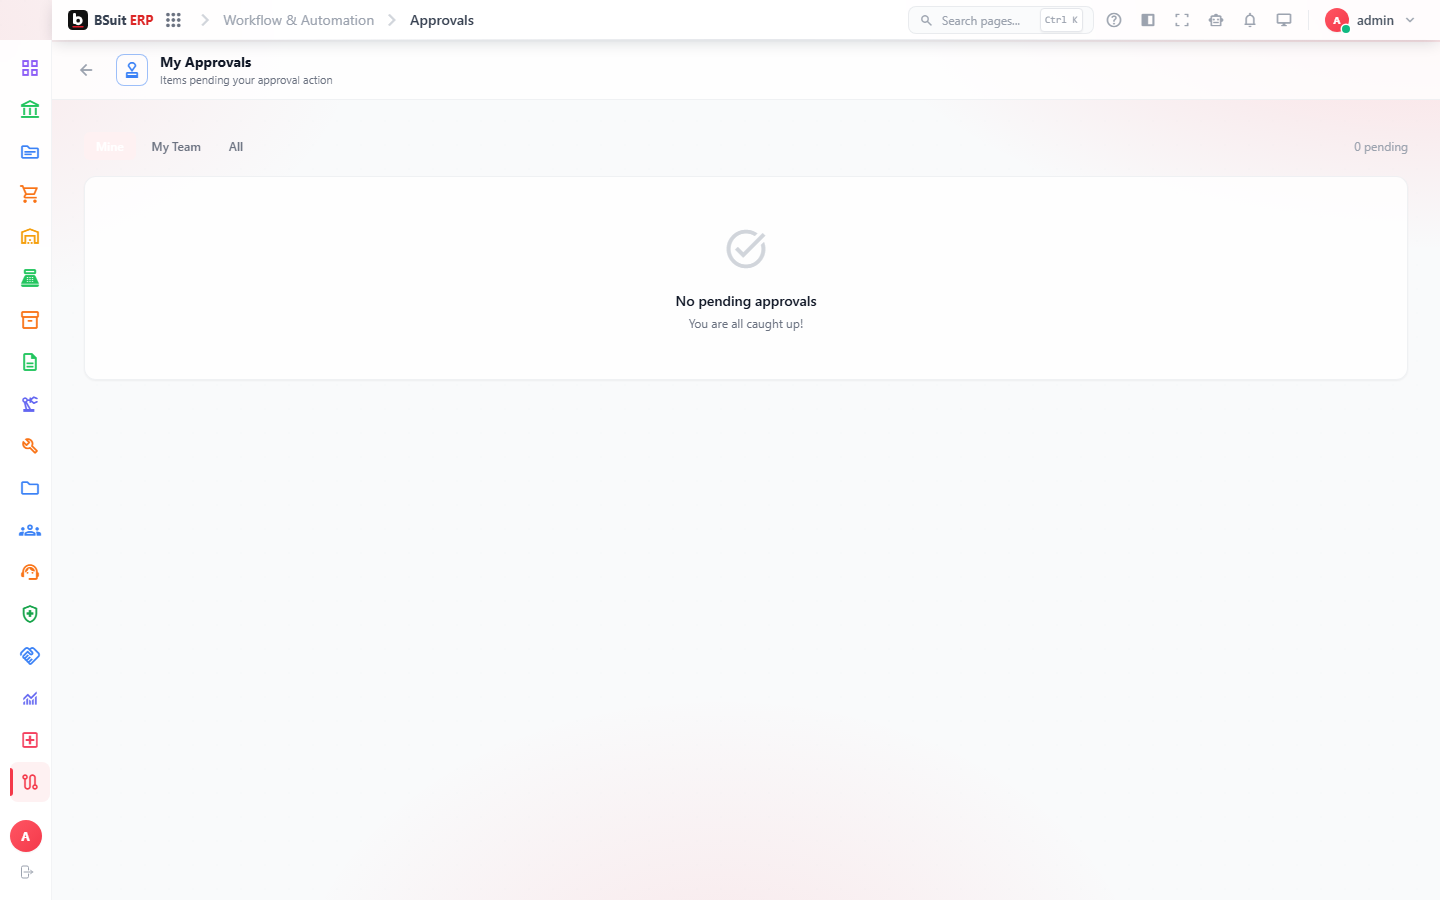
Screenshot of the Approvals and workflow tasks page
The Approvals and workflow tasks page in BSuit.

#Submit for approval

  1. Complete required record information.
  2. Resolve validation warnings.
  3. Select Submit and add a useful comment when requested.
  4. Track the record status or workflow timeline.

#Approve or reject

Open the assigned task, review the record and supporting files, then approve, reject, or return it according to your authority. The decision and comment are retained in the audit trail.

About this guide

Status
Partially reviewed
Application
BSuit ERP
Audience
Staff (internal users)
Owner
BSuit documentation team
Reviewer
Not yet reviewed
Last verified
Never
Checked against
Generated from source revision a36c7a086 on 2026-10-02
Seen on a running system
2026-09-21
Help version
2026.0.0-preview
Guide ID
erp:/workflow-automation/approvals
Need more help?If feedback above cannot be sent, email support and quote guide ID erp:/workflow-automation/approvals.
Email support

Getting started with BSuit Smart

The persona-based mobile/tablet app for point-of-sale, field, and self-service work — cashier, technician, warehouse, patient, student, and more.

On this page

#How the app is organized

BSuit Smart is one installable app whose screens change based on who signs in — it is not separate apps per role. Point-of-sale personas: POS (checkout), Cashier (till sign-in/reconciliation), Sales Register, Restaurant (Floor/Order/KDS — kitchen display). Field/maintenance: PM (technician sign-in, asset scan via barcode/QR, device management, session log). Warehouse: receiving against a PO, box scan/detail, stock audit, inquiry. Delivery: Van (sell on the road). Self-service: ESS (attendance, expenses, approvals, documents) for employees, Patient (appointments, booking, lab results, bills) for HMS, Student (classes, assignments, attendance, discussions, event RSVP), Teacher (class roll-call, assignments, resources, marks) and Parent (children switcher, then their schedule, attendance, results and fees) for Campus — the same accounts as the Campus Portal web app. Driver (assigned deliveries, proof of delivery with photo and signature), Doctor (patients, prescribing) and Caregiver access (via the Patient area) complete the personal sign-ins. Every screen has its own guide under BSuit Smart, Driver, Doctor, Patient and the other areas in the directory.

#Where to start

  1. Sign-in determines which persona’s screens appear — a technician signing in sees PM screens, a cashier sees till screens, and so on; there is no manual "switch persona" step.
  2. PM’s Asset Scan uses the device camera against a physical barcode/QR on the asset — it needs the asset already registered in Plant Maintenance (see the Plant Maintenance guide) to resolve to anything.
  3. Warehouse’s Receiving screen expects an approved Purchase Order or GRN already in Inventory & Warehouse to receive against.
  4. Patient and Student personas are read-mostly self-service — most data (appointments, grades, attendance) originates from HMS/Campus staff-side pages, not entered in the app itself.
  5. ESS mirrors the Employee Self-Service module’s own web pages, scoped to mobile-friendly use in the field.

About this guide

Status
Partially reviewed
Application
BSuit ERP
Audience
Cashiers, technicians, drivers, clinicians, students, teachers, parents and employees using BSuit Smart
Owner
BSuit documentation team
Reviewer
Not yet reviewed
Last verified
Never
Checked against
Generated from source revision a36c7a086 on 2026-10-02
Seen on a running system
Not yet
Help version
2026.0.0-preview
Guide ID
erp:article/apps/bsuit-smart
Need more help?If feedback above cannot be sent, email support and quote guide ID erp:article/apps/bsuit-smart.
Email support

Campus Portal: one sign-in for students, teachers and parents

What each kind of account sees after signing in to the Campus Portal, and which pages belong to whom.

On this page

#One portal, three homes

There is a single Campus Portal and a single sign-in form. Your school creates and invites your account; the portal decides from the type of account whether you are a Student, a Teacher or a Parent and shows the matching home page. There is no separate student site.

#What each account can open

Pages by account type
AccountPages in the menu
StudentHome, Schedule, Learning, Attendance, Results, Fees, Courses, Events
TeacherHome, My classes, Timetable
ParentMy children (home), Schedule, Attendance, Results, Fees

#Phones and tablets

On a phone a bottom bar replaces the sidebar. Students see Home, Schedule, Learning and More (Attendance, Results, Fees, Courses and Events are under More). Teachers and parents see all of their pages in the bar.

#Student home

Shows a greeting, a “Needs your attention” area (for example a warning when outstanding fees are blocking exam eligibility, with a link to Fees), your next class with a Join live button when a live session is available, today’s schedule, assignments due soon and a summary of your progress and attendance.

#Teacher home

Shows the number of classes you teach, periods per week and teaching load in hours, today’s schedule with a link to the full week, and your classes with a link to all classes.

#Parent home

  1. Open My children and choose a child.
  2. Schedule, Attendance, Results and Fees then show that child’s information.
  3. Use the “Choose which child to view” switcher in the top bar to change child.

#Signing in and out

  1. Open the portal address your school gave you.
  2. Enter your email and password. If you have not set a password, use the invitation link your school emailed.
  3. Use “Forgot password” on the sign-in page to request a reset link; the link works once.
  4. Use the account menu to sign out, especially on shared devices.

#Mobile app

The same accounts work in the BSuit Smart app, which offers Student, Teacher and Parent screens.

#If something is missing

  1. A page you expect is missing: it may not belong to your account type (see the table above).
  2. A parent sees no children: the school has not yet linked you to a student with portal access.
  3. You cannot sign in: ask your school to resend the invitation or reset your access.

About this guide

Status
Partially reviewed
Application
Campus Portal
Audience
Students, teachers and parents
Owner
BSuit documentation team
Reviewer
Editorial review pending
Last verified
2026-09-21
Checked against
a9ad297d6
Seen on a running system
Not yet
Help version
2026.0.0-preview
Guide ID
campus:article/apps/campus-portal

Known limits: Observed 2026-09-25 in a browser via read-only admin view-as as Student, Teacher and Parent: each role reached only its own pages (Teacher: Home/Classes/Timetable; Parent: Children/Schedule/Attendance/Results/Fees; Student: all eight) and other pages returned to the home page, as the guide states. Sign-in and invitation wording taken from project notes, not re-read from the auth pages.

Need more help?If feedback above cannot be sent, email support and quote guide ID campus:article/apps/campus-portal.
Email support

Setting up BSuit for a new organisation

What an administrator configures, in the order it has to exist, before people can record transactions.

On this page

Process at a glance

  1. Company, currency and countryAdministratorThe legal entity exists with its base currency.
  2. Install modulesAdministratorOnly the modules you licensed appear in the menu.
  3. Taxes and exchange ratesFinance administratorTax codes and rates are available on documents.
  4. Fiscal year and periodsFinance administratorPostings have an open period to land in.
  5. Chart of accountsFinance administratorLedger groups and ledgers, including bank, retained earnings and FX gain/loss.
  6. Record types and numberingAdministratorEvery voucher type is numbered and knows whether it needs approval.
  7. Approval workflowsAdministratorDocuments that need approval are routed to approvers.
  8. Users, roles and securityAdministratorPeople can sign in and see only what their role allows.
  9. Email and print templatesAdministratorNotifications are delivered and documents print in your format.

#Purpose

Use this chapter when a new organisation (tenant) or a new company is being prepared for use. It lists the configuration in dependency order: each step relies on the ones before it. Skipping ahead is the most common reason a first transaction cannot be saved or posted.

#What BSuit creates for you

When a tenant is provisioned, several masters are seeded automatically so you do not start from empty screens.

Seeded automatically vs entered by you
MasterCreated byWhere to maintain it
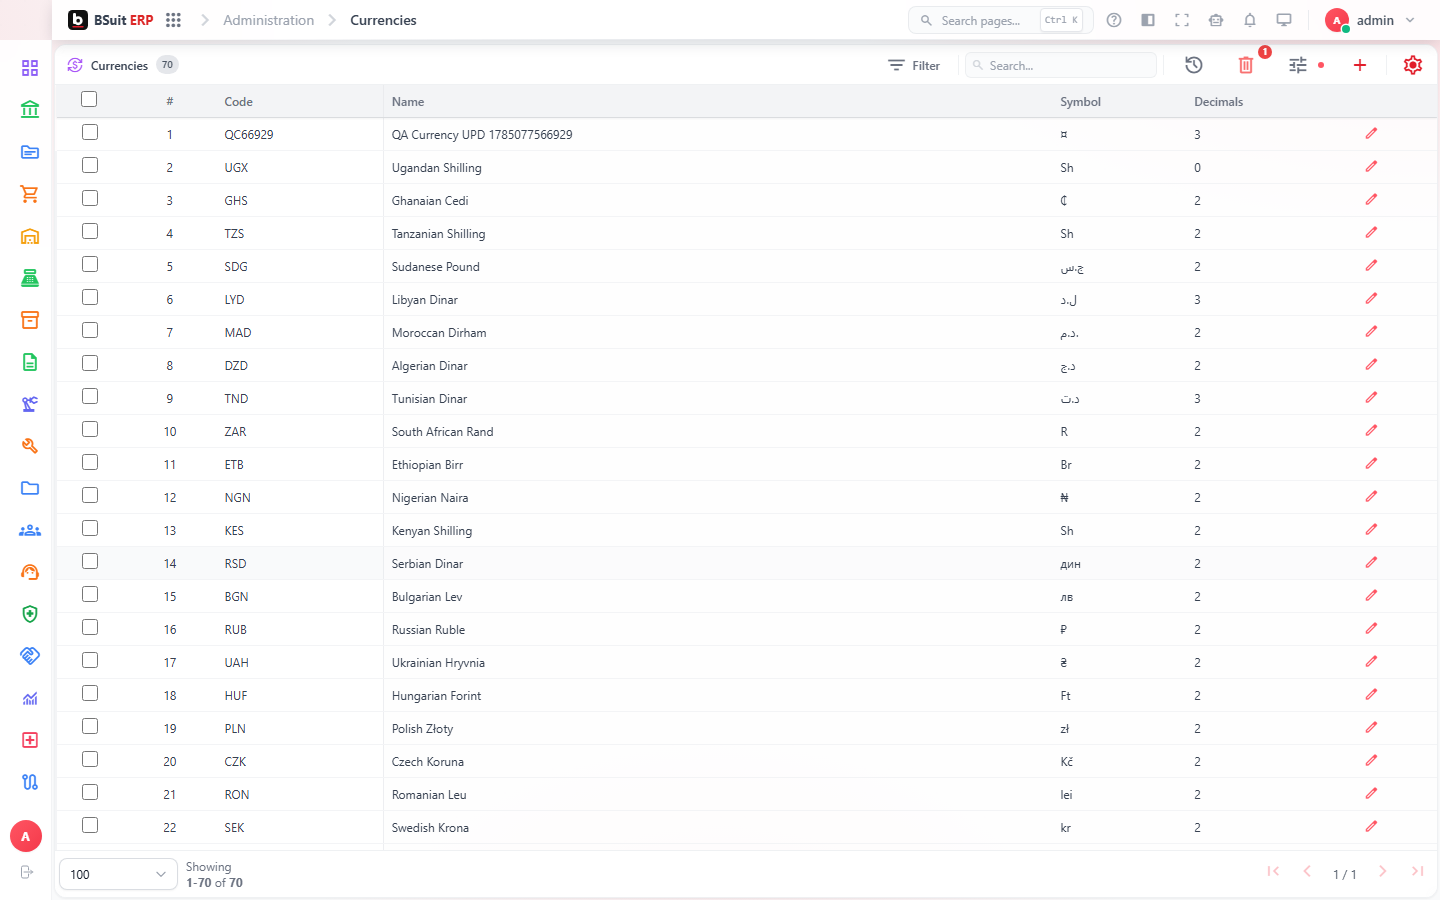
Currencies (ISO 4217)SeededCurrencies
Countries (about 80)SeededCountries
Exchange-rate provider (Frankfurter, on by default)SeededExchange rates
67 record types with numbering series, 43 print templates, 4 email templatesSeededRecord types
Chart of accounts and the first fiscal year with 12 monthly periodsSeeded when Finance is installedLedgers
Default company "MAIN" (only when no company exists)SeededCompanies
TaxesYouTaxes
Email server settingsYouEmail configurations
Company details, logo and addressesYouCompanies

#Step 1 — Company, base currency and country

  1. Open Administration › Companies and edit the company created for you (or create one).
  2. Set the legal name, country, address and logo.
  3. Set the company currency. This is the base currency used by foreign-exchange revaluation and consolidation.

#Step 2 — Install modules

Administration › Modules lists the modules available to your plan. Installing a module that depends on another is refused until the dependency is installed ("Module … depends on modules that aren't installed"). Only administrators can install modules.

#Step 3 — Taxes and exchange rates

  1. Create each tax and its rate in Administration › Taxes; link product-specific taxes in Product taxes.
  2. Check Administration › Exchange rates. The seeded provider fetches daily rates; add manual rates for currencies it does not cover.

#Step 4 — Fiscal year and periods

  1. Open Finance › Fiscal years. The first year and its 12 monthly periods were created at install.
  2. For later years, create the year, then open Finance › Fiscal periods and make sure its periods exist.
  3. Postings are refused in closed periods, so check the current period is open before go-live.

#Step 5 — Chart of accounts

  1. Review the seeded ledger groups (Asset, Liability, Income, Expense, Equity) and ledgers.
  2. Create a ledger for each bank account and link it to the bank.
  3. Make sure an Equity group exists: year-end close moves profit into Retained Earnings under Equity.
  4. Choose the FX gain and loss ledgers if you use foreign currencies (needed for automatic revaluation).
  5. Create the control and posting ledgers other modules need: inventory (stock, goods-received control, COGS, variance), purchase-invoice posting (AP control, default expense), payroll posting and travel-expense posting.

#Step 6 — Record types and numbering

Each voucher type (cash receipt, journal, sales invoice…) is a record type. Its prefix, next number, padding and reset rule decide the document number; its flags decide whether it needs approval, a party account, a project, and whether it moves stock.

Record type settings that change what users experience
SettingEffect
Prefix, next number, padding, separator, suffixThe automatic document number (for example CR-0001).
Reset (none / yearly / monthly)Numbering restarts on the calendar year or month — not the fiscal year.
Requires workflow approvalThe document cannot be posted until it is approved.
Party account required / shownA customer or supplier must be chosen.
Update stockPosting the document moves inventory.

#Step 7 — Approval workflows

  1. Open Workflow automation › Templates to review the seeded approval templates.
  2. Link each template to the record type it approves (only super administrators can change templates and links).
  3. Set up delegations for approvers who will be away (Workflow automation › Delegations); a delegate can act only on steps that allow delegation.

#Step 8 — Users, roles and security

Create users in Identity › Users and give them roles. See the chapter “Roles and access” for how permissions work.

#Step 9 — Email and print templates

  1. Add your mail server in Administration › Email configurations and use its Test action.
  2. Review the seeded print templates and email templates and apply your branding.

#Before the first transaction: checklist

What must exist to save and to post a voucher
NeededTo saveTo post
Active record type and permission record_type.<code>.createYesYes
Party, trade account or fund, when the record type requires themYesYes
A project — whenever the Projects module is installedYesYes
Ledgers for each lineYesYes
Approval, when the record type requires itNoYes
An open fiscal period for the dateNoYes
Passing the budget check, balanced debits and creditsNoYes

About this guide

Status
Partially reviewed
Application
BSuit ERP
Audience
System administrators and implementation consultants
Owner
BSuit documentation team
Reviewer
Editorial review pending
Last verified
2026-09-25
Checked against
cb3691bbf
Seen on a running system
Not yet
Help version
2026.0.0-preview
Guide ID
erp:article/guide/implementation-setup

Known limits: Written from a line-by-line read of the implementation (every statement traced to source). Not yet walked through end to end by a trainer on a running system.

Need more help?If feedback above cannot be sent, email support and quote guide ID erp:article/guide/implementation-setup.
Email support

Procure to pay: from requisition to supplier payment

Request, source, order, receive, match the supplier invoice and pay — who does each step, on which screen, and what BSuit records.

On this page

Process at a glance

  1. Raise requisitionRequesterPR approved; stock reserved and budget committed.
  2. Request quotationsBuyerRFQ awarded; a draft PO is created.
  3. Issue purchase orderBuyerPO issued to the supplier.
  4. Supplier acknowledgesSupplier (Vendor Portal)PO acknowledged.
  5. Receive goodsStorekeeperStock increased; PO partially received or received.
  6. Supplier invoicesSupplier (Vendor Portal)Invoice submitted for review.
  7. Review and approve invoiceAccounts payableInvoice approved and posted to payables.
  8. PayFinancePayment approved and posted from the bank.

#Purpose and scope

This chapter covers buying goods and services with BSuit’s procurement documents: requisition, request for quotation (RFQ), purchase order (PO), goods receipt note (GRN), supplier invoice, payment and returns. Suppliers take part through the Vendor Portal.

#Two ways to buy — choose one

BSuit offers two purchasing models. They do not share documents, so pick one per organisation or per category of spend and use it consistently.

Purchasing models
ModelDocumentsBest for
Procurement documents (this chapter)Requisition → RFQ → PO → GRN → supplier invoice → payment orderControlled purchasing with supplier collaboration in the Vendor Portal
Purchase vouchersEstimate → Quotation → Order → Purchase invoice (Purchase transactions)Simple purchasing recorded directly as accounting vouchers; the purchase invoice moves stock when posted

#Before you start

  1. Suppliers (with a party ledger), products, units, warehouses, currencies and tax codes.
  2. Inventory posting ledgers (stock, goods-received control, COGS, variance) in inventory posting configuration.
  3. Purchase-invoice posting configuration (Invoice posting config): AP control ledger and default expense ledger.
  4. Approval workflows for PREQ (requisitions), GRN-RCV (receipts) and BANK-PAY (payments).
  5. Budgets per cost centre if you want spend control at requisition.

#1. Raise a purchase requisition

  1. Open Requisitions and create a requisition with the items, quantities, priority (low, normal, high, urgent) and cost centre.
  2. Choose Save & Submit (or Submit for approval on a saved draft).
  3. BSuit checks the budget for the cost centre. A blocking rule stops submission; a warning rule lets it through with a warning.
  4. The requisition goes to the PREQ approval workflow. Approvers act from their approvals inbox.
Requisition statuses
StatusMeaning
DraftBeing prepared
SubmittedWaiting for approval
ApprovedStock reserved and budget committed
RejectedReturned by the approver
ConvertedTurned into a purchase order

#2. Request and compare quotations (RFQ)

  1. In RFQs create an RFQ with lines and scoring criteria.
  2. Invite at least one supplier. The RFQ becomes Sent and invited suppliers respond in the Vendor Portal.
  3. Score each response, then Award the winner. BSuit creates a draft purchase order from the winning response and marks the other responses rejected.

#3. Create and issue the purchase order

  1. Open Purchase orders › New, or open the draft created by the award. A PO created from a requisition needs that requisition to be approved.
  2. Choose the supplier, currency and lines. Choose Save draft or Save & issue.
  3. Issue the PO. The linked requisition becomes Converted, blanket-agreement consumption is applied, and the supplier is notified.
Purchase order lifecycle
StatusSet byButtons available
DraftBuyerIssue, Cancel
IssuedIssueAcknowledge, Cancel
AcknowledgedSupplier or buyerClose, Cancel
Partially received / ReceivedAccepted goods receiptsClose, Cancel
ClosedClose—
CancelledCancel (reason required)—

#4. Receive the goods (GRN)

  1. Open Goods receipt notes and create a receipt for the PO, with received quantities, warehouse, and batch or serial numbers where the product needs them.
  2. Submit for approval if your GRN-RCV record type requires it.
  3. Accept the receipt. Accepting is currently limited to superuser accounts.
What accepting a receipt does
EffectDetail
StockWarehouse quantity increases; weighted-average cost and cost layers update; a stock movement (IN) is recorded.
AccountsDebit stock asset, credit goods-received control — only if inventory posting ledgers are configured.
Purchase orderReceived quantity updates; the PO becomes Partially received or Received.
TolerancesA warning when received quantity or price is outside tolerance (10% by default).

#5. Supplier invoice and review

  1. The supplier submits the invoice in the Vendor Portal (Invoices) against an issued or received PO.
  2. Accounts payable opens Vendor invoices. Opening the review panel claims the invoice.
  3. Approve, Reject (notes required) or Request more information (notes required).
  4. Approval (finance manager or superuser) posts the purchase invoice automatically: debit expense and input tax, credit the supplier (or the AP control ledger).
  5. Check Matching for the three-way match result between PO, receipt and invoice.
Supplier invoice statuses
StatusMeaning
DraftBeing prepared by the supplier
SubmittedSent to the buyer
Under reviewClaimed by an AP reviewer
More info requestedReturned to the supplier with a question
ApprovedAccepted and posted to payables
RejectedRefused, with a reason

#6. Pay the supplier

  1. Create payment orders in Payment orders, or use Payment run to propose payments from open posted bills and create them in one go.
  2. Submit the payment order. It goes to the BANK-PAY approval workflow.
  3. On approval BSuit posts debit supplier (beneficiary) ledger, credit bank ledger.
  4. Initiate, then download the bank batch file and mark it transmitted (or failed).

#7. Returns to the supplier

  1. Create a return in Return to vendors.
  2. Submit it for approval (RTV workflow), then Approve and Complete (superuser).
  3. Completing issues the stock out and posts debit COGS, credit stock.

#Reports

Procurement reports
ReportUse
AP agingSupplier balances in age buckets (current, 1–30, 31–60, 61–90, over 90). Aged by transaction date, not due date.
Procurement registerAll purchasing documents.
Spend analyticsSpend by supplier and category.

#Troubleshooting

Common problems
Message or symptomCauseWhat to do
“Budget exceeded for cost centre…”Blocking budget ruleReduce the amount, move budget, or ask finance.
“No active workflow is configured for record type 'PREQ'.”No approval workflow linkedAn administrator links a workflow to PREQ.
“PR … is …, must be 'approved'.”Creating a PO from an unapproved requisitionGet the requisition approved first.
“Cannot issue a PO with no lines.”Empty POAdd lines.
“Approval required before receiving.”GRN-RCV requires approvalSubmit the receipt for approval.
“…is batch-controlled — BatchId is required…”Batch-tracked productEnter the batch on the receipt line.
Accept button refusedAccept is superuser-only todayAsk a superuser to accept.

About this guide

Status
Partially reviewed
Application
BSuit ERP
Audience
Requesters, buyers, storekeepers, accounts payable and finance managers
Owner
BSuit documentation team
Reviewer
Editorial review pending
Last verified
2026-09-25
Checked against
cb3691bbf
Seen on a running system
Not yet
Help version
2026.0.0-preview
Guide ID
erp:article/guide/procure-to-pay

Known limits: Written from a line-by-line read of the implementation (every statement traced to source). Not yet walked through end to end by a trainer on a running system.

Need more help?If feedback above cannot be sent, email support and quote guide ID erp:article/guide/procure-to-pay.
Email support

Order to cash: from opportunity to collected payment

Win the deal, quote, order, deliver, invoice, receive and apply payment, and chase overdue customers.

On this page

Process at a glance

  1. Qualify and winSales rep / managerWon deal; draft sales order created.
  2. Quote and orderSales repApproved quotation and sales order.
  3. DeliverDispatcher / driverStock issued; proof of delivery captured.
  4. InvoiceBillingPosted sales invoice; customer owes the amount.
  5. Receive paymentAccounts receivableReceipt posted and applied to invoices.
  6. Collect overdueCredit controllerReminders sent; credit hold where needed.

#Purpose and scope

This chapter covers selling: CRM leads and opportunities, quotations, orders, delivery and shipments (including the driver app), invoicing, receipts and cash application, collections, returns and point of sale.

#Two kinds of sales order

BSuit has an accounting sales-order voucher and a separate operational sales order. They are not linked; know which one your team uses.

Sales order types
TypeCreated byUsed for
Sales order voucher (Sales transactions › Orders)Sales staff, or conversion from a quotationThe voucher chain Estimate → Quotation → Order → Invoice
Operational sales order (Sales orders)Automatically, from a won CRM deal or a web-store checkoutConfirming and delivering (delivery notes are raised from it)

#Before you start

  1. Customers: a CRM account with a customer ledger (needed to win a deal), and a customer ledger for invoicing.
  2. Products, price lists (reference only — prices are not applied automatically), tax codes, warehouses.
  3. Record types EST, SQ, SO, SI, SR, CASH-REC, BANK-REC, CHQ-REC and CN with approval workflows (seeded for SI, SO, SQ, SR, CN and receipts).
  4. Sales posting configuration (Posting config) for web and POS sales.
  5. Dunning levels if you chase overdue customers.

#1. Lead, opportunity and win

  1. Capture leads in Leads; Convert a qualified lead — BSuit creates the account and an opportunity.
  2. Work the opportunity in Opportunities or the pipeline board; add product lines and create quote versions for the customer.
  3. Choose Win. BSuit checks the amount is positive and, when the opportunity has product lines, that the account has a customer ledger; with the JV-CRM-WIN workflow configured it then waits for approval.
  4. When the win is approved, BSuit marks the opportunity won and creates a draft operational sales order from the product lines. Nothing is posted to the ledger: revenue is recorded when the sales invoice is posted.

#2. Quotation, order and invoice vouchers

  1. Create the document in Sales transactions (Quotations, Orders or Invoices).
  2. Choose the customer, add product lines; save as draft.
  3. Submit for approval; approvers act in their inbox.
  4. Post when approved.
Sales voucher types
TypeCodeMoves stock when postedNeeds approval
EstimateESTNoYes
Sales quotationSQNoYes
Sales orderSONoYes
Sales invoiceSIYes (stock out)Yes
Sales returnSRNoYes

#3. Confirm and deliver

  1. Confirm the operational order in Sales orders (from draft).
  2. Raise a delivery note from the confirmed order in Delivery notes; generate a pick list and assign a vehicle.
  3. Dispatch: stock is issued from the warehouse and reservations are consumed.
  4. Deliver, capturing proof of delivery.
  5. On a dispatched or delivered note choose Create sales invoice: BSuit drafts the invoice priced from the sales order, with each line linked to the note.

#4. Shipments and the driver app

  1. Plan shipments in Shipments, hand them to drivers in Handoff.
  2. The driver, in the BSuit Smart app, starts the trip, marks Arrived, then Delivered (recipient name, signature, delivery code and photo as your shipment settings require), or Couldn’t deliver with a reason, or Return to warehouse. It works offline and syncs later.
  3. Customers are notified of shipment status by email and in-app.
Proof-of-delivery messages the driver may see
CodeMeaning
photo_requiredA delivery photo is required by the shipment settings.
signature_name_requiredThe recipient’s name must be entered as signature.
otp_required / otp_invalid / otp_lockedThe customer’s delivery code is required, wrong, or locked after too many attempts.

#5. Receive and apply payment

  1. Record the payment as a Bank receipt, Cash receipt or Cheque receipt.
  2. Enter the customer (or income) lines as credits. The bank or cash side is generated automatically and hidden.
  3. Open Bill-wise and select the invoices this receipt settles; BSuit proposes open posted invoices for the customer.
  4. Submit, approve and post.
Cash-application messages
MessageMeaning
“Select at least one bill to apply this receipt against.”Choose invoices in Bill-wise.
“Allocations (x) exceed the receipt amount (y).”Reduce the allocations.
“Allocation (x) exceeds the bill's outstanding amount (y).”The invoice is already partly paid.
“…its line items must be entered as credits.”On a receipt, enter customer/income lines as credits.
“Cheque … is tracked in the Post-Dated Cheque register…”Use the PDC register for post-dated cheques.

#6. Collections

  1. Review AR aging (buckets current, 1–30, 31–60, 61–90, over 90, by transaction date) and Statement of account.
  2. Set up dunning levels, then run Dunning. BSuit ages open invoices by due date, logs a collection activity, emails the level’s template to the customer and puts the customer on credit hold where the level says so (lifting it when paid).
  3. Track calls and promises in Collections.

#7. Returns and credit notes

  1. Web-store returns: Returns — approve, receive (stock goes back to a warehouse and a credit journal is posted), then refund (store credit gift card or refund pending to the original payment).
  2. Other credits: raise a Credit note against the customer.

#8. Point of sale

Terminal sales sync to POS transactions and post automatically using the sales posting configuration (debit cash/bank/customer, credit sales and tax). If the configuration is missing the sale stays in draft marked “failed — no config”. POS postings do not go through approval or the period and budget checks.

About this guide

Status
Partially reviewed
Application
BSuit ERP
Audience
Sales reps, sales managers, dispatchers, drivers, accounts receivable and credit controllers
Owner
BSuit documentation team
Reviewer
Editorial review pending
Last verified
2026-09-25
Checked against
cb3691bbf
Seen on a running system
Not yet
Help version
2026.0.0-preview
Guide ID
erp:article/guide/order-to-cash

Known limits: Written from a line-by-line read of the implementation (every statement traced to source). Not yet walked through end to end by a trainer on a running system.

Need more help?If feedback above cannot be sent, email support and quote guide ID erp:article/guide/order-to-cash.
Email support

Inventory operations: transfers, adjustments, counts and batches

Move stock between warehouses, correct quantities, run cycle counts, manage batches and expiry, and read stock reports.

On this page

Process at a glance

  1. Transfer stockWarehouse clerkStock moved between warehouses (via goods in transit).
  2. Adjust stockWarehouse managerQuantities corrected after approval.
  3. Count stockWarehouse teamVariances posted to stock variance.
  4. Manage batchesQuality / warehouseExpiry alerts; quarantined stock cannot be issued.
  5. Review reportsInventory accountantValuation, movements, ageing, reorder alerts.

#Before you start

  1. Warehouses, with “allow negative stock” and valuation method (weighted average by default; per product or per warehouse FIFO/LIFO possible).
  2. Inventory posting ledgers: stock asset, goods-received control, COGS and stock variance.
  3. Approval workflows for STK-TRF (transfers), STK-ADJ (adjustments) and CYC-CNT (counts) if your policy needs approval.

#1. Transfer stock between warehouses

  1. Create the transfer in Stock transfers with source and destination warehouses (they must differ) and positive quantities.
  2. Submit for approval (STK-TRF workflow) or approve directly (superuser).
  3. Dispatch: stock leaves the source into an automatic “Goods in transit” warehouse. Then Receive at the destination. Or use Complete to do both in one step.
Transfer statuses
StatusMeaning
DraftBeing prepared
SubmittedWaiting for approval
ApprovedReady to dispatch
In transitLeft the source warehouse
CompletedReceived at the destination
CancelledVoid (an in-transit transfer must be received first)

#2. Adjust stock

  1. Create an adjustment in Stock adjustments; for each item enter the difference and a reason.
  2. Submit for approval (STK-ADJ) — or a superuser approves directly.
  3. Post (superuser). Stock is increased or decreased by each difference.

#3. Cycle count (stock count)

  1. Create a count in Cycle counts and Start it — BSuit snapshots the system quantities.
  2. Enter the counted quantity for every line, then Complete (all lines need a count).
  3. Submit for approval (CYC-CNT), then Post adjustments (superuser, once only).
  4. Variances are applied to stock and posted: stock asset against stock variance.

#4. Batches, quality and expiry

  1. Batches are created on receipt (or automatically when a stock-moving purchase invoice is posted). Manage them in Batches.
  2. Quality status: released, quarantine, testing or rejected. Stock in a batch that is not released cannot be issued.
  3. A daily job marks batches expired and raises alerts at 90, 60, 30 and 0 days (Batch expiry alerts); acknowledge and resolve them.
  4. Use first-expiry-first-out suggestions when picking.

#Reports

Stock reports
ReportUseCaution
Stock valuationValue of stock on handValues at the product master cost price, not the running weighted-average or FIFO cost. Use it for quantities; confirm values with finance.
Stock movementsEvery IN/OUT/adjustment—
Reorder alertsItems at or below minimumQuantities may be overstated; confirm on the stock screen before ordering.
Expiring batchesBatches expiring soon—
Stock agingHow long stock has been held—

About this guide

Status
Partially reviewed
Application
BSuit ERP
Audience
Warehouse clerks, warehouse managers and inventory accountants
Owner
BSuit documentation team
Reviewer
Editorial review pending
Last verified
2026-09-25
Checked against
cb3691bbf
Seen on a running system
Not yet
Help version
2026.0.0-preview
Guide ID
erp:article/guide/inventory-operations

Known limits: Written from a line-by-line read of the implementation (every statement traced to source). Not yet walked through end to end by a trainer on a running system.

Need more help?If feedback above cannot be sent, email support and quote guide ID erp:article/guide/inventory-operations.
Email support

Service and support: tickets, SLAs, changes and warranties

Log and resolve incidents and requests, meet SLAs, manage problems and change requests, and support customers through the portal.

On this page

Process at a glance

  1. Log the ticketAgent or customerSLA applied; auto-assigned if the group allows.
  2. Work and updateAgentStatus moves; pending pauses the SLA clock.
  3. Escalate on breachSystemEscalation notifications when resolution time is breached.
  4. ResolveAgentCustomer receives a satisfaction survey.
  5. Problem and known errorProblem managerRoot cause recorded in the known-error database.

#Before you start

  1. Statuses (seeded: open, pending, resolved, closed) and priorities (seeded: critical, high, medium, low) in Statuses and Priorities.
  2. Agent groups (with auto-assign if wanted), business calendars and holidays.
  3. SLA policies (SLA policies) and escalation rules.
  4. Grant permissions to the seeded Service Desk Agent, Change Manager and Problem Manager roles — they are created empty.

#Default SLA targets

An SLA policy chosen on the ticket wins; otherwise BSuit picks the most specific match: priority and category, then priority, then category, then a catch-all. Due times follow the business calendar.

Seeded priorities
PriorityFirst responseResolution
Critical1 hour4 hours
High4 hours8 hours
Medium8 hours24 hours
Low24 hours72 hours

#1. Log and work a ticket

  1. Create the ticket in Tickets (or Incidents / Problems): type, category, priority, channel and description.
  2. BSuit applies the SLA and, if the agent group auto-assigns, assigns an agent.
  3. Work your queue in My assigned. Set Pending while waiting on the customer — the SLA clock pauses and due dates shift when work resumes.
  4. Resolve. The customer is emailed a one-time satisfaction survey.

#2. Escalation

Every minute BSuit marks tickets past their resolution due time as escalated and fires matching escalation rules (trigger “SLA breach”), notifying the agent, group or an email list, with repeats and levels. Other trigger types are not acted on.

#3. Problems and known errors

  1. Link related incidents to a problem.
  2. Record the root cause and workaround, then Promote to known error — it is added to the known-error database for agents to search.

#4. Change requests

  1. Create the change in Change requests; submit it, or submit it for CAB review.
  2. Add CAB approvers; each votes approved, rejected or abstain.
  3. Move the change through approved → scheduled → implementing → implemented → closed (or failed).

#5. Customer support portal

  1. Customers raise tickets at Support portal with their email and subject; attachments are virus-scanned.
  2. They check progress with the ticket number and email, read the knowledge base, and rate the resolution (CSAT and effort, 1–5, once).

#6. Warranties and RMAs

Check coverage by serial number in Warranties (active, expired, not started, inactive). Service returns are handled in RMAs (requested → approved → received → inspecting → replaced, refunded, rejected or closed); a refund posts a journal through the JV-RMA-REFUND workflow. Warranty coverage is not checked automatically when a ticket is logged.

About this guide

Status
Partially reviewed
Application
BSuit ERP
Audience
Service desk agents, team leads, change and problem managers, and customers
Owner
BSuit documentation team
Reviewer
Editorial review pending
Last verified
2026-09-25
Checked against
cb3691bbf
Seen on a running system
Not yet
Help version
2026.0.0-preview
Guide ID
erp:article/guide/service-support

Known limits: Written from a line-by-line read of the implementation (every statement traced to source). Not yet walked through end to end by a trainer on a running system.

Need more help?If feedback above cannot be sent, email support and quote guide ID erp:article/guide/service-support.
Email support

Record to report: journals, month-end and year-end close

Post journals, reconcile banks, revalue foreign currency, run the close checklist, lock periods, close the year and produce the financial statements.

On this page

Process at a glance

  1. Post journalsAccountantJournal vouchers are approved and posted.
  2. Reconcile banksAccountantStatement lines are matched and the reconciliation is locked.
  3. Revalue foreign currencyAccountantUnrealised gains/losses posted as JV-FX-REVAL.
  4. Work the close checklistFinance team15 close tasks completed or force-closed with a note.
  5. Lock the periodControllerSoft- or hard-close stops posting to the period.
  6. Review reportsControllerTrial balance, P&L, balance sheet and cash flow.
  7. Close the yearControllerProfit moved to Retained Earnings; all periods locked.

#Purpose and scope

This chapter covers the finance cycle from recording journals to closing the year: journal vouchers, recurring journals, bank reconciliation, foreign-exchange revaluation, the close checklist, period and year locking, and the financial reports. Sub-ledger processes (purchases, sales, payroll) feed it and are covered in their own chapters.

#Before you start

  1. A fiscal year with periods covering the dates you post (see “Setting up BSuit”).
  2. Chart of accounts with an Equity group (for Retained Earnings), bank ledgers linked to banks, and FX gain/loss ledgers if you use foreign currencies.
  3. Record types JV and the payment/receipt types, with approval workflows where your policy needs them.
  4. Permission to create/edit the voucher types you use (record_type.JV.create, …).

#1. Record a journal voucher

  1. Open Transactions and choose the journal type.
  2. Enter the date, narration and at least two ledger lines. Debits must equal credits.
  3. Save. The voucher is a draft and gets its number from the record type.
  4. Choose Submit for approval if the type requires approval. It becomes pending approval and is routed to the workflow linked to the record type.
  5. After approval, choose Post. Posting runs the final checks (see below) and the voucher becomes posted.
Voucher statuses
StatusMeaningWhat you can do
DraftSaved, not yet submittedEdit, delete, submit, post (if no approval is required)
Pending approvalWaiting for an approverWait; approvers approve or reject
ApprovedApproved, not yet in the ledgerPost
PostedIn the general ledgerCancel (creates a posted reversal)
CancelledVoidNothing

#What is checked when you post

Posting checks, in the order they run
CheckMessage you may see
Approval, when the record type requires it“Transaction requires approval before posting.”
Fund, when requiredFund is required
Open period and open fiscal year“Fiscal period … is closed. Cannot post to this date.” / “… is soft-closed. Contact a finance manager to post.”
BudgetBlocked, or a budget-override approval is started
Duplicate supplier invoice (payables)Duplicate invoice warning
Debits equal credits over all rows, including hidden ones“Debit (x) and Credit (y) must balance.”

#2. Recurring journals

  1. Open Recurring transactions and base a template on an existing voucher.
  2. Choose the frequency (daily, weekly, monthly, quarterly, yearly), start and end, lead days, optional escalation % and skip dates.
  3. Tick Auto-post if the generated vouchers should post automatically; otherwise they are created as drafts for review.
  4. Use Run now to generate the next occurrence immediately.

#3. Bank reconciliation

  1. Import the statement in Bank statement imports. The bank account must be linked to a GL ledger, and the same file cannot be imported twice.
  2. Match statement lines to posted transactions. Only posted, non-cancelled transactions can be matched.
  3. In Bank reconciliation, when every line is matched, choose Reconcile. The reconciliation records who reconciled it and when.

#4. Foreign-exchange revaluation

  1. Open FX revaluation and choose the revaluation date.
  2. Preview the open foreign-currency positions and the gain or loss for each.
  3. Run. BSuit reverses the previous revaluation automatically (JV-FX-REVAL-REV) and posts the new one (JV-FX-REVAL).

#5. The close checklist (Financial Close Cockpit)

Open Period close, pick the period and start the close. BSuit copies a fixed 15-task checklist into the run; assign owners (they are notified) and mark tasks done, blocked or not applicable.

Standard close tasks
#GroupTaskAuto-verified?
1Sub-ledgersClose Accounts Receivable sub-ledgerNo
2Sub-ledgersClose Accounts Payable sub-ledgerNo
3Sub-ledgersInventory / stock cut-off and valuationNo
4Sub-ledgersPost and lock payrollNo
5ReconciliationsBank and cash reconciliationNo (deliberately manual)
6ReconciliationsReconcile AR sub-ledger to GL controlNo
7ReconciliationsReconcile AP sub-ledger to GL controlNo
8ReconciliationsIntercompany reconciliation and eliminationYes — when no intercompany entries are unmatched
9AccrualsPost accruals and prepaymentsNo
10AccrualsRun depreciation and amortisationYes — when a posted depreciation run exists
11AccrualsFX revaluation of open balancesYes — when a posted run falls in the period
12ReportingReview Trial BalanceNo
13ReportingPrepare financial statementsNo
14ReviewManagement review of resultsNo
15ReviewFinal sign-off and lock periodNo

#6. Lock the period

Period locks
LockEffect
Soft-closeNobody can post to the period (“…is soft-closed. Contact a finance manager to post.”). There is currently no override for elevated users.
Hard-closeNobody can post to the period; a snapshot of ledger balances is stored for fast reporting.
Closed fiscal yearNobody can post anywhere in the year.

#7. Close the fiscal year

  1. Make sure no drafts remain in the year. In Fiscal years choose Close.
  2. BSuit posts a year-end journal dated the last day of the year that moves all income and expense balances into Retained Earnings (creating the RETAINED-EARNINGS ledger under Equity if needed).
  3. Every period is hard-closed and the year is marked closed.
Year-end messages
MessageMeaning
“Cannot close fiscal year with {n} unposted voucher(s) (…). Post, cancel or reject them first.”Finish or cancel those vouchers first.
“…no Equity ledger group exists to hold Retained Earnings…”Create an Equity ledger group in the chart of accounts.

#Reports to review

Financial statements
ReportUse
Trial balanceBalances per ledger as of a date, rolled up by chart of accounts. Posted vouchers only.
Trial balance — 6 columnOpening, period movement and closing, each as debit/credit.
Profit and lossIncome and expense for a period (also comparative).
Balance sheetFrom a balance-sheet template (also comparative).
Cash flowOperating, investing and financing activities.
Budget vs actualVariance by cost centre for a budget version.
ConsolidationGroup view; balance sheet at closing rate, P&L at average rate, difference to CTA.

#Who can do what

Posting, submitting and cancelling a voucher need the edit permission on its record type. Closing, reopening, archiving and restoring fiscal years and periods, and signing off or reopening period-close runs, need the Finance Manager role (or a superuser); anyone else gets “403 Forbidden”. The Finance Manager role holds view/create/edit on finance records and nine voucher types.

About this guide

Status
Partially reviewed
Application
BSuit ERP
Audience
Accountants, finance managers and controllers
Owner
BSuit documentation team
Reviewer
Editorial review pending
Last verified
2026-09-25
Checked against
cb3691bbf
Seen on a running system
Not yet
Help version
2026.0.0-preview
Guide ID
erp:article/guide/record-to-report

Known limits: Written from a line-by-line read of the implementation (every statement traced to source). Not yet walked through end to end by a trainer on a running system.

Need more help?If feedback above cannot be sent, email support and quote guide ID erp:article/guide/record-to-report.
Email support

Hire to retire: recruitment, onboarding, attendance, leave and exit

Recruit through the careers portal, hire and onboard, manage attendance, shifts and leave, run appraisals, and handle resignations.

On this page

Process at a glance

  1. Requisition and postingHiring manager / HRApproved requisition; published job posting.
  2. Candidates applyCandidate (careers site)Application received with résumé.
  3. Interview and offerHR / interviewersOffer sent, accepted by the candidate.
  4. Create employee and onboardHREmployee linked to a user; onboarding tasks.
  5. Attendance and leaveEmployee / managerDaily attendance and approved leave.
  6. AppraisalEmployee / managerSelf and manager review finalised.
  7. ExitEmployee / HRResignation accepted; exit checklist completed.

#Before you start

  1. Departments, designations and shifts.
  2. Each employee record linked to the person’s user account — every self-service feature (attendance, leave, payslips, expenses) needs this link. BSuit links automatically where the email matches exactly.
  3. Attendance geofences for sites where people check in by phone.
  4. Leave types and the LEAVE-REQ approval workflow (seeded).
  5. The careers portal feature switched on if you recruit externally.

#1. Requisition and job posting

  1. Create a Job requisition and Submit it (JOB-REQ workflow).
  2. Approve it (or reject). A posting linked to a requisition needs the requisition approved.
  3. Create the Job posting. It shows on the careers site when it is published, active and before its closing date.

#2. Applications, interviews and offers

  1. Candidates apply on the careers site with a PDF or Word résumé (up to 5 MB, virus-scanned) and must accept the data-processing notice.
  2. Move applications through stages in Candidate applications or the board: Applied, Screening, Shortlisted, Interview, Assessment, Offer, Hired, Rejected, Withdrawn.
  3. Schedule interviews (Interview schedules); candidates pick a slot. Record feedback and scorecards.
  4. Create the Offer letter, Generate the letter (it is attached to the candidate), then set the status to Sent — candidates cannot see Draft offers.
  5. The candidate accepts or declines on the careers site; expired offers cannot be accepted.

#3. Hire and onboard

  1. Create the employee in Employees (department, designation, joining date, salary, manager) and link their user account.
  2. Create onboarding tasks in Onboarding checklists: IT accounts (day 0), documents (+3 days), statutory and benefits enrolment (+7), orientation and buddy (+1), workspace (day 0), induction training (+14).

#4. Attendance and shifts

  1. Employees check in and out on the phone app or at My attendance; location and accuracy are recorded.
  2. Inside an active geofence the day is Present; otherwise, or with poor GPS accuracy, it is Pending review for the manager.
  3. Supervisors can record attendance for their team in bulk (up to 500 people): Present, Absent, Half day, Late, On leave, Site duty, Training.
  4. Plan shifts in Shift roster (up to 90 days at a time).

#5. Leave

  1. The employee requests leave in My leave (web or phone).
  2. The manager approves in My approvals or Team leave.
  3. On approval the request is Approved (approver and time recorded); on rejection the reason is kept.
  4. Leave balances are calculated by BSuit from each leave type’s accrual and carry-forward rules; there is no separate balances screen, so HR confirms a balance on request.

#6. Performance

  1. Open a cycle in Performance cycles and set goals (Goals).
  2. Employee completes the self-review; the self section locks when the manager starts.
  3. Manager review follows (only after self-review is submitted), then HR finalises. A finalised appraisal needs HR to reopen it.

#7. Resignation and exit

  1. The employee submits a resignation in My resignation with a reason and a future last day. They can retract it while open.
  2. HR accepts or rejects it. Accepting creates the exit checklist from the template.
  3. HR ticks checklist items; when all are done the resignation is completed.
  4. Record the final settlement in Final settlements.

About this guide

Status
Partially reviewed
Application
BSuit ERP
Audience
HR officers, hiring managers, line managers and employees
Owner
BSuit documentation team
Reviewer
Editorial review pending
Last verified
2026-09-25
Checked against
cb3691bbf
Seen on a running system
Not yet
Help version
2026.0.0-preview
Guide ID
erp:article/guide/hire-to-retire

Known limits: Written from a line-by-line read of the implementation (every statement traced to source). Not yet walked through end to end by a trainer on a running system.

Need more help?If feedback above cannot be sent, email support and quote guide ID erp:article/guide/hire-to-retire.
Email support

Payroll: running, approving, posting and releasing payslips

Set up salary structures and country packs, run payroll for a month, get it approved and posted to the ledger, and release payslips to employees.

On this page

Process at a glance

  1. Set upPayroll adminComponents, structures and country packs.
  2. Create the runPayroll adminDraft run for a month and year.
  3. ExecutePayroll adminPayslips calculated; run Completed.
  4. Submit for approvalPayroll adminJV-PAYROLL approval.
  5. Post to ledgerSystem on approvalSalary expense and payables journal.
  6. Release payslipsPayroll adminEmployees see payslips and are notified.

#Before you start

  1. Salary components (earnings and deductions) and structures (Salary structures); each employee has a basic salary or a structure.
  2. Country packs (Country packs) with effective-dated tax slabs and statutory deductions.
  3. Payroll posting ledgers (salary expense, tax payable, statutory payable, net pay, employer contribution) in the payroll posting configuration.
  4. The HR Payroll Admin role for the people who run payroll.

#1. Create and scope the run

  1. In Payroll runs create a run for the month and year, optionally choosing a country pack.
  2. While the run is Draft, you can limit it to selected employees.

#2. Execute

Execute (superuser or HR Payroll Admin) calculates every active employee of the company:

  1. Gross = basic salary, or the sum of the structure’s earning components.
  2. Proration by attendance when attendance exists: present, work-from-home, on duty, paid leave, holiday and week-off count as a full day; half day as half; anything else as zero.
  3. Progressive income tax from the country pack plus the employee’s statutory deductions.
  4. A payslip PAY-yyyyMM-<employee code> in Draft with basic, tax and statutory lines.
Run statuses
StatusMeaning
DraftCreated; can be scoped
RunningCalculating
CompletedPayslips created; ready to submit
FailedSee the error message on the run

#3. Approve and post

  1. On a Completed run choose Submit for approval (JV-PAYROLL workflow). If no workflow is configured it posts immediately.
  2. On approval BSuit posts the payroll journal PAYRUN-yyyyMM: debit salary expense (gross); credit tax payable, statutory payable and net pay; plus the employer-contribution debit and credit.
  3. If approval is rejected, fix and resubmit.
Messages
MessageMeaning
“Payroll run must be Completed before posting.”Execute first.
“Already posted as …”The run is in the ledger.
“Payroll posting ledgers are not configured…”See Before you start.
“Payroll run gross total must be positive…”No pay was calculated.

#4. Release payslips

Employees see only released payslips (web My payslips and the phone app). Releasing notifies them in-app, by push, email (with the PDF) and WhatsApp.

  1. On a Completed, posted run open the run in Payroll runs and choose Release all payslips. Slips already released or cancelled are skipped.
  2. To release one slip, choose Release on it in Salary slips.

About this guide

Status
Partially reviewed
Application
BSuit ERP
Audience
Payroll administrators, HR and finance
Owner
BSuit documentation team
Reviewer
Editorial review pending
Last verified
2026-09-25
Checked against
cb3691bbf
Seen on a running system
Not yet
Help version
2026.0.0-preview
Guide ID
erp:article/guide/payroll

Known limits: Written from a line-by-line read of the implementation (every statement traced to source). Not yet walked through end to end by a trainer on a running system.

Need more help?If feedback above cannot be sent, email support and quote guide ID erp:article/guide/payroll.
Email support

Travel and expenses: claims, approval and reimbursement

Capture expenses with receipts, approve reports, mark them paid and post them to the ledger.

On this page

Process at a glance

  1. Capture expensesEmployeeDraft expense report with receipts.
  2. SubmitEmployeeReport submitted with its total.
  3. ApproveFinance (superuser today)Report approved.
  4. Mark paid and postFinanceExpense journal posted; employee reimbursed.

#Before you start

  1. Posting configuration in Posting config: the record type, bank ledger, default expense ledger and a ledger per expense category.
  2. Per-diem rates by country (Per diem rates) if you pay allowances.

#1. Capture expenses

  1. On the web, create a report in My expenses with a title.
  2. On the phone, use Quick capture: photograph the receipt (JPEG, PNG, HEIC, WEBP or PDF, up to 20 MB) and enter category and amount; it is queued offline and added to a “Quick capture” draft report.

#2. Approve, pay and post

  1. Finance opens Expense reports and approves submitted reports (currently superuser only).
  2. Mark paid & submit: the report becomes Paid and its posting goes through the configured approval (or posts at once).
  3. The journal debits each category’s expense ledger and credits the bank ledger; its number is the report code.
Report statuses
StatusMeaning
DraftBeing prepared
SubmittedWaiting for approval
ApprovedApproved for payment
PaidReimbursed; journal posted or pending approval
RejectedNot approved

#Travel requests

Plan trips in Travel requests: draft → submitted → approved → booked → completed (or rejected).

About this guide

Status
Partially reviewed
Application
BSuit ERP
Audience
Employees, approvers and finance
Owner
BSuit documentation team
Reviewer
Editorial review pending
Last verified
2026-09-25
Checked against
cb3691bbf
Seen on a running system
Not yet
Help version
2026.0.0-preview
Guide ID
erp:article/guide/travel-expense

Known limits: Written from a line-by-line read of the implementation (every statement traced to source). Not yet walked through end to end by a trainer on a running system.

Need more help?If feedback above cannot be sent, email support and quote guide ID erp:article/guide/travel-expense.
Email support

Campus: academic set-up, admissions, teaching, results and fees

Set up the academic structure, admit and enrol students, give portal access, mark attendance and marks, publish results and collect fees.

On this page

Process at a glance

  1. Academic set-upAcademic coordinatorYears, terms, programs, courses, sections, offerings.
  2. TimetableAcademic coordinatorPublished timetable visible in the portals.
  3. Admission and enrolmentRegistrarStudent and enrolment records.
  4. Portal accessRegistrar / coordinatorStudent, guardian and teacher invited to the Campus Portal.
  5. Attendance and marksFaculty (Campus Portal)Daily attendance and component marks.
  6. ResultsExam controllerPublished term results.
  7. FeesBursarInvoices and receipts; students and parents see fees.

#Where things are

Campus records live under Campus in the ERP menu (each list is a Campus page such as Academic years, Terms, Programs, Course offerings, Timetable versions, Admission applications, Students, Fee invoices). Teachers, students and parents use the Campus Portal or the BSuit Smart app. Field-level detail for every campus record is in the data reference for the Campus area.

#1. Academic structure and timetable

  1. Create in order: campus, academic year, terms, departments, programs and program versions, courses and curriculum, batches, sections, course offerings, faculty assignments, periods.
  2. Create a timetable version and its slots, or use Generate on the version to place sessions automatically (“Placed n session(s)”).
  3. Set the timetable version to Published — only published timetables appear in the portals.

#2. Admission and enrolment

  1. Set up admission cycles and seat matrices; record enquiries and applications (numbered from the CMP-APP series).
  2. Record documents and assessments; compute the merit list (ranks applicants and marks Selected or Waitlisted against seats).
  3. Issue offers and seat allotments.
  4. On an Accepted offer choose Enrol student: BSuit creates the Student (CMP-STU), the enrolment for the batch and an Admitted status event, marks the application Enrolled and confirms the seat. Link guardians on the student.

#3. Give portal access

  1. Open the student’s (or teacher’s) Overview page and use the Portal access card to Grant access. For a guardian, first tick portal access on the student–guardian link.
  2. BSuit emails a one-time set-password link valid for 3 days (template campus_invite). Nobody sees or chooses the password.
  3. Use Resend invite if it expires; Revoke switches access off without losing the link.
Who can grant access
PersonPermission needed
Studentcampus.student.edit
Guardiancampus.guardian.edit
Teachercampus.facultyassignment.edit (Academic Coordinator has it)

#4. Attendance and marks (teachers)

  1. In the Campus Portal, open My classes › the class › Attendance, pick the date and period and mark Present, Absent, Late, Excused or Half-day. Future dates and other teachers’ periods are refused.
  2. Open Marks, choose an assessment component and enter marks (0 to the component maximum). The class needs an assessment plan.

#5. Results

  1. The exam controller verifies and moderates marks.
  2. On Term results choose Compute results, pick the term (and optionally a batch): BSuit computes course results, term results (SGPA/CGPA) and batch ranks. It can be run again.
  3. Choose Publish results. Students and parents see only published results.

#6. Fees

  1. Set up fee categories, structures, components and instalments.
  2. Raise fee invoices (CMP-FEE-INV) — students and parents see non-draft invoices; parents only if they receive invoices for that child.
  3. Record fee receipts (CMP-FEE-RCPT), concessions and refunds.
Fee invoice statuses
StatusMeaning
DraftNot visible to the student
ApprovedIssued
Partially paid / PaidBy receipts
OverduePast due
Cancelled / Written offClosed

#Seeded roles

Principal, Registrar, Bursar, Exam Controller, Academic Coordinator, Faculty, Counsellor, Special Educator, Warden, Librarian, Clinical Coordinator and Preceptor. See Roles and permissions for what each can do.

About this guide

Status
Partially reviewed
Application
BSuit ERP
Audience
Registrars, academic coordinators, faculty, exam controllers, bursars and principals
Owner
BSuit documentation team
Reviewer
Editorial review pending
Last verified
2026-09-25
Checked against
cb3691bbf
Seen on a running system
Not yet
Help version
2026.0.0-preview
Guide ID
erp:article/guide/campus-lifecycle

Known limits: Written from a line-by-line read of the implementation (every statement traced to source). Not yet walked through end to end by a trainer on a running system.

Need more help?If feedback above cannot be sent, email support and quote guide ID erp:article/guide/campus-lifecycle.
Email support

Healthcare: from registration to billing

Register patients, book appointments, consult and prescribe safely, order tests, and bill patients and insurers.

On this page

Process at a glance

  1. RegisterReceptionistPatient record with allergy notes.
  2. BookReceptionist or patient appScheduled appointment in a free slot.
  3. ConsultDoctor (Smart app)In consultation → completed; summary viewed.
  4. PrescribeDoctorIssued prescription after the safety check.
  5. Order testsDoctor / labLab or radiology order through its stages.
  6. BillBillingClaims and bills posted; co-pay collected.

#1. Register the patient

Receptionists, nurses, doctors and administrators create patients in Healthcare › Patients (the 360° overview shows everything about the patient). Record allergies in Allergy notes — the prescribing safety check reads this field.

#2. Book the appointment

  1. Front desk: create the appointment (statuses Scheduled, Checked-in, In consultation, Completed, Cancelled, No-show).
  2. Patient app: choose specialty, doctor and a free slot and book; cancel or reschedule later.
Booking messages
MessageMeaning
“That slot is no longer available.” / “…was just booked by someone else.”Pick another slot.
“That slot is in the past.”Choose a future slot.

#3. Consultation (doctor, BSuit Smart)

  1. The doctor signs in to the Doctor workspace and sees the day’s schedule; allergy and alert flags show on each appointment.
  2. Open the patient summary — available only for patients seen by that doctor in the last 12 months; every view is audited.
  3. Start consultation, then Mark completed or No-show. Scheduling and cancelling stay with the front desk.

#4. Prescribe safely

  1. Choose Prescribe (voice or typed). Dictation or text is turned into a draft by AI when speech-to-text is configured; otherwise add medicines by hand.
  2. Check the lines (1–20 medicines) and choose Issue prescription.
  3. If the safety check finds a critical issue (for example a recorded allergy), issuing is blocked. Fix the lines, or confirm with a reason of at least 5 characters — the override is audited.

#5. Lab and radiology orders

Use Advance and Cancel on the order row. Completed orders cannot be cancelled.

Order stages (advance one at a time, no skipping)
OrderStages
LabPending → Collection done → Processing → Result ready
RadiologyPending → Scheduled → In progress → Report ready

#6. Billing and insurance

  1. Request pre-authorization; BSuit evaluates coverage (Approved, Partial, Rejected or Pending) with the reason.
  2. Capture charges and assemble the claim or bill.
  3. Post the insurance claim to the ledger (JV-HMS-BILL); it becomes Submitted.
  4. Collect the patient co-pay (cash, bank or cheque, including post-dated cheques).
  5. Settle with the insurer when paid; an optional write-off posts JV-HMS-CLAIM-WO.
  6. Self-pay bills: collect payment against Issued bills.

#7. Caregiver access

In the patient app, a patient can let another patient-app account (for example a family member) view chosen parts of their record — appointments, prescriptions, bills, results, visits — for up to a year (180 days by default). Caregivers can only look; every view is audited, and the patient can withdraw access at any time.

About this guide

Status
Partially reviewed
Application
BSuit ERP
Audience
Receptionists, doctors, nurses, lab and radiology staff, billing and patients
Owner
BSuit documentation team
Reviewer
Editorial review pending
Last verified
2026-09-25
Checked against
cb3691bbf
Seen on a running system
Not yet
Help version
2026.0.0-preview
Guide ID
erp:article/guide/patient-journey

Known limits: Written from a line-by-line read of the implementation (every statement traced to source). Not yet walked through end to end by a trainer on a running system.

Need more help?If feedback above cannot be sent, email support and quote guide ID erp:article/guide/patient-journey.
Email support

Plant maintenance: preventive plans, work orders and technicians

Plan preventive maintenance, run work orders from release to cost posting, work on the technician terminal, and handle breakdowns and compliance.

On this page

Process at a glance

  1. AssetsPlannerAssets to maintain.
  2. PM planPlannerWork orders generated when due.
  3. ReleasePlannerWork order Open.
  4. WorkTechnician (terminal)Sessions, labour hours and parts.
  5. Complete and closeManager / financeCost posted (JV-PM-COST) after approval.

#1. Assets and preventive plans

  1. Register assets in Assets (active, maintenance, retired, disposed).
  2. Create a PM schedule with a time interval and/or a meter interval — whichever comes first — and a checklist and parts template. Choose fixed or completion-based recurrence.
  3. A daily job generates a preventive work order (status Open) when a plan is due, copying the checklist and parts. Missed occurrences are listed.

#2. Work order lifecycle

Allowed status changes
FromTo
DraftOpen, Cancelled
OpenIn progress, On hold, Completed, Cancelled
In progressOn hold, Completed, Cancelled
On holdOpen, In progress, Cancelled
Pending approval(moved only by the approval result)
CompletedIn progress (reopen — not after cost is posted)

#3. Technician terminal

  1. An administrator issues an enrollment code (workshop, kiosk or field; shared or personal) and the device registers once.
  2. The technician signs in with their PIN (locked after repeated failures; a personal terminal accepts only its bound technician).
  3. Start a work session on the order (it moves to In progress). Pause with a reason (awaiting parts, permit issue, safety stop, shift end, break, other) — if only paused sessions remain the order goes On hold. Resume and End.
  4. Ending a session records labour hours. Ending never completes the order.

#4. Parts

  1. Request parts on the order; approvals move them to approved-awaiting-stock.
  2. Issue from a warehouse (quantity and warehouse required).
  3. Handle failures in Parts exceptions: retry issue, return stock, or void.

#5. Complete and close

  1. Complete the order when all checklist items are done and no part lines are waiting.
  2. If a JV-PM-COST approval workflow is configured, the order goes to Pending approval; approval posts the cost and completes it, rejection returns it to In progress.
  3. Without a workflow, completing posts the cost at once — which needs the close permission.
Completion blockers
MessageWhat to do
“{n} checklist item(s) are not completed.”Finish the checklist.
“{n} part line(s) are awaiting approval, awaiting stock or failed to issue.”Resolve the parts.
“No costed parts or labor are recorded…”Record costs, or confirm zero-cost maintenance.
“Completing this order posts its cost to Finance…Ask a supervisor to close it.”A user with close permission completes it.

#Roles

Maintenance permissions
RoleCan
Maintenance PlannerChange status (transition)
TechnicianExecute assigned orders
Maintenance ManagerEverything, including close, reopen, parts retry and return
Maintenance FinanceClose (post cost)

#Breakdowns and compliance

Report breakdowns in Breakdown reports (reported → acknowledged → in progress → resolved); a work order can be raised from a report (emergency if critical, otherwise corrective) — check one does not already exist. Compliance alerts warn 45 days before asset insurance, permits, warranty, vehicle registration or insurance, emissions and driver licences or medicals expire (critical at 14 days); review them in the compliance alerts inbox.

About this guide

Status
Partially reviewed
Application
BSuit ERP
Audience
Maintenance planners, technicians, maintenance managers and maintenance finance
Owner
BSuit documentation team
Reviewer
Editorial review pending
Last verified
2026-09-25
Checked against
cb3691bbf
Seen on a running system
Not yet
Help version
2026.0.0-preview
Guide ID
erp:article/guide/maintenance-work-orders

Known limits: Written from a line-by-line read of the implementation (every statement traced to source). Not yet walked through end to end by a trainer on a running system.

Need more help?If feedback above cannot be sent, email support and quote guide ID erp:article/guide/maintenance-work-orders.
Email support

IoT: onboard devices, ingest readings, alerts and commands

Register devices and credentials, connect gateways, watch telemetry, set alert rules, work alerts and send commands to devices.

On this page

Process at a glance

  1. Prepare device types and groupsIoT administratorDevice classes with an expected reporting interval.
  2. Onboard devicesIoT administratorDevices created with a one-time credential, singly or by CSV.
  3. Connect the gatewaySuperuserGateways post readings with the tenant token.
  4. Watch devices and readingsOperationsOffline, never-reported and failing-command lists.
  5. Define alert rulesIoT administratorThreshold, rate-of-change and offline rules.
  6. Work alertsOperationsAlerts acknowledged and resolved (or reopened with a reason).
  7. Send commandsOperatorCommand followed from queued to acknowledged.

#Purpose and scope

This chapter covers the IoT module: the device registry, the gateway ingest feed, telemetry, alert rules and alerts, commands to devices and firmware tracking. Telemetry is what devices report; alerts are raised when a rule is breached.

#Before you start

  1. The IoT module installed for your tenant and the gateway-ingest feature enabled.
  2. Permission to create devices (the IOT-ADMIN role is seeded for provisioning and device credentials). Issuing and cancelling commands, acknowledging, resolving and reopening alerts, and provisioning devices each have their own permission (iot.command.issue, iot.command.cancel, iot.alert.acknowledge, iot.alert.resolve, iot.alert.reopen, iot.device.provision).
  3. A superuser account for the Gateway Ingest page, which is restricted to superusers.

#1. Device types and groups

  1. Open Device types and create a type with a code, name and category (GPS, Environment, Meter, Energy, Access, Machine or Other).
  2. Set the Expected interval (seconds) if devices of this type should be considered offline when silent. Leave it blank and they are never considered offline.
  3. Optionally create Device groups so a single rule can cover a named set of devices.

#2. Onboard devices

  1. Open Onboarding. The wizard has four steps: Identity, Binding, Credential, First reading.
  2. Enter a code and name, pick a device type, and the external device id (the id the gateway sends; it defaults to the code). Optionally add the provider and the entity the device is bound to (asset, vehicle, warehouse, room and so on).
  3. Choose Create device & generate credential. The credential is generated by the server and shown once; only its hash is stored. Copy it, tick I have saved the credential and continue.
  4. The last step polls every 5 seconds and shows a tick when the first reading arrives.
  5. For many devices, use the bulk import: Download template, fill the CSV, Validate (dry run), then Import & generate credentials. Download the credentials CSV straight away; credentials are shown once.

#3. Connect the gateway (Gateway Ingest)

  1. Open Gateway ingest as a superuser. Other users see a notice that the page is restricted.
  2. Check that Accepting telemetry is on. Turning it off stops ingestion without changing the token; readings are refused until it is turned on again.
  3. Configure the gateway to POST to the ingest URL shown, with the tenant token in the X-IoT-Key header. If the device has a credential, also send it in X-IoT-Device-Key. The sample payload is on the page.
  4. To revoke the token, choose Rotate token and confirm. Every gateway using the old token stops being able to post at once and must be updated with the new one.
Ingest responses
SituationResponse
Missing or invalid X-IoT-Key401 Unauthorized
Token rotated since it was issued401 “Ingest token has been revoked”
Ingestion switched off for the tenant403 “IoT ingestion is disabled for this tenant”
More than 5,000 readings in one request400 “Batch too large”
Unknown, inactive or unauthorised devices in the batchAccepted readings are stored; the response counts the skipped ones by reason

#4. Watch what needs attention

  1. Open Overview. It refreshes every 30 seconds and shows counts for active, offline and never-reported devices, devices without a credential, and command counts (pending, delivered awaiting acknowledgement, failed and unconfirmed in 7 days, expired in 24 hours), plus open alerts by severity.
  2. Use the lists under it: Open alerts, Offline devices, Failed and unconfirmed commands, and the onboarding checklist of devices that have never reported.
  3. Open a device to chart a metric over 6 hours to 90 days. Short windows show raw readings; long windows show hourly minimum, maximum and average. See also Telemetry for raw readings (read-only) and Device map for devices with a GPS fix.

#5. Alert rules

  1. Open Rules and choose the rule type: Threshold (Min or Max value on a metric), Rate of change (delta threshold within a window in seconds) or Offline (applies to the device as a whole, so leave Metric blank).
  2. Choose the scope: a specific device, a device type or a device group. A more specific scope narrows the rule.
  3. Set the severity (Info, Warning, Critical) and the cooldown in minutes (default 30), which suppresses repeat alerts for the same device and rule.
  4. Optionally list the users to notify (comma-separated user ids) and an Approval Record Type code. A breach then starts that record type’s approval workflow.

#6. Work alerts

  1. Open Alerts. Each row shows its severity and status (open, acknowledged, resolved).
  2. Choose Acknowledge to take ownership, then Resolve when fixed.
  3. A resolved alert shows Reopen; you must give a reason.

#7. Commands to devices

  1. Open Commands and choose Issue command. The device must be active, otherwise BSuit refuses with “Device is … and cannot accept commands”.
  2. The command starts Pending with an expiry (default 15 minutes, between 1 minute and 24 hours). If the device is offline the screen warns that it expires undelivered if it does not reconnect in time.
  3. When the device collects it the command becomes Sent; the device then reports success (Acked) or failure (Failed).
  4. Use the status filter and the timeline on a row to follow it; retry or cancel from there.
Command statuses
StatusMeaningNext
PendingQueued, not yet collectedCancel, or it expires
SentDelivered, awaiting acknowledgementAcked or Failed; Unconfirmed if no acknowledgement arrives in time
Acked / FailedThe device reported the resultFailed can be retried
ExpiredPassed its deadline undeliveredRetry
UnconfirmedDelivered but never acknowledged; outcome unknownRetry only after confirming the risk
CancelledCancelled while PendingRetry

#8. Firmware drift

Firmware records known versions per device type and one target version per type, with an optional vendor checksum kept for verification only. It reports drift (devices not on the target) but does not deliver updates; there is no over-the-air delivery.

#Housekeeping done for you

A background worker flags devices silent for longer than their type’s expected interval (raising an alert where an offline rule exists), evaluates rate-of-change rules, builds hourly rollups, expires stale commands, marks unacknowledged ones Unconfirmed, and trims raw telemetry past the retention window once its rollup exists. A retention of 0 days keeps everything.

About this guide

Status
Partially reviewed
Application
BSuit ERP
Audience
IoT administrators, operations staff and facility or fleet managers
Owner
BSuit documentation team
Reviewer
Editorial review pending
Last verified
2026-10-03
Checked against
cb3691bbf
Seen on a running system
Not yet
Help version
2026.0.0-preview
Guide ID
erp:article/guide/iot-operations

Known limits: Written from a read of the implementation; statements traced to source. Not yet walked through end to end by a trainer on a running system.

Need more help?If feedback above cannot be sent, email support and quote guide ID erp:article/guide/iot-operations.
Email support

Transport: book, rate, dispatch, deliver, settle trips and bill freight

Set up rate cards, book and rate consignments, plan loads and dispatch, track and prove delivery, settle trip sheets, and bill customers and hired carriers.

On this page

Process at a glance

  1. Set up tariffsTransport administratorRate cards with lanes, zones and surcharge rules.
  2. Book and rateBooking clerkConsignment booked and rated from the tariff.
  3. Plan and dispatchDispatcherLoads built, checked, confirmed and dispatched with vehicle and driver.
  4. Track and prove deliveryDispatcher / driverScans on the timeline; delivery closed by proof of delivery.
  5. Settle the tripTrip accountantTrip sheet closed at the odometer and settled by journal.
  6. Bill the customerBilling clerkFreight bill approved and posted, or a consignment invoice.
  7. Pay hired carriersPayables clerkCarrier bill approved and posted to payables.

#Purpose and scope

This chapter covers the Transport module: tariffs, consignments (bookings such as LR, AWB or B/L), multi-leg movement, load planning and dispatch, trip sheets, delivery performance and exceptions, and customer and carrier billing.

#Where Transport is in the menu

Transport has no sidebar group of its own. In the source its menu items are declared under Sales Management → Transport & Freight, and the address /transport opens the Transport overview. If you cannot see those items in your sidebar, open the pages by address (for example /transport/overview) and ask an administrator to check that the Transport module is installed and your role has access. Rate cards, zones, surcharge rules, vehicle cost profiles, carriers, freight tax profiles and driver pay rules are marked admin-only in the menu.

#Before you start

  1. The Transport module installed (Sales Management lists it as a dependency).
  2. Ledgers: a freight income ledger on the rate card or charge lines, a tax ledger where tax is charged, a creditor ledger on each hired carrier, and driver, advance and expense ledgers for trip settlement.
  3. Customers and consignors or consignees linked to ledgers, so a bill-to account can be resolved.
  4. The named permissions you need, such as transport.consignment.invoice, transport.consignment.cancel, transport.trip_sheet.close, transport.trip_sheet.settle, transport.freight_bill.* and transport.carrier_bill.*. They are granted to the TRANSPORT-ADMIN role.

#1. Tariffs and charges

  1. Create Freight zones (cities and pincode prefixes) to use in lanes.
  2. Create a Rate card with a validity window, the mode, optional customer, vehicle type and currency, then add Rate lines: origin and destination (city or zone), weight slab, basis and minimum charge.
  3. Add Surcharge rules for fuel, waiting, detention, ODA, COD, peak and handling surcharges.
  4. Set Freight tax profiles (which GST or VAT masters freight is billed under, rounding and reverse charge).

#2. Book and rate a consignment

  1. Open Consignments and create a booking with origin, destination, parties, freight terms (paid, to-pay or TBB) and weight.
  2. Rate it from the tariff. The freight line and any rule-based surcharges are saved as charge lines on the consignment; add hand-written accessorial charges in Consignment charges.
  3. Only billable charge lines count toward the header total, so the total equals what will be billed.

#3. Plan loads and dispatch

  1. Open the Planning workbench. Build a load from open consignments (BSuit can also suggest and consolidate), and set planned departure and arrival; arrival must be after departure.
  2. BSuit checks capacity and vehicle-type compatibility, expired insurance, permits, registration and licence, licence class, and the driver’s hours of service.
  3. Confirm the load (it needs at least one consignment), then Dispatch and later Complete. A load is Planned, Confirmed, Dispatched, Completed or Cancelled, and only a Planned load can be edited or deleted; cancel others instead.
  4. Alternatively use the Dispatch board to assign an own-fleet vehicle or a hired vehicle number to a consignment, and Trips to see legs, fleet trips and sales deliveries together.

#4. Legs, containers, tracking and proof of delivery

  1. For multi-leg movement use Route legs: depart and arrive each leg. Once legs exist the consignment status is derived from them, so it cannot read Delivered while a leg is still at a hub.
  2. Track movement in Track & trace, which records scans (Booked, Picked up, In transit, Reached destination, Out for delivery, Undelivered). Track containers, seals and custody in Containers; a seal that differs on arrival is flagged, not overwritten.
  3. Record proof of delivery with the receiver name (required) and delivered packages. This is the only way a consignment becomes Delivered.
  4. To cancel, use the cancel action (needs transport.consignment.cancel).

#5. Trip sheets and settlement

  1. Open Trip sheets. A new sheet is a Draft; Open it when the driver departs.
  2. Record the driver’s advance and book route costs as Trip sheet expenses. Distance and the driver’s balance are derived from the odometer and lines, never typed in.
  3. Optionally plan the cost from a vehicle cost profile and the planned distance, and compute the driver’s pay from a driver pay rule.
  4. Close the sheet at the final odometer (not below the opening reading, and needs transport.trip_sheet.close). After closing, expenses can no longer be added.
  5. Settle (needs transport.trip_sheet.settle). BSuit posts a settlement journal and freezes the sheet.

#6. Bill customers

  1. Open Freight bills and create a bill from eligible consignments (single, consolidated or by customer and period).
  2. Approve the draft (maker-checker: the creator needs the self-approve permission to approve their own bill), then Post. Posting debits the customer and credits freight revenue and tax payable.
  3. Cancel an unposted bill; reverse a posted one (books a full credit note); raise credit or debit notes against a posted bill; file a GST e-invoice where used.
  4. For a single consignment you can instead post a consignment invoice (needs transport.consignment.invoice); a consignment already on a freight bill must be billed from the bill.
Why a consignment is not billable yet
MessageWhat to do
“…has no proof of delivery yet — to-pay and TBB consignments bill after POD.”Record POD. Prepaid freight may be billed at booking.
“…has no bill-to account — link the consignor/consignee to a ledger first.”Link the party to a ledger or set the bill-to.
“…is already invoiced.” / “…is already on a freight bill.”Nothing to do; it is already billed.
“…carries a manually entered tax amount; clear it and use a freight tax profile…”Clear the manual tax or use the legacy invoice.
“…has no billable charges.”Rate the consignment or add a billable charge.
“No freight income ledger on the rate card or charge lines…”Set the income ledger on the rate card.

#7. Pay hired carriers

  1. Create Carriers (hired transporters) linked to a creditor ledger.
  2. Open Carrier bills and build a bill from delivered consignments (or legs) that have a hire cost for that carrier. An inactive carrier or a consignment with no hire cost is refused.
  3. Approve (transport.carrier_bill.approve), then Post to payables (transport.carrier_bill.post). Posting needs a hire-cost expense ledger and, when tax is present, a tax ledger.

#8. Monitor: overview, delivery performance, exceptions and profitability

Overview shows in transit, delayed, awaiting POD, uninvoiced and open trip sheets. Delivery performance shows on-time, in-full, OTIF, delays and dwell and the late list. Profitability shows margin by lane, customer, carrier and consignment, and planned versus actual trip cost.

  1. Work Exceptions (delays, breakdowns, failed delivery, receiver rejection, damage scans, expired compliance and long stops): acknowledge, start, assign, resolve or dismiss, and reopen if needed. Users with transport.exception.manage work them and are the dispatchers notified of new ones.
  2. Holders of transport.exception.reassign can move the affected legs to another vehicle or driver in one step.

About this guide

Status
Partially reviewed
Application
BSuit ERP
Audience
Transport dispatchers, booking clerks, fleet and trip accountants and freight billing staff
Owner
BSuit documentation team
Reviewer
Editorial review pending
Last verified
2026-10-03
Checked against
cb3691bbf
Seen on a running system
Not yet
Help version
2026.0.0-preview
Guide ID
erp:article/guide/transport-freight

Known limits: Written from a read of the implementation; statements traced to source. Not yet walked through end to end by a trainer on a running system. Sidebar placement taken from the SalesModule menu declaration (Sales Management > Transport & Freight); not confirmed in a running sidebar.

Need more help?If feedback above cannot be sent, email support and quote guide ID erp:article/guide/transport-freight.
Email support

Agriculture: fields, crop cycles, livestock, automation, costing and harvest revenue

Set up fields, crop types and livestock, run a crop cycle from planting to harvest, post costs and revenue to the ledger, and optionally automate irrigation and feeding.

On this page

Process at a glance

  1. Set up master dataFarm managerFields, crop types, livestock profiles and animal groups.
  2. Plan a crop cycleAgronomistA Planned cycle with budget and expected yield.
  3. Start and run the cycleFarm managerCycle Growing; costs recorded and posted.
  4. HarvestFarm managerYield and sale rate recorded; revenue journal posted.
  5. Close the cycleFarm managerCycle closed once every cost is posted.
  6. Livestock feeding and costsLivestock supervisorFeeding events become livestock cost entries, posted to the ledger.
  7. Compare seasonsFarm managerYield and cost variance by crop type and planting year.

#Purpose and scope

This chapter covers the Agriculture module: field, crop type, livestock profile and animal group master data, the crop-cycle lifecycle with costing and harvest revenue, livestock feeding and cost entries, irrigation and feeding automation, and season comparison.

#Before you start

  1. Expense, payable (or cash), receivable and revenue ledgers in the chart of accounts. They are only needed when you post a cost or a harvest.
  2. Permissions: agriculture.cost.post (post a crop-cycle cost), agriculture.harvest.record (record a harvest), agriculture.livestock_cost.post (post a livestock cost) and agriculture.cycle.transition (start or close a cycle). The seeded FARM-MANAGER role is described as owning field and crop planning, irrigation scheduling, sensor-driven decisions and cost and harvest postings.
  3. For automation, IoT devices bound to the field or animal group (see the IoT guide).

#1. Master data

  1. Create Fields with a code, name and area in hectares. Purpose is Crop, Pasture or Barn. Soil type, location (free text) and company scope are optional.
  2. Create Crop types with the soil moisture, temperature and humidity ranges the crop prefers, an optional growing-degree-day base temperature and the typical days to harvest.
  3. Create Livestock profiles with the body temperature range and the feed ration per head with its unit.
  4. Create Animal groups (herd or pen) with species and head count, optionally linked to a field and a livestock profile.

#2. Plan and start a crop cycle

  1. Open Crop cycles and create a cycle with a code, field, crop type, planting date, expected harvest date, expected yield and unit, and budgeted cost. The expected harvest date cannot be before the planting date, and the field must exist.
  2. Optionally break the budget down by seed, labour, irrigation and other categories. The Budgeted Cost total stays independent of the breakdown.
  3. Open the cycle and choose Start cycle. Only a Planned cycle can be started; it becomes Growing.
Crop cycle lifecycle
StatusHow it is reachedWhat is allowed
PlannedCreatedEdit, start, record costs
GrowingStart cycleRecord a harvest, record and post costs
HarvestedRecord harvestLate costs are still accepted; Close cycle
ClosedClose cycleNo further edits; no costs can be added or posted

#3. Record and post costs

  1. On the cycle’s Cost Entries tab add a cost with a description and a positive amount. Choose the expense ledger (debit) and the payable or cash ledger (credit); they are only required to post.
  2. Post the entry to the ledger (needs agriculture.cost.post). Posting debits the expense ledger and credits the payable ledger, and tags the journal to the cycle so actuals roll up per cycle. Posting twice has no further effect.

#4. Harvest and revenue

  1. On the Harvest & Revenue tab enter the actual harvest date, the actual yield quantity and the sale rate per unit (all positive), and choose a receivable ledger and a revenue ledger.
  2. Record the harvest (needs agriculture.harvest.record). BSuit posts a journal for yield × rate: debit receivable, credit revenue. The cycle becomes Harvested.

#5. Close the cycle

  1. Post or delete every unposted cost entry.
  2. Choose Close cycle on a Harvested cycle (needs agriculture.cycle.transition).

#6. Livestock feeding and costs

  1. Record each feed dispense in Feeding events: animal group, time, source, quantity and unit.
  2. On a feeding event choose Create cost entry. Pick the basis: unit cost × quantity dispensed, or a total amount, and optionally the expense and payable ledgers.
  3. Open the animal group and, on its Cost Entries tab, post the entry (needs agriculture.livestock_cost.post). Posting debits the expense ledger and credits the payable ledger, tagged to the animal group.

#7. Irrigation and feeding automation

Every field and animal group starts with automation Off. In Fields and Animal groups choose Dry run or Live per record. Off only alerts and never actuates; Dry run logs what it would do without sending a command; Live issues a real IoT command. Irrigation events and Feeding events show the log, with the source (manual, rule or dry run).

What triggers the automation
TrackTriggerGuardrails
Irrigation (fields with a crop cycle whose crop type is set)Soil moisture below the crop type’s range, or moisture within 5 points of the minimum while temperature is above range and humidity is below rangeOne hour cooldown between triggers; a daily cap in seconds per field that overrides telemetry once reached
Feeding (animal groups)Schedule only: no feeding event in the last 24 hoursOne hour cooldown; a daily feed cap per group

#8. Compare seasons

Season comparison groups every crop cycle by crop type and planting year and shows expected and actual yield, budgeted and actual cost, yield and cost variance and net margin. Actuals are sourced from the ledger.

About this guide

Status
Partially reviewed
Application
BSuit ERP
Audience
Farm managers, agronomists, livestock supervisors and farm accountants
Owner
BSuit documentation team
Reviewer
Editorial review pending
Last verified
2026-10-03
Checked against
cb3691bbf
Seen on a running system
Not yet
Help version
2026.0.0-preview
Guide ID
erp:article/guide/agriculture-farm-cycle

Known limits: Written from a read of the implementation; statements traced to source. Not yet walked through end to end by a trainer on a running system.

Need more help?If feedback above cannot be sent, email support and quote guide ID erp:article/guide/agriculture-farm-cycle.
Email support

Restaurant: floor set-up, reservations, orders, kitchen tickets and billing

Set up sections, tables, kitchen stations and modifiers, take reservations, run dine-in orders through the kitchen, settle the bill, and publish restaurants to the Food marketplace.

On this page

Process at a glance

  1. Set up the floor and kitchenRestaurant managerSections, tables, kitchen stations and modifiers.
  2. Take reservationsHostBookings registered; parties seated into orders.
  3. Open an order and add itemsWaiter / cashier (terminal)Open ticket on a table with item lines.
  4. Fire to the kitchenWaiterA KOT batch is created and appears on the kitchen display.
  5. Prepare and bumpKitchenItems marked Served as tickets are bumped.
  6. Settle the billCashierSale posted to the ledger; table freed.
  7. Publish to the marketplaceRestaurant managerBrand, branches and menu items visible to customers.

#Purpose and scope

This chapter covers Restaurant & KDS: the floor and kitchen master data, reservations, the order ticket lifecycle from open to settle, kitchen tickets (KOT) and kitchen display, and the public Food marketplace presence. The screens in the ERP are registers and master data. Orders are taken and settled on a POS terminal (the same terminal connection used for POS), which calls the same order service as the ERP.

#Before you start

  1. The Restaurant feature switched on for your tenant (the menu group is marked admin-only).
  2. Products to sell, with an outward tax set on the product or its category. Tax on each line is resolved from the product’s outward tax first, then its category’s, otherwise zero.
  3. The POS record type configured. Settling an order uses it and fails with “POS RecordType not configured” if it is missing.
  4. Payment ledgers (cash, card, bank) for settlement, and a customer ledger if you allow credit.

#1. Floor and kitchen set-up

  1. Create Floor sections such as Hall, Garden and Bar.
  2. Create Kitchen stations such as Grill, Fry and Bar. They route kitchen tickets and drive the kitchen display boards.
  3. Create Tables with a code, capacity and section.
  4. Create Modifier groups (for example Spice level or Add-ons) with minimum and maximum selections, add the choices with price deltas in Modifier options, then attach groups to products in Menu modifiers. Attached groups make the picker appear on the terminal for that product.

#2. Reservations

  1. Open Reservations and book a table: customer name (required), phone, party size, date and time, duration in minutes and an optional table.
  2. Filter by status or show only upcoming bookings. On a Booked row use No-show or Cancel.
  3. When the party arrives, seat it from the terminal. Seating opens a dine-in order on the booking’s table (or the table you choose), marks the reservation Seated and links the order.

#3. Orders and kitchen tickets

  1. On the terminal open an order. A dine-in order needs a table, and a table can have only one open order; opening it marks the table Seated.
  2. Add items. Each line takes the unit price and a tax amount snapshotted at the time it is added. Items can be updated, or voided with a reason (voiding an already voided line does nothing).
  3. Fire to the kitchen. Every item in Ordered status becomes Fired and gets a new KOT batch number; with nothing to fire, BSuit says “no Ordered items to fire”. A KOT can be reprinted.
  4. The kitchen display shows every fired ticket not yet bumped, oldest first, optionally per station. Bumping a ticket sets its Fired items to Served and removes it from the board; single items can be bumped too, and a recently bumped ticket can be recalled.
  5. To change tables use Move (the target must be active and have no open order); to combine bills use Merge (both orders must be Open, and an order cannot merge into itself). Merged KOT batches continue the primary order’s numbering.

#4. Settle or cancel

  1. Open the order bill. Only an Open order can be settled, and it must have at least one non-voided item.
  2. Enter any order-level discount and service charge. The bill total is item lines less discounts, less the order discount, plus service charge, plus item tax.
  3. Choose the tender: a single payment ledger, credit to a customer ledger, or split tender. Split legs each need a payment ledger and must add up to the bill total within one cent. Split tender cannot be combined with credit.
  4. Settle. BSuit posts the sale through the POS posting (one party ledger, sales income and tax counter-entries) using the POS record type, so restaurant sales report together with counter sales. The order becomes Billed.
  5. To cancel, use Cancel with a reason. The table is freed.
Order statuses
StatusMeaning
OpenTicket in progress; items can be added, fired, moved or merged
BilledSettled and posted
CancelledCancelled with a reason, or merged into another order

#5. Review the order register

Orders lists tickets with status (open, billed, cancelled), table, customer, items, totals and KOT history; open one to see its lines and KOT batches. Use Reservations for the booking register.

#6. Publish to the Food marketplace

  1. Create a Marketplace restaurant: code, name, public slug (used in public links), cuisine types, description, logo and status Draft or Published.
  2. Add Branches with address, city, country, coordinates, delivery time in minutes, delivery fee, minimum order amount and status Draft or Published.
  3. Curate Menu items per branch: choose the product and a menu section, dietary tags, sort order, and flag items as Available for ordering or Featured.

About this guide

Status
Partially reviewed
Application
BSuit ERP
Audience
Restaurant managers, hosts, cashiers, kitchen staff and accountants
Owner
BSuit documentation team
Reviewer
Editorial review pending
Last verified
2026-10-03
Checked against
cb3691bbf
Seen on a running system
Not yet
Help version
2026.0.0-preview
Guide ID
erp:article/guide/restaurant-service

Known limits: Written from a read of the implementation; statements traced to source. Not yet walked through end to end by a trainer on a running system.

Need more help?If feedback above cannot be sent, email support and quote guide ID erp:article/guide/restaurant-service.
Email support

Oil & Gas JV: wells, partners, AFEs, joint interest billing and cash calls

Set up wells and joint-venture partners, approve AFEs, bill partners by working interest through a JIB, issue partner statements and collect cash calls.

On this page

Process at a glance

  1. Set up wellsJV accountantWells with a cost recovery ledger and the Operator flag.
  2. Add partnersJV accountantActive partners totalling 100% working interest per well, each with a ledger.
  3. Approve the AFEJV accountant / approverApproved AFE authorising spend on the well.
  4. Raise cash callsJV accountantEach partner is asked to pre-fund its share.
  5. Record fundingJV accountantReceipt posted; call Partially funded or Funded.
  6. Generate the JIBJV accountantOne journal per partner, billed by working interest.
  7. Issue partner statementsJV accountantA locked point-in-time statement per partner.

#Purpose and scope

This chapter covers the Oil & Gas JV module. The address /oil-gas-jv redirects to Oil & Gas; the module key and API use oil-gas-jv while the pages live under /oil-gas. The Operator runs day-to-day operations, pays costs up front and bills partners back through a Joint Interest Billing (JIB); a Non-Operator owes its working-interest share.

#Before you start

  1. A cost recovery ledger for each well. A JIB credits it.
  2. A partner ledger (AR for the Operator, AP for a Non-Operator) for every partner. It must exist in the company.
  3. Costs on the well. Other modules count toward a JIB when their cost journal is reference-stamped to the well (reference type “well”); only posted, non-cancelled, non-reversed journals dated within the period are counted.
  4. Permissions (granted to the JV-ACCOUNTANT role): oil_gas_jv.afe.submit, .afe.approve, .afe.close, .jib.generate, .statement.issue, .cash_call.create, .cash_call.fund and view permissions.

#1. Wells and partners

  1. Create a well in Wells with a code, name, location and the Cost Recovery Ledger. Tick “This tenant is the Operator” if you run the well.
  2. Add the co-owners in Partners: partner name, working interest %, partner ledger and active flag.

#2. Authorization for expenditure (AFE)

  1. Create an AFE in AFEs with a unique AFE number, the well, the estimated amount (greater than zero) and optionally Block billing over this AFE.
  2. Submit it (needs oil_gas_jv.afe.submit). If an active OILGAS-AFE approval workflow exists it starts; otherwise decide it manually with Approve or Reject (needs oil_gas_jv.afe.approve).
  3. Close an Approved AFE when spending is finished (needs oil_gas_jv.afe.close).
  4. The decision history shows every submit and decision; the variance view compares the estimate to billed JIB cost.
AFE lifecycle
StatusAllowed next steps
DraftEdit, delete, submit
Pending approvalApprove or reject (manually, or through the approvals inbox when a workflow owns it)
ApprovedBill and raise cash calls against it; Close
RejectedReopen to Draft, or re-submit
ClosedFinal

#3. Cash calls

  1. Open Cash calls and raise a call against an Approved AFE: total amount to call (greater than zero) and a due date that is not in the past.
  2. BSuit splits the amount across active partners by working interest so the rows add up exactly to the call.
  3. When a partner pays, choose Record funding: amount received, received date, instrument (cash, bank transfer or cheque), reference, the bank or cash ledger received into, and an idempotency key. BSuit posts a Finance receipt (debit bank or cash, credit the partner’s ledger).
Cash call status
StatusMeaning
RequestedNothing funded yet
Partially fundedSome of the amount received
FundedFully funded
OverdueShown for any call not Funded after its due date

#4. Joint interest billing (JIB)

  1. Open JIB, choose the well, the period start and end, and optionally the AFE and a narration.
  2. Preview the split. Nothing is written. Warnings and blocks (overlapping period, AFE limit, mixed currencies) are shown here.
  3. Generate. BSuit sums the well’s posted costs for the period, splits them by working interest and posts one journal per partner (debit partner AR, credit the well’s cost recovery ledger), all in one database transaction. A failure rolls everything back.

#5. Partner statements

On Partners open a partner’s statement to see its JIB lines (optionally for a period) with a running billed total and the AFE reference. Billed, not billed minus collected. Issue the statement (needs oil_gas_jv.statement.issue) to lock a permanent point-in-time copy of what was sent, which later JIB corrections do not change.

About this guide

Status
Partially reviewed
Application
BSuit ERP
Audience
Joint-venture accountants, operators’ finance teams and partner managers
Owner
BSuit documentation team
Reviewer
Editorial review pending
Last verified
2026-10-03
Checked against
cb3691bbf
Seen on a running system
Not yet
Help version
2026.0.0-preview
Guide ID
erp:article/guide/oil-gas-joint-venture

Known limits: Written from a read of the implementation; statements traced to source. Not yet walked through end to end by a trainer on a running system.

Need more help?If feedback above cannot be sent, email support and quote guide ID erp:article/guide/oil-gas-joint-venture.
Email support

Hospitality: rooms, rate plans, bookings, check-in, folio and check-out

Set up rooms and rate plans, book and amend reservations, check guests in and out, manage the guest folio, deposits and refunds, and keep the hotel calendar.

On this page

Process at a glance

  1. Set the hotel time zoneHospitality administratorThe hotel’s own calendar date drives arrivals and no-shows.
  2. Set up roomsHospitality administratorRooms with type, floor, base rate and housekeeping status.
  3. Set up rate plansRevenue managerSeasonal and weekday nightly rates by room type.
  4. BookFront deskConfirmed reservation holding a room for the nights.
  5. Check inFront deskGuest in house; room Occupied.
  6. Manage the folioFront deskCharges, deposits and payments posted to the ledger.
  7. Check outFront deskFolio settled; room set to Vacant — Dirty.

#Purpose and scope

This chapter covers the Hospitality module: rooms, rate plans, reservations and their lifecycle, the guest folio and its postings to the ledger, and the hotel calendar. The Hospitality home page shows today at the hotel (arrivals, departures and in-house guests) for the front desk.

#Before you start

  1. Install the Hotel industry pack (Finance → Industry Packs). Folio postings use its ledgers (guest receivable GUEST-AR and guest advances GUEST-ADV, plus revenue ledgers). Without them posting fails with “Hotel ledgers not found — install the Hotel industry pack … first.”
  2. Set the hotel time zone (see step 1).
  3. Permissions: reservation create and edit for bookings, and named permissions hospitality.folio.charge, hospitality.folio.payment, hospitality.folio.refund, hospitality.folio.override, hospitality.reservation.override and hospitality.settings.manage. FRONT-DESK holds the day-to-day ones, without refunds, overrides or settings; HOSPITALITY-ADMIN holds all.

#1. Hotel settings

  1. Open Settings and choose the hotel’s time zone as an IANA id such as Asia/Dubai or America/New_York (needs hospitality.settings.manage).

#2. Rooms

  1. Create rooms in Rooms with a room number, type, floor, base rate per night and housekeeping status.
  2. A new room must start as Vacant — Clean, Vacant — Dirty or Out of Order.
  3. Use the housekeeping status to move a room between Vacant — Clean, Vacant — Dirty and Out of Order.

#3. Rate plans

  1. Create plans in Rate plans: name, room type, nightly rate, optional season start and end (blank start means evergreen), the days of the week it applies to (none selected means every day) and a priority.
  2. For each night, the active plan whose season and days cover the night wins, and a higher priority wins an overlap. If none matches, the room’s base rate is used.

#4. Book a stay

  1. Open Reservations and choose New booking.
  2. Enter the guest name (required), contact details, check-in and a later check-out date. The picker lists the rooms free for those dates, optionally filtered by room type.
  3. Leave the rate blank to quote from the rate plans, or enter a negotiated rate per night. The quote total is shown.
  4. Save. The reservation is Confirmed and holds the room for the nights.

#5. Check in

  1. On the reservation choose Check in.
  2. BSuit checks the room is active, not out of order and not occupied, and that the stay has not already ended.

#6. Change, cancel and reinstate

  1. Use Move room to put an in-house or booked guest in another room, with a reason and an optional new rate. The target must be active, free for the nights and able to receive a guest.
  2. Cancel needs a reason. The room is released immediately and, if a deposit is held, it is flagged for refund. A checked-in guest cannot be cancelled; check them out instead.
  3. Reinstate brings a cancelled or no-show reservation back to Confirmed if the room is still free and the stay has not ended.

#7. The guest folio

  1. Open the reservation’s folio. Charges can only be added to booked or in-house stays.
  2. Add a charge (description, amount, type) or choose Generate room charges to post every night not yet charged, at that night’s rate. Re-running resumes from the first missing night, and a night already charged is not charged twice. Posting a charge debits guest receivable and credits revenue.
  3. Take an Advance deposit (cash, bank or cheque) into the folio; it is held as a guest advance. Settle the folio to receive payment against the balance, and use Apply held deposit to balance to move a held deposit to the receivable.
  4. Void a charge with a reason (a reversing entry is posted), or Refund deposit (needs hospitality.folio.refund and the cash or bank ledger it is paid from).
Folio postings
ActionPostingPermission
Charge or room nightDebit guest receivable, credit revenuehospitality.folio.charge
Void a chargeReverse: debit revenue, credit guest receivablehospitality.folio.refund
DepositDebit cash/bank, credit guest advancehospitality.folio.payment
SettlementDebit cash/bank, credit guest receivablehospitality.folio.payment
Apply depositDebit guest advance, credit guest receivablehospitality.folio.payment
Refund depositDebit guest advance, credit the cash/bank ledgerhospitality.folio.refund

#8. Check out

  1. Choose Check out. The dialog can post unposted room nights first and apply a held deposit to the balance.
  2. BSuit re-reads the folio. If a balance is due, check-out is refused (“A balance of … is due … Settle the folio, or check out with the override permission”).
  3. To leave with a balance, use Check out with balance due (override) with a reason; it needs hospitality.folio.override and is noted on the reservation.

#9. Calendar and availability

Calendar shows room occupancy across dates and the availability picker shows free rooms for a date range. Both follow the hotel’s own business date.

About this guide

Status
Partially reviewed
Application
BSuit ERP
Audience
Front-desk staff, reservations managers, hotel accountants and general managers
Owner
BSuit documentation team
Reviewer
Editorial review pending
Last verified
2026-10-03
Checked against
cb3691bbf
Seen on a running system
Not yet
Help version
2026.0.0-preview
Guide ID
erp:article/guide/hospitality-front-desk

Known limits: Written from a read of the implementation; statements traced to source. Not yet walked through end to end by a trainer on a running system.

Need more help?If feedback above cannot be sent, email support and quote guide ID erp:article/guide/hospitality-front-desk.
Email support

Insurance: products, policies, premiums, claims and reinsurance

Set up products and rating factors, quote and issue policies, bill and collect premium, handle claims from report to payment, and cede premium and recover claims under reinsurance treaties.

On this page

Process at a glance

  1. Set up products and ratingInsurance managerProducts with base rate and sum-insured limits; rating factors.
  2. Register policyholdersPolicy administratorIndividual or organisation parties.
  3. Create and issue a policyUnderwriterActive policy with its installment schedule.
  4. Bill and collect premiumInsurance accountantInstallments billed to unearned premium and paid in order.
  5. Handle claimsClaims handlerClaim reviewed, reserved, paid and closed.
  6. ReinsureInsurance managerPremium ceded and claims share recovered.
  7. End of termPolicy administratorPolicy expires, lapses, is cancelled or renewed.

#Purpose and scope

This chapter covers the Insurance module (the C# module installed per tenant). It is not the “insurance” Industry Pack, which is a separate JSON-only configuration bundle; the two are unrelated systems that happen to share a key. The module does however post to ledgers that the Insurance industry pack creates, so both are needed (see below).

#Before you start

  1. Install the Insurance industry pack (Finance → Industry Packs). Postings use its ledgers (policyholder receivable, unearned premium, claims expense and reserve, and the reinsurance ledgers RI-CEDED-PREM, RI-PAYABLE and RI-RECOVERABLE). Without it BSuit says “Insurance ledgers not found — install the Insurance industry pack … first.”
  2. Permissions (granted to INSURANCE-MANAGER): insurance.premium.bill, insurance.premium.collect, insurance.policy.cancel, insurance.policy.lapse, insurance.claim.review, insurance.claim.reserve, insurance.claim.pay, insurance.claim.reject, insurance.claim.close, insurance.reinsurance.cede and insurance.reinsurance.recover. A tenant can delegate a single finance action without handing out the role.
  3. A cash or bank ledger for collections and claim payments.

#1. Products, rating factors and quotes

  1. Create Products with a code, name, category, base rate per sum insured, and optional minimum and maximum sum insured.
  2. Create Rating factors for a product: a factor key (for example risk_zone:high) and a multiplier. The risk-zone, age-band and similar adjustments compound.
  3. Use Quote on a product with a sum insured and a list of factor keys. Annual premium is the sum insured times the base rate, multiplied by every matching factor, rounded to 2 decimals at the end. Keys that match no active factor are reported back instead of ignored.

#2. Policyholders and policies

  1. Create Policyholders as Individual or Organization, with an optional national ID or registration number used to recognise the same party across policies.
  2. Create a Policy for the policyholder: product, coverage start and end (end after start), sum insured, premium (positive) and premium frequency: single, monthly, quarterly, semi_annual or annual. It starts as a Draft with a POL- number.
  3. Issue the policy. This activates it and builds the installment schedule: the premium is split evenly across the periods and the last installment absorbs the rounding remainder.

#3. Bill and collect premium

  1. On the policy open its installments and Bill each one when due (needs insurance.premium.bill). Billing debits policyholder receivable and credits unearned premium. At this point the premium is a liability, not revenue.
  2. Collect a premium receipt (needs insurance.premium.collect) from the policyholder into a cash or bank ledger. It is allocated oldest installment first and capped at the outstanding billed balance; an installment becomes Paid once fully covered.
  3. A daily sweep recognises unearned premium as revenue pro-rata over the coverage period. Only billed premium is earned, and re-running never double-earns.
Policy lifecycle
StatusHowNotes
DraftCreatedFreely editable
ActiveIssueCan be billed, collected, cancelled, lapsed, and claimed against
ExpiredDaily sweep after the coverage end dateCan still be billed and collected; claims for losses inside the coverage window are still accepted
LapsedDaily sweep, or Lapse overdue on demandBilled installments unpaid for more than 30 days past their due date
CancelledCancel an active policyPremium earned pro-rata to the effective date; the billed unearned rest is reversed; any refund due is reported

#4. Renew

  1. Choose Renew on a policy whose term is running or finished. BSuit creates a new Draft policy for the next term with the same length, starting the day after the old term ends, keeping the policyholder and optionally re-rating from the product.
  2. Issue the new policy as in step 2.

#5. Claims

  1. Record a claim in Claims against a policy. The policy must be active (or expired), the incident date must fall inside the coverage window and not be in the future, the reported date cannot be before the incident, and the claimed amount must be positive and within the sum insured. A heuristic fraud-risk score is calculated automatically on creation to help triage; it does not decide anything.
  2. Start the review (needs insurance.claim.review). Status moves from Reported to Under review.
  3. Reserve (needs insurance.claim.reserve): enter a positive reserve not above the claimed amount or the sum insured. BSuit posts debit claims expense, credit claims reserve, and the claim becomes Approved.
  4. Pay (needs insurance.claim.pay) from a cash or bank ledger. Each payment debits the reserve and credits the ledger you choose, is recorded as its own payment, and cannot exceed the remaining reserve. When the paid amount reaches the reserve the claim becomes Paid; until then it stays Approved, so part payments are possible.
  5. Reject (needs insurance.claim.reject) a claim that has no reserve yet, or Close (needs insurance.claim.close) an approved, paid or rejected claim. Closing releases any unpaid reserve (debit claims reserve, credit claims expense).
Claim statuses
StatusNext steps
ReportedStart review, reserve, reject
Under reviewReserve, reject
ApprovedPay (also partially), close
PaidClose
RejectedClose
ClosedFinal

#6. Reinsurance (quota share)

  1. Open Reinsurance treaties and create a treaty for an active policy: reinsurer name (required) and cession ratio above 0 and at most 1 (for example 0.3 for 30%). The total ceded share on one policy cannot exceed 100%.
  2. Cede premium (needs insurance.reinsurance.cede): debit reinsurance ceded premium, credit reinsurer payable, for the cession ratio times the policy premium. For a cancelled or lapsed policy only the retained (earned) premium counts, so a cancellation shrinks the cession.
  3. Recover claims (needs insurance.reinsurance.recover): debit reinsurance recoverable, credit claims paid, for the cession ratio times the total claims paid on the policy.

About this guide

Status
Partially reviewed
Application
BSuit ERP
Audience
Underwriters, policy administrators, claims handlers, insurance accountants and managers
Owner
BSuit documentation team
Reviewer
Editorial review pending
Last verified
2026-10-03
Checked against
cb3691bbf
Seen on a running system
Not yet
Help version
2026.0.0-preview
Guide ID
erp:article/guide/insurance-policy-claims

Known limits: Written from a read of the implementation; statements traced to source. Not yet walked through end to end by a trainer on a running system.

Need more help?If feedback above cannot be sent, email support and quote guide ID erp:article/guide/insurance-policy-claims.
Email support

Legal Practice: matters, time, billing, collections and client trust

Open matters with a conflict check, set a fee arrangement, record time and expenses, bill and collect, hold client money in trust and reconcile it monthly.

On this page

Process at a glance

  1. Open the matterAttorneyMatter created, parties screened for conflicts, trust ledger provisioned.
  2. Set the fee arrangementAttorneyHourly, fixed fee, retainer or contingency terms.
  3. Record time and expensesFee earnersTime (with timer) and expenses on an Open matter.
  4. Bill the matterBilling staffOne journal and one invoice for the selected items.
  5. Collect and adjustBilling staffReceipts allocated oldest first; write-offs, credit notes and voids as needed.
  6. Hold client money in trustLegal administratorDeposits and disbursements against the matter’s trust ledger.
  7. Reconcile trust monthlyLegal administratorThree-way reconciliation signed off.

#Purpose and scope

This chapter covers the Legal Practice module: matters and their parties, conflict-of-interest screening, deadlines and tasks, time and expenses, fee arrangements, billing, receivables, and client trust accounting with its monthly three-way reconciliation.

#Before you start

  1. The module installs its own billing ledgers and record types. If they are missing BSuit says “Legal billing ledgers not found — reinstall the Legal Practice module.”
  2. A trust bank ledger for the firm, which you choose on each matter. Each matter gets its own client trust liability ledger (TRUST-<matter code>), created automatically in the Client Trust group when the matter is created.
  3. The LEGAL-ADMIN role (or a superuser) for trust deposits, disbursements and reversals, conflict overrides, reports and trust reconciliation. Named permissions apply on top for money actions: legal_practice.payment.receive, invoice.write_off, invoice.credit_note, invoice.void, retainer.draw, trust.reverse and trust.reconcile.

#1. Open a matter and screen conflicts

  1. Open Matters and create a matter with a unique code and a name. Status is Open, OnHold or Closed.
  2. Add the client, opposing side and others in Matter parties (or on the matter’s Parties tab). The role is Client, Opposing, Related, Witness or Other.
  3. BSuit screens every name on the matter (its own name and all its parties) against every party on other matters. A match is exact when the normalised names are equal and partial when one contains the other (names of at least 4 characters). The result is stored on the matter and refreshed after any matter or party change, so adding a clean party never erases an earlier hit.
  4. You can also run a conflict check for any list of names before taking a matter on.

#2. Fee arrangement

  1. On the matter set the fee arrangement type and terms. Payment terms must be 0 to 365 days and the default hourly rate cannot be negative. A rate card may give each attorney a rate (one row per attorney); the rate card wins over the arrangement default.
  2. Hourly: bills recorded hours. Fixed fee: needs a fixed fee amount above zero and bills milestones (their total cannot exceed the fixed fee). Retainer: needs a retainer amount and a mode, Trust drawdown or Apply to invoice. Contingency: needs a percent above 0 and up to 100, and a recovery amount.

#3. Time, expenses and tasks

  1. Record time in Time entries: matter, employee, hours (above 0 and at most 24) and rate. Or start a timer on a matter and stop it later. Time and expenses can be recorded only against an Open matter.
  2. Record Expenses against an Open matter with a positive amount.
  3. Track deadlines in Deadlines & tasks: status open, in progress, done or cancelled, due date and an optional reminder some days before. Overdue active tasks are flagged, and reminders can be sent. An open task cannot be added to a closed matter.

#4. Bill the matter

  1. On the matter choose Bill. Select unbilled billable time, unbilled billable expenses, pending fixed-fee milestones, or a contingency fee, according to the arrangement.
  2. BSuit posts one journal and creates one invoice snapshot atomically for the selection. Invoices are numbered INV-<matter code>-0001, sequential per matter.
  3. For a contingency fee, BSuit bills the percentage of the recovery not yet billed.

#5. Collect, adjust and void

  1. Open Receivables for open invoices and aging by days past due. Record a payment on a matter (needs legal_practice.payment.receive): amount, instrument (cash, bank or cheque), the cash or bank ledger it went into, and an idempotency key. If you give no allocation, it is applied oldest due first; allocations must add up to the amount and cannot exceed an invoice’s balance.
  2. Write off or credit note an invoice (needs legal_practice.invoice.write_off or credit_note) with a positive amount up to the balance and a reason of up to 1,000 characters.
  3. Void an invoice (needs legal_practice.invoice.void) to post a reversing journal and un-bill every line.
  4. For a retainer matter in Apply to invoice mode, apply the retainer to an invoice (needs legal_practice.retainer.draw).
Invoice statuses
StatusMeaning
IssuedBilled, nothing collected
Partially paidSome of the invoice collected
PaidFully collected
VoidReversed; its time and expenses are billable again

#6. Client trust

  1. Open Trust controls for client funds held, exceptions (negative client balances, stale funds with no recent activity) and the reconciliation.
  2. Deposit a client retainer into trust on the matter: debit the firm’s trust bank ledger, credit the matter’s trust ledger. Disburse to the firm as an earned fee or to a third party.
  3. Reverse a trust transaction with a reason (needs legal_practice.trust.reverse). The original is flagged and never deleted, and a reversal cannot itself be reversed.

#7. Monthly three-way trust reconciliation

  1. On Trust controls choose the trust bank ledger and a period end that is the last day of a month and not in the future. Enter the bank statement balance.
  2. BSuit compares three figures: the bank statement, the general ledger balance and the total of the client ledgers. Save the draft (needs legal_practice.trust.reconcile).
  3. Sign off. If the three agree within half a cent and no client balance is negative, signing records who and when. If not, you must resolve the difference or sign with a variance explanation of at least 10 characters.

About this guide

Status
Partially reviewed
Application
BSuit ERP
Audience
Attorneys, legal secretaries, billing staff and the legal administrator or managing partner
Owner
BSuit documentation team
Reviewer
Editorial review pending
Last verified
2026-10-03
Checked against
cb3691bbf
Seen on a running system
Not yet
Help version
2026.0.0-preview
Guide ID
erp:article/guide/legal-practice-matters

Known limits: Written from a read of the implementation; statements traced to source. Not yet walked through end to end by a trainer on a running system.

Need more help?If feedback above cannot be sent, email support and quote guide ID erp:article/guide/legal-practice-matters.
Email support

Plan to produce: BOMs, MRP, production orders and quality

Define bills of materials and routings, run material requirements planning, convert the results to purchase requisitions or production orders, run the shop floor and inspect quality.

On this page

Process at a glance

  1. Define BOMs and routingsEngineer / plannerApproved BOM per product; routing with operations per work center.
  2. Set planning parametersPlannerLead time, safety stock, reorder point and lot sizing per product.
  3. Run MRPPlannerPurchase, produce and transfer recommendations with peg trace.
  4. Convert recommendationsPlannerPurchase requisitions or production orders are created.
  5. Release and scheduleSupervisorWork orders per routing operation placed on work centers and days.
  6. Execute and inspectOperators / inspectorsQuantities completed, rejects recorded, inspections passed or failed.
  7. Review costCost accountantMaterial, labor, overhead and subcontracting costs per order.

#Purpose and scope

This chapter follows a manufactured product from its bill of materials to finished goods: master data, material requirements planning (MRP), production orders and work orders, capacity scheduling, quality inspection and costing. The Manufacturing home page lists production orders, work orders, BOMs and overdue jobs.

#Before you start

  1. Products (finished, semi-finished and raw) exist in the product master, and warehouses are set up (see “Inventory operations”).
  2. Work centers exist in Work centers; standard steps exist in Operations.
  3. Sales orders, forecasts and existing production orders are the demand MRP reads, so keep them current.

#1. Bills of materials and routings

  1. Open BOMs, create the BOM header for the product and add the component lines.
  2. Build the routing in Routings with its steps in Routing operations; each step names a work center and a sequence.
  3. Submit the BOM for approval, then approve it.
BOM statuses (enforced by the server)
StatusRule
DraftCan be submitted only if it has at least one active line: “Cannot submit a BOM with no active lines.”
Pending approvalWaiting for approval.
ApprovedApproving deactivates the previously active BOM of the same product and type, so only one approved BOM per product/type is active.

#2. Planning parameters and the master schedule

  1. In Planning parameters set, per product, the planning group (Raw Material, Finished Goods, Semi-Finished, Packaging), ABC class, preferred vendor, lead time in days, safety stock, reorder point and reorder quantity.
  2. Choose a lot sizing method: LFL (lot for lot), FOQ (fixed order quantity) or EOQ (economic order quantity), with fixed, minimum and maximum order quantities where relevant.
  3. Optionally capture demand in Demand forecasts and plan the master production schedule in MPS plans; the MPS workbench shows a product by period matrix with available-to-promise and can recalculate it.

#3. Run MRP

  1. Open the MRP dashboard.
  2. Set Plan From and Plan To and tick what to include: Production Orders, Forecasts, Safety Stock.
  3. Choose the Plan Mode: Regenerative re-plans everything; Net Change re-plans only items whose demand or supply changed since the last run.
  4. Choose Run MRP. The run header shows the number, status and the totals for purchase, produce and transfer recommendations.
  5. Review each result: planned quantity, net and gross requirement, stock, safety stock, lot method, required date, suggested order date and what it is pegged to. Use the Peg trace to see the demand behind a line.
  6. When the run is Completed, choose Confirm to lock it from re-execution.
MRP run statuses seen on screen
StatusMeaning / what you can do
RunningCalculation in progress.
CompletedResults are ready; Confirm is offered.
Draft or FailedA Re-run action is offered.
ConfirmedLocked. Only a Completed run can be confirmed: “Cannot confirm run in … status”.

#4. Convert recommendations

  1. Use the All, Purchase, Produce and Transfer tabs (a tab appears only if it has results) and search by product.
  2. Select the unconverted lines, then convert to Purchase Requisitions (for bought items) or Production Orders (for made items).
  3. Converted lines are dimmed and marked “Converted to …”; they cannot be converted twice.

#5. Production orders and work orders

A production order is created by conversion, from a sales order, or by hand in Production orders (product, BOM, routing, planned quantity, dates, warehouse, department, project, cost centre, priority Low/Normal/High/Critical). The Materials tab lists required materials and can be populated from the BOM.

Production order lifecycle
TransitionRule and effect
Draft → ReleasedOnly Draft orders can be released. Opens a WIP entry at standard cost and creates one work order (status Scheduled) per routing operation.
Released → In ProgressOnly Released orders can start; sets the actual start.
In Progress → CompletedCompleted quantity must be positive and not exceed the planned quantity. Finished goods are received into the warehouse.
Completed → ClosedOnly Completed orders can be closed.
Draft or Released → CancelledOrders already in progress cannot be cancelled.

#6. Capacity and the shop floor

  1. In the Capacity schedule drag a work order to another work center or day, or tap it to change the work center and start/end dates. Each cell shows planned versus available hours and the load percentage.
  2. The Work center board shows live Andon status and Availability, Performance, Quality and OEE for the last 24 hours.

#7. Quality inspection

  1. Define what is measured in Quality parameters.
  2. Record an inspection in Quality inspections against a work order or production order: date, inspector, quantity inspected, passed and rejected.
  3. Enter a measurement per parameter in Inspection results.
Inspection statuses
StatusMeaning
PendingNot yet decided
PassAccepted
FailRejected
ConditionalAccepted with conditions

#8. Production costs

Production costs tracks cost lines per production order. Each line has a type — Material, Labor, Overhead or Subcontracting — with quantity, unit cost, total, cost centre and optional work order.

About this guide

Status
Partially reviewed
Application
BSuit ERP
Audience
Production planners, shop-floor supervisors and quality inspectors
Owner
BSuit documentation team
Reviewer
Not yet reviewed
Last verified
Never
Checked against
Generated from source revision a36c7a086 on 2026-10-02
Seen on a running system
Not yet
Help version
2026.0.0-preview
Guide ID
erp:article/guide/manufacturing-mrp
Need more help?If feedback above cannot be sent, email support and quote guide ID erp:article/guide/manufacturing-mrp.
Email support

Real Estate: listings, inquiries, viewings, offers and deals

List a property, publish it, work inquiries and viewings, negotiate offers, reserve the listing by accepting an offer, and close the deal as sold or rented.

On this page

Process at a glance

  1. Create the listingAgentDraft listing with price, city and images.
  2. Check the priceAgentAdvisory price suggestion from comparables.
  3. PublishProperty managerListing on the market and visible on the public site.
  4. Work inquiriesAgentInquiries contacted and moved forward.
  5. Schedule viewingsAgentViewings booked without agent double-booking.
  6. Negotiate offersAgent / property managerOffers countered, rejected or accepted; accepting reserves the listing.
  7. Close the dealProperty managerListing marked sold or rented; a deal record awaits hand-off.

#Purpose and scope

This chapter covers the Real Estate module: listings for sale, rent and lease, buyer and renter inquiries, viewings, offers, the deal record, local market comparables and stale-listing tracking. Buyers and renters reach published listings through the public site and customer portal, and their inquiries, viewing requests and offers land in the same pipeline.

#Before you start

  1. The roles PROPERTY-MANAGER and LEASING-AGENT are seeded. A leasing agent sees and changes only the records assigned to them; managers, administrators and superusers see everything.
  2. Two actions have their own named permissions: realestate.propertylisting.publish (publish, unpublish and archive a listing) and realestate.propertyoffer.accept (accept an offer).
  3. An agent assigned to each listing, so viewings can be scheduled and the public can reach the right person.

#1. Create and publish a listing

  1. Open Property listings and create a listing: title, listing type (sale, rent or lease), property type, price, currency, rent period for rentals, address, city, country, bedrooms, bathrooms, area, amenities, images (one URL per line), expiry date and assigned agent.
  2. Use the row actions to change status. The status cannot be edited as a field.
  3. Publish. The listing needs a price greater than zero, a city and at least one image, and its expiry date cannot be in the past.
Listing lifecycle
FromAllowed to
DraftPublished, Archived
PublishedDraft, Reserved (by accepting an offer), Sold, Rented, Archived
ReservedPublished (release), Sold, Rented. Never archived under an accepted offer
SoldArchived
RentedPublished (re-list), Archived
ArchivedDraft (restore)

#2. Check the price with comparables

  1. Enter local Market comparables with an as-of date. Comparables older than about 18 months are excluded.
  2. The listing’s Price check compares your price with the average of comparables for the same segment (listing type, property type, city and bedrooms), falling back to your own published listings when there are too few. With fewer than 3 data points there is no suggestion.
  3. A price at least 25% away from the suggestion is flagged as an outlier.

#3. Inquiries

  1. Open Property inquiries. Inquiries arrive from the public site or are entered by an agent (company and agent are copied from the listing).
  2. Move an inquiry along with Mark contacted, Close or Spam. Statuses are New, Contacted, Viewing scheduled, Closed and Spam. A closed inquiry can be reopened to Contacted, and Spam back to New.

#4. Viewings

  1. Open Property viewings and schedule a viewing on a published listing: start and end time, optionally linked to an inquiry.
  2. A viewing must be in the future, end after it starts, and last between 15 minutes and 4 hours.
  3. Buyers can also request a viewing from the public site with up to 3 preferred times within 90 days. That creates a Requested viewing, which holds no slot. Confirm it with the buyer’s time or another, and the buyer is emailed.
  4. Complete, cancel, reschedule or mark a viewing as no-show.

#5. Offers

  1. Open Property offers and make an offer on a published listing: amount above zero, an expiry in the future, and a contact name or a linked inquiry.
  2. Use the row actions: accept, counter, reject or withdraw. A counter marks the original Countered and creates a new open offer with the new terms.
  3. Accept (needs realestate.propertyoffer.accept). This reserves the listing and supersedes every other live offer on it in one step.
Offer statuses
StatusMeaning
OpenNegotiable
CounteredReplaced by a counter-offer
AcceptedListing reserved
Rejected / WithdrawnClosed by the agent or the buyer
ExpiredPassed its expiry; expired automatically when the module is viewed
SupersededAnother offer was accepted

#6. Close the deal

  1. Mark the reserved listing Sold or Rented. BSuit creates one deal record from the accepted offer (idempotent) and closes the linked inquiry.
  2. Open Property deals. Deals are created only this way and cannot be created by hand or deleted; cancel a deal instead of deleting it.
  3. Record the downstream record type and its id or number on the deal to mark it Handed off. Until then it is Pending hand-off.

#7. Stale listings and public alerts

Stale listings lists Published listings that were published more than N days ago (60 by default), oldest first, so you can reprice or re-list. Customers can save property searches on the public site; an hourly background job emails matching alerts for the listings of their own company only.

About this guide

Status
Partially reviewed
Application
BSuit ERP
Audience
Property managers and leasing or sales agents
Owner
BSuit documentation team
Reviewer
Editorial review pending
Last verified
2026-10-03
Checked against
cb3691bbf
Seen on a running system
Not yet
Help version
2026.0.0-preview
Guide ID
erp:article/guide/real-estate-listing-to-deal

Known limits: Written from a read of the implementation; statements traced to source. Not yet walked through end to end by a trainer on a running system.

Need more help?If feedback above cannot be sent, email support and quote guide ID erp:article/guide/real-estate-listing-to-deal.
Email support

Developer Studio: custom entities, forms, change requests, rules, notifications and audit

Define custom entities and fields, design forms, promote schema changes through governed change requests, package low-code applications, and add business rules, notifications, form actions and audit policies.

On this page

Process at a glance

  1. Define entities and fieldsAdministratorEntity with fields and relationships, linked to a draft change request.
  2. Design the formAdministratorForm with tabs, fields and grid columns.
  3. Release the change requestAdministratorMigration and rollback SQL generated and numbered.
  4. Apply the change requestAdministratorTables created, permissions registered, menu and form published.
  5. Package the applicationAdministratorCustom application activated once ready.
  6. Add rules and notificationsAdministratorBusiness rules, notifications and form actions live.
  7. Set audit policyAdministratorPer-entity audit settings and retention.

#Purpose and scope

This chapter covers the Developer menu (the AI Studio module's low-code surface): custom and built-in entity definitions, the form builder, governed change requests, custom applications, business rules, notification rules, form actions and audit configuration. The Developer home page lists these tools.

#Before you start

  1. The Developer menu group is admin-only. The change-request surface runs and generates database DDL, so it is restricted to a superuser or the Admin role, and a portal token can never authorise it.
  2. The module declares three separately activatable capabilities because they can change tenant behaviour and data models: Runtime Forms & Custom Entities (entities, form builder, applications), Governed Schema Change Workflow (change requests) and Developer Automation Rules (business rules, notifications, audit configuration). Ask your administrator which are active for your tenant.
  3. Work in a development environment first and promote with an exported package.

#1. Entities and fields

  1. Open Entities to see custom and built-in entity definitions. Create a custom entity, or extend an existing standard module table by choosing the target module key, entity key and table name.
  2. Add fields with a snake_case name (lowercase letters, numbers and underscores, starting with a letter) and a data type: string, integer, decimal, boolean, date, datetime or text.
  3. Add relationships: One-to-Many (a foreign key column) or Many-to-Many (a junction table).
  4. To make an entity usable by outside users, set Portal Exposure to customer, vendor or careers, name the owner field (required), and optionally allow portal users to create rows (the owner is stamped by the server).
  5. For approval, set the status field, the approval record type (default CUST-<entity key>) and mark the entity Submittable. For finance, switch on posting: choose the posting record type (default JV), the amount field and the debit and credit ledgers (or per-row ledger fields); a journal voucher is posted when an approved row is finalised.

#2. Forms

  1. Open Form builder. A form has tabs, fields and grid columns that you can reorder. Regenerate rebuilds a form from its entity.
  2. Save a version to keep a commit-style history with diffs, and restore an earlier version when needed.
  3. For shipped (standard) forms you save a customization layout instead of editing the original.

#3. Change requests

  1. Open Change requests. A change request collects entity and field changes (statuses: draft, released, applied, rolled back, failed).
  2. Preview SQL first. Release a draft change request: BSuit generates the forward and rollback SQL from the entity definitions and gives it the next sequence number.
  3. Apply (shown as Activate) a draft, released or rolled-back change request. BSuit runs the DDL, deploys the entities, registers permission codes, registers menu items, publishes form layouts, unlocks the objects and records the change in the applied ledger.
  4. Roll back an applied change request to run its rollback SQL, set entities back to draft and deactivate the menu items. A rolled-back change request can be reset to draft.
  5. Export a change request as a package and import it into another environment; the import creates a draft change request.
Change request actions
ActionAllowed fromNotes
ReleasedraftGenerates and stores the SQL; refused otherwise (“Can only release draft change requests”)
Applydraft, released, rolled backA failed change request must be reset to draft, fixed and retried
Roll backapplied
Reset to draftrolled back, failed

#4. Custom applications

  1. Open Custom applications and create an application with a key (permanent, it cannot be changed), a name, icon, colour and order. A key owned by a compiled BSuit module is refused.
  2. Optionally use Design with AI. It produces a review-only blueprint; accepting it creates inactive metadata and a draft change request, and does not release, apply or publish anything.
  3. Activate the application. It must pass the readiness check: at least one entity, every entity deployed, a form for every entity, and every linked change request applied. The blockers are listed.
  4. Export the application package to move it.

#5. Business rules

  1. Open Business rules and create a rule for an entity with a trigger (before save, after save, on load, on field change or on delete), conditions in JSON and a priority (lower runs first).
  2. Choose actions: set a field (supports {current_user}), throw an error (blocks the save on before save), set required, set read-only, set visible, or run a sandboxed script.
  3. Use trace to test a rule against sample data without applying it.

#6. Notifications and form actions

  1. Open Notifications and create a rule for any entity (built-in or custom) with a trigger event (create, update or delete), optional conditions, channels (in-app, email, SMS, push), title, body and link templates with {field} placeholders, and recipients: followers, specific users (comma-separated ids), a role, or a field holding a user id.
  2. Open Form actions to add buttons to an entity’s form: start the record’s approval workflow, run a read-only sandboxed script, or call a pre-registered integration endpoint (never a free-text address).

#7. Audit configuration

  1. Open Audit config and create a policy for an entity key: enabled flag, which operations to audit (creates, updates, deletes, views), fields to exclude, and retention days (365 by default).

About this guide

Status
Partially reviewed
Application
BSuit ERP
Audience
Administrators, low-code developers and implementation consultants
Owner
BSuit documentation team
Reviewer
Editorial review pending
Last verified
2026-10-03
Checked against
cb3691bbf
Seen on a running system
Not yet
Help version
2026.0.0-preview
Guide ID
erp:article/guide/developer-studio

Known limits: Written from a read of the implementation; statements traced to source. Not yet walked through end to end by a trainer on a running system. Entity and form-builder pages (very large) were read for labels and messages, not line by line.

Need more help?If feedback above cannot be sent, email support and quote guide ID erp:article/guide/developer-studio.
Email support

Idea to project close: intake, planning, delivery and billing

Take a project idea through intake, create the project from a template, plan the WBS, budget and resources, track risks, issues and change orders, and bill and recognise revenue.

On this page

Process at a glance

  1. Capture the ideaRequester / PMOIntake moves from idea to review to approved.
  2. Create the projectPMOProject, WBS, activities and milestones from a template, or converted from an approved intake.
  3. Plan work and budgetProject managerWork breakdown, activities, budget lines and resource allocation.
  4. Track the scheduleProject managerGantt, kanban and workload views.
  5. Manage risks, issues and changesProject managerApproved change orders adjust budget and end date.
  6. Forecast costProject managerBAC, committed, actual, EAC, ETC and VAC.
  7. Bill and recognise revenueProject accountantBilling items and percent-complete revenue recognition.

#Purpose and scope

This chapter follows a project from demand intake to billing. The Project Management home page shows budget versus actual, status, completions and overdue attention items, and the Dashboard gives the project view.

#1. Intake: from idea to project

  1. In Intake create an intake with a code, title, description, business case, requester, estimated cost, estimated benefit and score.
  2. Move the Stage through Idea, Review, Approved or Rejected.
  3. Choose Convert on a row that is not rejected or already converted.

#2. Create a project

  1. Either start from a template: Templates lists reusable blueprints; choose Instantiate and give a project name. BSuit creates the project with its WBS, activities and milestones and reports how many of each.
  2. Or create it directly in Projects: group, manager, location, status, priority, planned and actual dates, currency, budget, estimated cost and revenue method.
Project statuses and priorities
FieldValues
StatusPlanned (default), In Progress, On Hold, Completed, Cancelled
PriorityLow, Medium (default), High, Critical
Revenue methodUnrestricted, Recognition, Contract

#3. Plan the work, budget and people

  1. Break the scope down in WBS and Activities; group work under Epics for agile projects.
  2. Set the working calendar in Calendars and holidays in Calendar exceptions.
  3. Enter the cost budget by category in Budget lines.
  4. Allocate people in Resources, with cost and billing rates in Resource rate cards. The Workload heatmap shows allocation by week and flags over-allocation in red.

#4. Track delivery

  1. Follow the plan on the Gantt and the Kanban board; Sprint analytics shows burndown and velocity for agile projects.
  2. Log risks in the Risk register and problems in Issues.
Risk and issue fields
ItemStatuses and values
Risk statusIdentified (default), Analyzing, Mitigating, Resolved, Accepted, Closed
Risk assessmentProbability 1–5 and Impact 1–5, plus owner, trigger, mitigation plan and contingency plan; categories Technical, Financial, Schedule, Resource, External, Quality
Issue statusOpen (default), In Progress, Resolved, Closed, Deferred
Issue severity / typeLow, Medium, High, Critical; Bug, Change Request, Clarification, Blocker, Other

#5. Change orders

  1. Record a change request in Change orders with its cost impact and schedule impact in days. Status starts as Draft and can be Submitted.
  2. Use the Approve or Reject row action to decide it.

#6. Forecast cost and profitability

Cost forecast and P&L shows BAC (budget), Committed, Actual, EAC (forecast), ETC (to complete) and VAC (variance) by cost category, plus margin.

#7. Billing and revenue recognition

  1. Record billing items in Billing: billing type (Milestone, Time & Material, Fixed Fee, Percent Complete), amount, status Draft, Invoiced or Paid, invoice date and whether it is billable.
  2. For percent-complete revenue, pick the unbilled receivable and revenue ledgers and choose Recognize.

About this guide

Status
Partially reviewed
Application
BSuit ERP
Audience
Project managers, PMO and project accountants
Owner
BSuit documentation team
Reviewer
Not yet reviewed
Last verified
Never
Checked against
Generated from source revision a36c7a086 on 2026-10-02
Seen on a running system
Not yet
Help version
2026.0.0-preview
Guide ID
erp:article/guide/project-delivery
Need more help?If feedback above cannot be sent, email support and quote guide ID erp:article/guide/project-delivery.
Email support

Contract lifecycle: draft, sign-off, signature, milestones and payments

Create a contract from a template, route it for sign-off, collect signatures, track obligations and compliance, handle variations, and post milestones and progress payments to finance.

On this page

Process at a glance

  1. Prepare templates and clausesContract managerReusable terms and clauses.
  2. Draft the contractContract managerDraft contract with scope lines budgeted to cost codes.
  3. Submit for sign-offContract managerApproval workflow starts; on final approval the contract becomes Active.
  4. Collect signaturesContract managerEnvelope sent to signers with signing links.
  5. Track obligations and complianceContract managerObligations, expiries and alerts.
  6. Handle variationsProject controllerDCOR, COR and CO stages approved by workflow.
  7. Achieve milestones and payFinance approverMilestone and payment journals posted to finance.

#Purpose and scope

This chapter covers a contract from template to payment. The Contract Management home page shows status, value, payments, top contractors and expiries; the Contract dashboard gives an overview of contracts, payments and compliance.

#1. Templates and clauses

  1. Keep reusable wording in Contract clauses.
  2. In Contract templates set the contract type (Fixed Price, Time & Material, Unit Rate, Lump Sum or Cost Plus), default payment terms, default retention %, default warranty months and a boilerplate body.

#2. Draft the contract

  1. Open Contracts. Create a contract directly, or pick a template to create a draft from it (the draft is created and its code is shown).
  2. Fill in the contract code, name and scope of work; type; the contractor or consultant company; optional project, WBS element and parent contract (for a sub-contract); start, end and signed dates; warranty; and the commercial terms (retention, advance, performance guarantee percentages, payment terms).
  3. On the Cost Code Lines tab enter the scope lines, each budgeted to a project cost code. Cost codes are maintained in Cost codes.
Contract statuses
StatusMeaning
DraftBeing prepared; scope lines can be edited. Scope lines become read-only once the contract is past Draft.
SubmittedAn approval workflow is running.
ActiveSet when every approver has signed off.
On Hold, Completed, Terminated, ExpiredSelectable on the contract form.

#3. Submit for sign-off

  1. In the contract list choose Submit for sign-off on a Draft contract and confirm.
  2. BSuit starts the approval workflow configured for the contract record type and moves the contract to Submitted. It stays in the workflow until every approver signs off, then becomes Active with the signer and date stamped.

#4. Clause extraction and electronic signature

  1. Open a contract. The AI clauses tab extracts payment terms, deliverables, penalties, termination clause and expiry date from pasted contract text or an uploaded PDF, with a confidence score. The result is for review only; contract fields are never changed automatically. You can then create trackable obligation rows from the extracted obligations.
  2. On the signature tab create a signature envelope, add each signer with an email, role and signing order, and choose Send for signature. Signers get their links; you can copy a signing link or void the envelope.
  3. Track envelopes and signer status in Signature envelopes.

#5. Obligations, compliance, alerts and evaluations

Monitoring screens
ScreenUse
ObligationsType Deliverable, Payment, Compliance, Reporting or Other; party Us or Counterparty; status Open, In Progress, Met, Overdue or Waived.
ComplianceInsurance, licence, safety certificate, bank guarantee and performance bond documents with issue and expiry dates.
Contract alertsRenewal due, compliance expiring and warranty expiring alerts with severity (Expired, Critical, Warning) and status Open, Acknowledged or Dismissed.
EvaluationsQuality, schedule, safety and cooperation scores (1–10), an automatic overall score, and a recommendation: Preferred, Acceptable, Conditional or Blacklisted.

#6. Variations (change orders)

Variations runs a three-stage pipeline: DCOR (draft change order request), COR (change order request, submitted) and CO (approved change order), each with its own page (DCOR, COR, CO). Variation types are Addition, Omission, Substitution and Time Extension; statuses are Proposed, Under Review, Approved, Rejected and Implemented.

#7. Milestones

  1. In Milestones record payment milestones with a due date and amount.
  2. When the work is accepted choose Achieve and confirm. The achieved date is stamped and a journal is posted to finance (or submitted for approval if a workflow is configured).
Milestone journal
LineAmount
Debit Accounts ReceivableMilestone amount
Credit RevenueAmount × (1 − retention %)
Credit Retention LiabilityAmount × retention % (only if retention is above zero)

#8. Payments and RA bills

  1. Record payments in Payments (all kinds), Progress payments (RA bills and final bills) or Miscellaneous payments (advance, mobilisation, retention release, other).
  2. Save with a positive net payable, then choose Post to Finance.
  3. The payment moves through Draft, Submitted, Verified, Pending Approval, Approved, Paid or Rejected. Once posted, the record is read-only and shows the journal number.

About this guide

Status
Partially reviewed
Application
BSuit ERP
Audience
Contract managers, project controllers and finance approvers
Owner
BSuit documentation team
Reviewer
Not yet reviewed
Last verified
Never
Checked against
Generated from source revision a36c7a086 on 2026-10-02
Seen on a running system
Not yet
Help version
2026.0.0-preview
Guide ID
erp:article/guide/contract-lifecycle
Need more help?If feedback above cannot be sent, email support and quote guide ID erp:article/guide/contract-lifecycle.
Email support

License Management: plans, license requests, signed keys and the license lifecycle

Define license plans, produce a machine fingerprint request, issue a signed license key, activate it on a host, and renew, suspend or revoke client licenses.

On this page

Process at a glance

  1. Define plansLicense administratorEditions with seat limits and prices.
  2. Create a license requestCustomer administratorRequest file carrying the host’s machine fingerprint.
  3. Generate the signed keyPlatform owner (superuser)Signed license JSON and an issued client license record.
  4. Activate on the hostCustomer administratorSignature and machine id verified; the license becomes the host’s active license.
  5. Check statusAdministratorEdition, users, modules and days remaining.
  6. Review issued licensesLicense administratorIssued licenses with their history.
  7. Renew, suspend or revokeLicense administratorStatus changed and local keys updated immediately.

#Purpose and scope

This chapter covers the Client Licensing module: licenses that a vendor issues to its clients, and the licence installed on a host. It is not the ERP’s own subscription (see Account → Subscription). The module is admin-only: a superuser or the Admin role.

#Before you start

  1. An administrator account. Generating a key is further restricted to a superuser on the platform owner’s host, which is the only place the private signing key is installed. Customer or on-premises hosts carry only the public key, which is enough to verify and activate.
  2. The Client licensing home lists License Status, License Request, License Plans, Client Licenses and License Generator.

#1. License plans

  1. Open License plans and create a plan with a code, name, edition (Starter, Standard, Professional or Enterprise), duration in months, the modules allowed (JSON array), seat limits and prices.
  2. Seats come in four kinds: named, named concurrent, guest and guest concurrent, each with its own price. “Max users (legacy total)” is kept for older licenses.
  3. Mark a plan inactive to stop new licenses being issued against it.

#2. Create a license request

  1. On the host that needs the license, open License request and generate the request file. It carries a machine fingerprint (machine id), the host name, the operating system and the BSuit version.
  2. Send the file to the vendor.

#3. Generate the signed key (platform owner)

  1. Open License generator as a superuser. Load the request file, or enter the customer name and the machine id.
  2. Pick an optional plan to auto-fill, then confirm the edition, maximum concurrent users (at least 1), the modules, and the validity in months (1 to 120). Seat limits cannot be negative.
  3. Generate. BSuit signs the license JSON with RSA-SHA256, creates a client license record and writes an “issued” history row in the same transaction. Send the key to the customer.

#4. Activate the license on the host

  1. Submit the signed license JSON to the activation endpoint (POST /api/license-management/activate). BSuit verifies the RSA signature, requires a license code and a machine id that matches this host, and then stores it as the host’s active license with an activation history row.
  2. A license that is already active is answered with “License already active”.

#5. Check status and expiry

License status shows the active license: code, customer, edition, maximum concurrent users, modules allowed, valid from and until, days remaining, machine id and activation time. A license is valid through its valid-until date and expires the day after; it becomes valid on its valid-from date. An expired license reports as unlicensed (“License has expired”) so the host falls back to the unlicensed behaviour, and with no license it reports unlicensed with the machine id. An hourly background worker also marks the stored client licenses expired.

#6. Renew, suspend and revoke

  1. Open Client licenses for the issued license records and their history. Statuses are Active, Expired, Suspended and Revoked.
  2. Renew: enter the number of months (1 to 120). The new expiry is counted from the later of the current expiry and today. An expired or suspended license becomes Active again, and the host’s local keys are revalidated.
  3. Suspend: invalidates the host’s local key, so the host reports as unlicensed on its next status check.
  4. Revoke: invalidates the host’s local key immediately and permanently.

About this guide

Status
Partially reviewed
Application
BSuit ERP
Audience
Administrators, software vendors and their license administrators
Owner
BSuit documentation team
Reviewer
Editorial review pending
Last verified
2026-10-03
Checked against
cb3691bbf
Seen on a running system
Not yet
Help version
2026.0.0-preview
Guide ID
erp:article/guide/license-management

Known limits: Written from a read of the implementation; statements traced to source. Not yet walked through end to end by a trainer on a running system. No ERP screen was found that calls the activation endpoint; activation is documented as an API step.

Need more help?If feedback above cannot be sent, email support and quote guide ID erp:article/guide/license-management.
Email support

Lead to won deal: leads, pipeline, quotes and forecast

Capture and score leads, convert them to accounts and opportunities, work the pipeline board, issue versioned quotes, win the deal into a draft sales order and read the forecast.

On this page

Process at a glance

  1. Capture leadsSales / marketingLead with source, status and score.
  2. Score and segmentMarketingScoring rules award points; segments group leads by conditions.
  3. NurtureSalesTimed multi-step cadences with enrollments.
  4. Convert the leadSalesAn account and an opportunity are created; the lead is marked converted.
  5. Work the pipelineSalesOpportunities move between stages.
  6. Quote and winSalesVersioned quote issued; win creates a draft sales order.
  7. ForecastSales managerWeighted forecast, commit, best case and pipeline.

#Purpose and scope

This chapter follows a sales opportunity from first contact to a won deal. The CRM home page shows the pipeline, weighted forecast, opportunities and attention items. After the win, the order continues in the order-to-cash chapter.

#Before you start

  1. Pipeline stages exist in Pipeline stages: each has a code, name, probability, sort order, colour, and Won and Lost flags.
  2. Lead sources are set up in Lead sources.
  3. Sales teams, members, territories and quotas are in Sales teams, Team members, Territories and Quotas (monthly, quarterly or yearly target and achieved amounts).

#1. Capture and qualify leads

  1. Create leads in Leads: name, email, phone, mobile, company, designation, industry, website, source, address and notes. Website contact forms can also create leads.
  2. Move the Status through New, Contacted, Qualified, Converted or Lost.
  3. Before converting, use the duplicate search (by email, phone or company) to find matching leads and accounts. At least one of the three is required.
  4. To combine duplicates, merge the duplicate lead into the surviving one: its activities move to the survivor, blank fields on the survivor are back-filled, and the duplicate is marked merged.

#2. Score and segment

  1. In Lead scoring rules define rules as field + operator + value + points. Fields: name, email, phone, mobile, company, designation, industry, website, country, status. Operators: Equals, Not equals, Contains, Is not empty, Is empty.
  2. Active rules are evaluated against a lead to set its Score. A lead can be scored individually, or all leads that are not converted can be re-scored in bulk.
  3. Group leads with Lead segments, which use the same field and operator conditions; choose Members to see who matches.

#3. Nurture with sequences

  1. Build a cadence in Sales sequences and its timed steps in Sequence steps.
  2. Enrol a lead or contact; Sequence enrollments lists the sequence, status (Active, Paused, Completed), current step and next action time.
  3. Mass outreach uses Campaigns and Campaign members; wording is kept in Comm templates.

#4. Convert a lead

Converting a lead that is not already converted creates an account from the lead’s company, industry, website, contact and address details, and an opportunity named “Opportunity - <company>” linked to that account. The lead is marked converted and keeps links to the new account and opportunity, and a system entry is added to the timeline. A lead already converted is refused (“Lead is already converted”).

#5. Work the pipeline

  1. Complete the opportunity in Opportunities: name, account, amount, expected close date, probability and next step.
  2. Add product lines on the Line Items tab (Opportunity products); they roll up to the opportunity amount.
  3. Open the Pipeline board and drag each opportunity between stage columns to update its stage. An Unassigned column holds deals with no stage.

#6. Issue a quote

  1. On the opportunity open the quote tab and choose Issue Quote. The current line items are locked into a numbered, printable Quote / Proposal.
  2. If you edit the lines and issue again, a new version (v2, v3 …) is created; a version already sent is not changed.
  3. Use Print on an issued version to open the document.

#7. Win the deal

  1. On the opportunity open the Win tab and choose Win.
  2. If an approval workflow is configured for the win record type, the opportunity shows Win Pending Approval and the win is applied when approved. Otherwise it is applied immediately.
  3. The result is a draft sales order built from the opportunity’s product lines, with its order number shown on the opportunity. Continue in the order-to-cash chapter.
Win checks
ConditionMessage
Already won“Opportunity already won …”
Win already submitted“Opportunity win is already submitted for approval.”
Amount not positive“Opportunity amount must be positive to convert.”
No account“Opportunity has no account — cannot identify the customer.”
Orderable lines but the account has no customer ledgerA message that the customer ledger is missing

#8. Forecast

Sales forecast shows Weighted Forecast (amount × probability of open deals), Commit (won), Best Case (commit plus open pipeline) and Pipeline, by period, stage and owner. Compare against Quotas.

About this guide

Status
Partially reviewed
Application
BSuit ERP
Audience
Sales representatives, sales managers and marketing
Owner
BSuit documentation team
Reviewer
Not yet reviewed
Last verified
Never
Checked against
Generated from source revision a36c7a086 on 2026-10-02
Seen on a running system
Not yet
Help version
2026.0.0-preview
Guide ID
erp:article/guide/crm-sales-pipeline
Need more help?If feedback above cannot be sent, email support and quote guide ID erp:article/guide/crm-sales-pipeline.
Email support

Master Data Management: duplicate review, golden records, quality and relationships

Scan products, suppliers and employees for duplicates, review candidates, record a reversible alias to a golden record, track data-quality scores and maintain enterprise relationships.

On this page

Process at a glance

  1. Run a duplicate scanData stewardCandidate pairs queued for review.
  2. Review the candidateData stewardDecision recorded: confirmed duplicate, not duplicate or merge planned.
  3. Record the aliasData stewardA reversible alias from the source record to the golden record.
  4. Undo if neededData stewardAlias deactivated; candidate back to confirmed duplicate.
  5. Check data qualityData stewardCompleteness scores and issues, lowest first.
  6. Maintain relationshipsData stewardEdges between records across modules, browsable as a graph.

#Purpose and scope

This chapter covers the Master Data Management module: duplicate detection and review for products, suppliers and employees, golden-record aliasing, data-quality scoring and the enterprise relationship graph.

#Where Master Data Management is in the menu

Master Data Management has no sidebar entry of its own. The module declares no sidebar group and is deliberately not a standalone application tile; /master-data-management simply redirects to its Duplicates workspace. In the source, the same three pages are declared as admin-only items of the Administration menu (Duplicate Review, Data Quality and Relationships under /administration/master-data/…), and those addresses show the same pages. If you cannot see them in the sidebar, open Duplicates, Quality or Relationships by address, and ask an administrator to check your access.

#Before you start

  1. The module is admin-only. Reading candidates, quality scores and resolving an alias is open to any authenticated user of this admin module; every change needs a named permission (granted to MASTER-DATA-ADMIN): master_data_management.duplicate.scan, .duplicate.review, .duplicate.merge, .duplicate.unmerge and .relationship.manage.
  2. Two separately activatable capabilities: Master Data Quality (scans, candidate queues, quality scores, history) and Master Data Governance (reviewing and merging candidates and maintaining relationships). Governance is meant for tenants that have a data-steward process.
  3. The module depends on Product Management and Procurement.

#1. Scan for duplicates

  1. Open Duplicates and choose Refresh assessment for the entity type: products, suppliers or employees (needs master_data_management.duplicate.scan). Other types are refused.
  2. BSuit groups records by shared keys (exact identifiers such as barcode, SKU, licence, VAT, e-mail or phone, plus name-based keys) and compares only records that share a group. Pairs scoring at least 0.65 become candidates. Scores weigh exact identifiers and name similarity; employees weigh e-mail, phone and date of birth.
  3. The scan also calculates a quality score and issues for each record.

#2. Review a candidate

  1. Open a candidate to see the side-by-side comparison of the fields the matcher compared and the reasons it matched, such as same email or a very similar legal name.
  2. Review (needs master_data_management.duplicate.review): choose Not duplicate, Confirm (confirmed duplicate) or Keep A / Keep B (merge planned, with the golden record). The golden record must be one of the two records. A suggested golden record is shown only when one side is clearly more complete; on a near tie you must choose.
  3. Add notes. The history shows who decided what.

#3. Record an alias (merge) and undo it

  1. On a candidate reviewed as merge planned or confirmed duplicate choose Record alias (needs master_data_management.duplicate.merge). BSuit records a reversible alias from the source record to the golden record.
  2. To undo, choose Unmerge (needs master_data_management.duplicate.unmerge). The alias is deactivated, kept as an audit record, and the candidate returns to confirmed duplicate. Unmerging an already unmerged candidate does nothing.
  3. Other modules can resolve a record to its golden record through the resolve lookup; it follows active aliases and is cycle-safe.

#4. Data quality

Quality lists completeness and validation issues ranked by lowest score first, for each entity type. Run an assessment to calculate scores; a record’s history shows how its score changed.

#5. Enterprise relationships

  1. Open Relationships, enter a root entity type and ID, and load its graph (1 to 3 levels). Click any node to re-root the graph on it.
  2. Choose Add Relationship (needs master_data_management.relationship.manage): source entity type and ID, the relationship type, and the target entity type and ID. All fields are required.

About this guide

Status
Partially reviewed
Application
BSuit ERP
Audience
Data stewards and administrators
Owner
BSuit documentation team
Reviewer
Editorial review pending
Last verified
2026-10-03
Checked against
cb3691bbf
Seen on a running system
Not yet
Help version
2026.0.0-preview
Guide ID
erp:article/guide/master-data-management

Known limits: Written from a read of the implementation; statements traced to source. Not yet walked through end to end by a trainer on a running system. Sidebar placement taken from module declarations (module has no sidebar group; Administration menu declares the three pages); not confirmed in a running sidebar.

Need more help?If feedback above cannot be sent, email support and quote guide ID erp:article/guide/master-data-management.
Email support

Document control: folders, versions, approval, transmittals and retention

Store documents in folders, control versions and check-out, move files through review and publishing, issue transmittals, share links and recover deleted items.

On this page

Process at a glance

  1. Set up categories and foldersAdministratorDocument categories exist; folders are created in Browse.
  2. Upload and organise filesDocument controllerFiles sit in folders with versions and tags.
  3. Complete the registerDocument controllerDocument number, revision, type, confidentiality and dates are filled in.
  4. Review and publishApproverThe file is approved or rejected, then published.
  5. Issue to external partiesDocument controllerA transmittal records what was sent, to whom and why.
  6. Track due actionsOwnerFollow-ups show the next action and due date per record.
  7. Audit and recoverAdministratorAccess log shows every action; Trash restores deleted items.

#Purpose and scope

This chapter covers the document life cycle in Document Management: organising files, versioning and check-out, the review and publishing states, transmittals, sharing, retention rules and recovery. Other modules also attach files to their own records; those files are stored in the same document store and appear under automatically created attachment folders.

#Before you start

  1. Define document categories in Categories (code, name, colour, icon, sort order).
  2. Decide who may approve documents. Approvals and publishing use the workflow engine (see “Workflow automation”); the publishing workflow is linked to the record type DMS-DOC and transmittals use DMS-TRANS.
  3. Check the denied upload extensions with your administrator. The upload guard rejects files on the extension denylist and files whose content is an executable, whatever their extension.

#1. Organise and upload files

  1. Open Browse. Create folders in the tree, then upload files into a folder.
  2. Open a file to see its properties, versions, comments and tags. Details and grid views are available, and you can filter by lifecycle status.
  3. Folders can be renamed, copied, moved, pasted and downloaded as a ZIP. Deleting a file or folder sends it to Trash.
  4. Folder permissions are set per role (view, upload, download, delete, folder upload, folder download, edit metadata, check out, approve, share, print, comment).

#2. Versions and check-out

  1. Upload a new version from the file. The previous version stays in the history and the new one becomes the latest version, keeping the folder, lifecycle status, category and custom metadata.
  2. Check a file out before editing it offline. Only one user can hold a check-out at a time.
  3. Check it in when finished. Uploading a new version as the person who holds the check-out also clears the check-out.
Check-out rules
SituationResult
A second user checks out a file already checked outRefused (conflict)
The same user checks it out againRefused
Check-in by someone who does not hold the check-outRefused (forbidden)
New version uploaded while another user holds the check-outRefused (conflict)

#3. Complete the document register

  1. Open Document register. Search by name, document number, code or author, and filter by status, type or confidentiality.
  2. Double-click a row to edit: name, document number, revision, status, type, confidentiality, author, category, department, source, language, physical location, effective, expiry and review dates, description.
  3. The footer shows the number of documents, the total size and counts per status and type.
Register classifications
FieldValues
Document typeContract, Drawing, Specification, Procedure, Form, Report, Certificate, Invoice, Manual
ConfidentialityPublic, Internal, Confidential, Restricted, Secret

#4. Lifecycle, review and publishing

  1. A new file starts as Draft. In Browse choose Submit for publishing on a draft file and confirm. This starts the workflow linked to DMS-DOC and sets the file to Review.
  2. When the workflow is approved the file becomes Published. When it is rejected the file returns to Draft and the reason is appended to its description.
  3. Other status changes follow the allowed moves in the table below; a move that is not allowed is refused and the allowed list is shown.
Allowed lifecycle moves
FromCan move to
DraftReview, Published, Archived
ReviewDraft, Approved, Rejected
ApprovedPublished, Archived
RejectedDraft, Review
PublishedArchived, Review
ArchivedPublished, Destroyed
DestroyedNo further moves

#5. Per-reviewer approvals

  1. Open Approvals. Each row shows the file, who requested it, the approver, status, comments and dates.
  2. The designated approver chooses Approve or Reject and may add a comment. Only pending approvals assigned to you can be decided, and a decided approval cannot be decided again.
  3. Deciding also sets the file’s lifecycle status to Approved or Rejected.

#6. Transmittals

  1. Open Transmittals and create one with a subject, from and to company, attention, sent by (required), sent and due dates, purpose, priority and remarks.
  2. The Items column shows how many documents are on the transmittal.
  3. Track the status through draft, review, approved, sent, acknowledged and closed.
Transmittal choices
FieldValues
PurposeFor approval, For review, For information, For action, As requested
PriorityLow, Normal (default), High, Urgent

#7. Follow-ups

  1. Open Follow-ups and add one for an official document, a document transmittal, a shipment or a shipping container.
  2. Set the owner, next action, due date, priority (low, normal, high, urgent) and, if needed, who to escalate to.
  3. Move the status through open, in progress, blocked, completed or cancelled.

#8. Share links, retention and recovery

  1. Share links lists links with their token, file or folder, creator, downloads (against any maximum), expiry and status. Revoke a link after confirming.
  2. Retention policies defines a number of retention days, an action (Archive, Destroy or Review) and optional notify-before days.
  3. Trash has separate tabs for deleted files and folders; choose Restore to bring an item back.
  4. Access logs records time, user, action, file, folder, details and IP address. Storage statistics shows totals for files, folders, storage, uploads in the last 7 days and checked-out files.

#Other tools in this module

Supporting screens
ScreenUse
CAD viewerView CAD drawings in the browser (view only).
Plan markupRedline and comment on CAD plans, PDFs and images.
DocSync pairsFolder sync pairs; direction, enabled and size limit are controlled centrally.
DocSync registrationsRegistered DocSync desktop agents and their status.

About this guide

Status
Partially reviewed
Application
BSuit ERP
Audience
Document controllers, project and quality teams, and administrators
Owner
BSuit documentation team
Reviewer
Not yet reviewed
Last verified
Never
Checked against
Generated from source revision a36c7a086 on 2026-10-02
Seen on a running system
Not yet
Help version
2026.0.0-preview
Guide ID
erp:article/guide/document-control
Need more help?If feedback above cannot be sent, email support and quote guide ID erp:article/guide/document-control.
Email support

Employee Engagement: kudos, awards, pulse surveys and suggestions

Run peer recognition, formal awards, anonymous pulse surveys with aggregated results, and the suggestion box from submission to leadership response.

On this page

Process at a glance

  1. Give kudosEmployeePeer recognition appears on the public wall.
  2. Issue an awardHR / leadershipFormal award recorded against the employee.
  3. Launch a pulse surveyHRSurvey with questions, launch and close dates.
  4. Answer the surveyEmployeeResponse stored; identity removed when the survey is anonymous.
  5. Read the resultsHRPer-question distributions and a response timeline.
  6. Submit a suggestionEmployeeSuggestion received; others can upvote public ones.
  7. Respond to suggestionsLeadershipStatus moved forward with a response.

#Purpose and scope

This chapter covers the Employee Engagement module: peer kudos, HR-issued awards, pulse surveys and the suggestion box. Employees use their own pages (Kudos wall, Pulse surveys and Suggestions); HR and leadership use the Engagement menu. The module is switched on by the engagement feature flag.

#Before you start

  1. The Employee Engagement module installed and its feature on.
  2. Employee records for the people involved, and each employee’s user linked to their employee record so that “Give kudos” and “Suggest” know who is acting.
  3. The Engagement home page lists Kudos wall, Awards, Pulse surveys and Suggestions.

#1. Kudos

  1. Employees open Kudos wall and choose Give kudos: pick a colleague, write a message and choose a tag (for example teamwork). Kudos are sent as public.
  2. HR reads the full feed in Engagement › Kudos wall, a read-only list of all peer recognition with the sender, recipient, tag, public or private flag, date and message.

#2. Awards

  1. Open Awards and issue an award: an award type code (free text, for example STAR_OF_QUARTER), the recipient, an optional monetary value and currency, and a citation.
  2. BSuit stamps who issued it and when. You can edit an award (type, recipient, citation, value) or delete it.

#3. Pulse surveys

  1. Open Pulse surveys and create a survey: title, launch and close dates, whether responses are anonymous (on by default) and the questions as a JSON array. Each question has a q (the text), an optional type and, for multiple choice, an options list. Title and questions are required.
  2. Employees see active surveys in My pulse surveys (the mobile ESS app also lists them). They answer each question and submit.
  3. Open a survey to see the aggregated results: per-question distributions (option counts for multiple choice, a response count for free text) and a daily timeline of responses.
  4. For a survey that is not anonymous, HR can export the raw responses as CSV with the employee id and one column per question.

#4. Suggestion box

  1. Employees open Suggestions, choose Suggest, write a title and body (both required) and decide whether it is public on the wall. The author is always recorded for accountability, but is hidden when the suggestion is public.
  2. Other employees can upvote public suggestions on the Wall tab; Mine shows your own.
  3. Leadership opens Engagement › Suggestions, filters by status and chooses Update to set the status and write a response, which the employee sees.
Suggestion statuses
StatusMeaning
receivedSubmitted, not yet looked at (the starting status)
reviewingBeing considered
implementingAccepted and in progress
doneImplemented
declinedNot taken forward

About this guide

Status
Partially reviewed
Application
BSuit ERP
Audience
HR managers, leadership and employees
Owner
BSuit documentation team
Reviewer
Editorial review pending
Last verified
2026-10-03
Checked against
cb3691bbf
Seen on a running system
Not yet
Help version
2026.0.0-preview
Guide ID
erp:article/guide/employee-engagement

Known limits: Written from a read of the implementation; statements traced to source. Not yet walked through end to end by a trainer on a running system.

Need more help?If feedback above cannot be sent, email support and quote guide ID erp:article/guide/employee-engagement.
Email support

Performance: goals, appraisal cycles, manager reviews and feedback

Set up appraisal cycles, let employees keep goals and OKRs, review appraisals as a manager, give peer feedback and watch for feedback abuse.

On this page

Process at a glance

  1. Create an appraisal cycleHR managerOpen cycle with period, self due and manager due dates.
  2. Keep goalsEmployeeGoals with period, weight and status; aligned in the goal tree.
  3. Employee self-reviewEmployeeSelf rating and comments; status self-submitted.
  4. Manager reviewLine managerManager rating and comments saved as a draft or finalised.
  5. Monitor appraisalsHR managerAll appraisals across cycles with statuses and ratings.
  6. Peer feedbackEmployeesStructured, optionally anonymous feedback within rate limits.
  7. Audit feedback abuseHR administratorHotspots and fan-out patterns surfaced.

#Purpose and scope

This chapter covers the Performance Management module: appraisal cycles, goals and the goal tree, appraisal forms with their self and manager sections, and peer feedback. Employees work from My performance; managers from Team performance; HR from the Performance menu.

#Before you start

  1. The Performance Management module installed and its feature on.
  2. Employee records with managers set, and each user linked to their employee record. Without a link the employee pages say “No Employee record linked to your user — ask HR to link.”
  3. The Performance home page lists Cycles, Goals, Goal tree, Appraisals, Feedback and, for administrators, Feedback abuse audit.

#1. Appraisal cycles

  1. Open Cycles and create a cycle: name (for example H1 2026), period start and end, self-review due date, manager-review due date and status (Open or Closed).
  2. Edit or delete a cycle from the same list. Set its status to Closed when the cycle ends.

#2. Goals and the goal tree

  1. Employees add goals in My goals with a title and an optional weight from 0 to 100. A new goal starts Active. Use Mark achieved, or Reopen to put it back to Active. Goal statuses are draft, active, achieved and missed.
  2. HR sees every goal in Goals, filtered by employee or status.
  3. Open the Goal tree to see goals aligned under parents (OKR style). Drag a goal onto a new parent, or use the Move button, or drop it on the root area to detach it. Orphan goals are shown separately. The tree can be exported to CSV.

#3. Appraisal forms: self review and manager review

  1. An appraisal form belongs to a cycle and an employee, with a manager. Its status goes draft, self-submitted, manager-reviewed and finalised.
  2. Self review: the employee saves a self rating and comments and submits it, which sets self-submitted. The self section is locked once the manager review has started: “Self section locked once manager review begins”.
  3. Manager review: open Team performance, choose a cycle and open a report’s form. The manager sets a rating (Exceeds, Meets, Below or Unsatisfactory expectations), a final rating A to D (Exceptional, Strong, Solid, Below bar) and comments. Save draft keeps the status manager-reviewed; Finalise sets finalised and needs both ratings.
  4. HR follows every form in Appraisals, filtered by cycle and status, with the self, manager and final ratings.
Appraisal statuses
StatusMeaningEdit rules
draftCreated, not yet submittedEmployee edits the self section; the manager cannot review yet
self-submittedEmployee submittedEmployee can still edit until the manager starts; manager can review
manager-reviewedManager saved a reviewSelf section locked; manager can keep editing
finalisedManager finalisedNo further manager edits: “Already finalised — request HR to reopen.”

#4. Peer feedback

  1. Employees open My feedback, choose a colleague, a tag (kudos, concern, development or peer-review) and write specific feedback. Tick Send anonymously to hide the sender.
  2. HR reads the stream in Feedback. For anonymous feedback the sender is never returned by the API, not even to the subject.
Feedback rate limits (per sender and subject, rolling 24 hours)
TypeLimitMessage
Anonymous1“You’ve already sent anonymous feedback to this person in the last 24h. Wait before sending another.”
Named5“You’ve sent feedback to this person 5 times in the last 24h. Pause before sending another.”

#5. Feedback abuse audit

Feedback abuse audit is for administrators. It looks back over a window of 1 to 90 days (7 by default) and shows pair hotspots (one sender to one subject) and sender fan-out (one sender to many people). For anonymous feedback the thresholds are 5 or more to one person, or 5 or more distinct people; for named feedback 15 or more to one person or 20 or more distinct people. Use it to catch patterns the per-person rate limit cannot see.

#One-to-ones

The module also stores one-to-one meetings (employee, manager, meeting time, agenda, notes and follow-ups) through its API. The ERP has no one-to-one screen in the version reviewed.

About this guide

Status
Partially reviewed
Application
BSuit ERP
Audience
HR managers, line managers and employees
Owner
BSuit documentation team
Reviewer
Editorial review pending
Last verified
2026-10-03
Checked against
cb3691bbf
Seen on a running system
Not yet
Help version
2026.0.0-preview
Guide ID
erp:article/guide/performance-management

Known limits: Written from a read of the implementation; statements traced to source. Not yet walked through end to end by a trainer on a running system. No screen or action was found that creates appraisal forms or lets an employee complete the self section; documented as a known gap.

Need more help?If feedback above cannot be sent, email support and quote guide ID erp:article/guide/performance-management.
Email support

Workflow automation: templates, assignments, approvals and monitoring

Design approval templates, attach them to record types and actions, work the approval inbox, delegate, automate follow-up actions and monitor bottlenecks.

On this page

Process at a glance

  1. Design a templateProcess ownerA template with steps, approvers and routing exists.
  2. Assign itAdministratorThe template is linked to a record type and scope.
  3. Bind module actionsAdministratorEach module action has a workflow or proceeds immediately.
  4. Decide approvalsApproverItems are approved, rejected, returned or delegated.
  5. Cover absencesApproverA substitute sees your approvals while away.
  6. Trigger automationAdministratorAn HTTP call, email or integration flow fires when a template resolves.
  7. MonitorProcess ownerBottlenecks and instance status are reviewed.

#Purpose and scope

Workflow automation is the shared approval engine used by other modules. This chapter explains how to build a template, connect it to the records that need approval, handle the approval inbox and watch running work. Document publishing and many voucher types use it, so a mistake in a template affects every record type that uses it.

#Before you start

  1. Create the user roles that will approve (see “Roles and access”); approver steps point at a role (approver group).
  2. Know which record type or module action needs approval. Record types and their codes come from Administration.
  3. Decide who may edit templates. Anyone who can edit templates, steps and rule sets changes approval routing for the whole company.

#1. Design a template

  1. Open Templates and create a template with a code, name, description, Active flag and a trigger.
  2. Choose the trigger: Automatic when a record is submitted, Manual (run on demand) or Scheduled (a condition sweep with an interval of at least 5 minutes, an entity to scan and a JSON condition).
  3. Choose Design to open the designer. Add steps, drag to reorder, and click a step to edit it. Switch between canvas and linear views.
  4. Use Copy to duplicate a template, or the play button to run an active template now regardless of its trigger; the new run appears under Instances.
Step settings in the designer
SettingWhat it does
TypeApproval, Review, Notification or Condition. A Condition step is a decision node: it is evaluated automatically and has no approver.
Approver resolutionFixed group, the requester’s manager, a role read from a payload field, or a user read from a payload field. It is resolved when the step is entered.
Required, PriorityMarks the step required; priority is Low, Medium, High or Critical.
Auto-approve (days)Approves the step automatically after that many days.
SLA and escalationSLA days, escalation days and an escalation group.
Notifications and delegationNotify on entry, notify on overdue, allow delegation, and the entry and overdue email templates.
Step owner permissionsModify record, add, edit or delete documents while the step is current.
On rejectionRestart (back to step 1), Go to a chosen step, or End the workflow.
Conditional branchingBranches are checked top-down after approval; the first match wins, otherwise the workflow goes to the next step. A branch can go to the next step, a specific step, approve and finish, or reject and finish. Use Match ALL or Match ANY with comparisons such as equals, greater than, contains, in list, between, is empty or matches regex.

#2. Reuse rules with rule sets

  1. Open Rule sets and create a rule with a code, name and kind: Condition (boolean tree) or Decision table (rows to outcome).
  2. Enter the definition as JSON. A branch can then reference the rule set instead of an inline condition.

#3. Version a template

  1. In the designer choose Publish version and confirm. The current version is archived and new instances use the new version.
  2. Use Make active on the Versions list to switch back to an earlier version.

#4. Assign templates to records and actions

  1. In Assignments link a template to a record type (or All Record Types), choose the scope (System, a project group or a project), set Effective From and Active.
  2. In Action workflows each module action is listed by module with a drop-down of templates. Pick one to bind it, or choose No workflow so the action proceeds immediately. The counter shows how many actions are configured.

#5. Work the approval inbox

  1. Open My approvals. The tabs are Mine, My Team and, for superusers only, All.
  2. Add a comment, optionally attach files, then choose Approve, Reject or Return. Return sends the item to the previous step; it is refused on the first step.
  3. Choose Delegate to hand the current step to another user (the user is required, a comment is optional). Delegation is refused unless the step allows it.
  4. Delegations sets out-of-office cover: delegator, delegate, effective from and to, reason and Active. While active, the delegate also sees the delegator’s approvals.
Instance statuses
StatusMeaning
PendingCreated, not yet on a step
In progressWaiting on the current step
ApprovedFinished and approved
RejectedFinished and rejected
CancelledCancelled

#6. Automatic follow-up actions

  1. In Automation actions choose a workflow template, when to fire (Approved, Rejected or Both) and the action type: HTTP call, Email notify or Integration flow.
  2. Enter the configuration as JSON, for example the URL, method and body template for an HTTP call. The list shows the last run status and time.

#7. Monitor and recover

Monitoring screens
ScreenUse
InstancesAll executions with template, record type, status, current step, who started it and when.
AnalyticsWhere in-progress work is piling up: pending count, average and maximum wait in hours per workflow step.
Saga monitorCross-module saga state and step history. Only failed or compensating sagas can be retried.
Deleted logsRecover deleted workflow instances. Superusers only.

About this guide

Status
Partially reviewed
Application
BSuit ERP
Audience
Process owners, administrators and approvers
Owner
BSuit documentation team
Reviewer
Not yet reviewed
Last verified
Never
Checked against
Generated from source revision a36c7a086 on 2026-10-02
Seen on a running system
Not yet
Help version
2026.0.0-preview
Guide ID
erp:article/guide/workflow-automation
Need more help?If feedback above cannot be sent, email support and quote guide ID erp:article/guide/workflow-automation.
Email support

Integration setup: endpoints, flows, mappings, schedules and monitoring

Connect BSuit to external systems with endpoints, flows, field mappings, schedules, webhooks and API keys, and operate the queue, dead letters and alerts.

On this page

Process at a glance

  1. Create an endpointIntegration adminAn external system connection with its authentication exists.
  2. Build a flowIntegration adminA flow ties the endpoint to an entity and trigger.
  3. Map fieldsIntegration adminSource fields are transformed into target fields.
  4. Schedule or triggerIntegration adminA cron schedule or event starts the flow.
  5. Watch the queueIntegration adminItems are processed, retried or sent to the dead-letter queue.
  6. Replay failuresIntegration adminExhausted items are replayed or discarded.
  7. ReconcileIntegration adminQueued, sent, acknowledged and failed counts per flow and day.

#Purpose and scope

The Integration Hub moves data between BSuit and other systems. This chapter covers setting up the connection, the flow that moves data, mapping, scheduling, inbound credentials and day-to-day operation. The whole module is for administrators; it has no approval workflow.

#Before you start

  1. Get the partner’s URL, authentication method and credentials. Prefer secret references or let BSuit encrypt typed secrets; secrets are encrypted at rest and masked when shown.
  2. Know the BSuit entity the flow reads or writes, and its field names.
  3. For inbound writes into a company-scoped entity, plan a constant company_id mapping. Without it the write is rejected rather than saved without a company.

#1. Create an endpoint

  1. Start from Connectors: choose Install on a template to create a starter endpoint, then add credentials to finish. Or add an endpoint directly in Endpoints.
  2. Set code, name, direction (inbound or outbound), type, base URL, authentication, timeout, retry count, SSL verify and Active.
  3. For OAuth 2.0 choose Client Credentials or Authorization Code and fill token URL, client id, client secret, scope and, for authorization code, authorization URL and redirect URI. The list shows OAuth status as not connected, expired or connected.
  4. For SFTP and file-drop endpoints put the settings in the connection configuration JSON, using secret references rather than raw passwords.
Endpoint options
FieldChoices
TypeREST API, Webhook, File, SFTP, File drop (local), Database, SOAP, GraphQL
AuthenticationNone, Basic, Bearer Token, API Key (with header name), OAuth 2.0

#2. Create a flow

  1. Use Flow templates for ERP, EDI and file flows: pick a template, choose an endpoint and a flow code. It creates an inactive flow with its field mappings; replace placeholder values and review before activating.
  2. Or create one in Flows: code, name, direction, endpoint, connector, entity type, trigger (Manual, Scheduled, Event or Webhook), trigger event, request method and path, batch size and Active.
  3. Optionally choose a canonical payload schema (Order, ASN, Shipment Status, Invoice, Inventory Snapshot or Master Data) so payloads are validated.
  4. For inbound flows the form shows the ingress URL plus a static ingress key and an HMAC secret.

#3. Map fields

  1. In Field mappings choose the flow, then add rows with source field, target field, transform, transform config, default value, required and order.
  2. Without mappings the raw payload is sent unchanged. If a required field has no value after the default, the whole item fails rather than writing part of it.
Transform types
TransformEffect
DirectCopy the value
ConstantUse a literal value
FormatApply a format string or template to a number or date
LookupTranslate through a source-to-target table, falling back to the default
ExpressionBuild a value from fields such as {field} or {a.b}

#4. Schedule, receive and notify

  1. In Schedules pick a flow, enter a five-field cron expression (for example 0 2 * * *) and a time zone (default UTC). There is one schedule per flow.
  2. Webhooks defines incoming or outgoing webhooks with URL, secret key and an events filter. Outgoing webhooks are signed when a secret is set and retried on temporary failures.
  3. API keys generates a key with name, endpoint, scopes and expiry. The full key is shown once only; afterwards just the prefix is kept.
  4. Alerts notifies the addresses in Notify Emails when a failed log entry matches an active alert.

#5. Operate the queue

  1. Queue shows flow, entity, event type, status, attempts and priority. A worker takes pending items about every 30 seconds.
  2. A failed attempt is retried with a growing delay until the maximum attempts (3 by default) is reached; the item then moves to Dead Letter.
  3. In Dead letter queue choose Replay for one item, Replay all (optionally for one flow) or Discard, which marks the item cancelled.
  4. Logs records each dispatch with direction, status, method, URL, status code and duration. Reconciliation shows queued, sent, acknowledged and failed items per flow and day for the last 7, 14, 30 or 90 days.
Queue statuses
StatusMeaning
PendingWaiting to be processed or retried
ProcessingLocked by a worker
CompletedProcessed successfully
FailedOffered on the form; the Retry button appears on these rows
Dead letterRetries exhausted; replay or discard

#Other reference screens

Catalogue screens
ScreenUse
EventsCatalogue of entity and event types. It is reference data only and does not drive triggering.
Data formatsCatalogue of data format definitions for reference.
Entity sync statesLinks external ids to local records so a repeated inbound push updates the same row.

About this guide

Status
Partially reviewed
Application
BSuit ERP
Audience
Administrators and integration engineers
Owner
BSuit documentation team
Reviewer
Not yet reviewed
Last verified
Never
Checked against
Generated from source revision a36c7a086 on 2026-10-02
Seen on a running system
Not yet
Help version
2026.0.0-preview
Guide ID
erp:article/guide/integration-setup
Need more help?If feedback above cannot be sent, email support and quote guide ID erp:article/guide/integration-setup.
Email support

Product catalog: from taxonomies to a published product

Set up brands, categories and groups, create products with prices, barcodes and packaging, map vendors and customers, and publish ready products to the storefront.

On this page

Process at a glance

  1. Set up classificationProduct managerCategories, brands, types, groups, attributes and tags exist.
  2. Create the productProduct managerA product with code, name, classification, prices and flags is saved.
  3. Add detailProduct managerSpecifications, UOM, tax, variants, media, tags and relations are added on the saved product.
  4. Add prices and barcodesProduct managerPrice lines, barcodes and packaging levels are recorded.
  5. Map trading partnersBuyer or sales teamVendor and customer SKUs and prices are mapped.
  6. Check readinessMerchandiserEach product shows a completeness score and blocking issues.
  7. PublishMerchandiserReady products are published to the storefront.

#Purpose and scope

This chapter covers the product master: classification, creating and enriching products, prices, barcodes and packaging, partner mappings, and publishing to the online storefront. Stock movement, sales pricing resolution and ledger postings happen in other modules that use the product as a reference.

#Before you start

  1. Create categories in Categories, then Brands, Product types, Product groups, Product attributes (variant axes such as Color or Size, values as a JSON array) and Product tags.
  2. Define unit conversions that are not product specific in UOM conversions (from unit, to unit, factor).
  3. The catalog is shared across companies. Anyone with access to the module can change products, so agree ownership of price and master-data edits.

#1. Create a product

  1. Open Products and choose Add. The create form shows only essential groups; the others appear after the product is saved.
  2. Enter code and name (required), barcode, SKU, HSN code, brand, model number, lifecycle status, descriptions and image URL.
  3. Under Classification set category, type, group, unit of measure, product nature, valuation method (FIFO or LIFO), shelf life, warranty and return policy.
  4. Under Pricing set purchase price, sales price, MRP and currency, plus weight and dimensions.
  5. Under Inventory set opening stock, minimum, maximum, reorder level and quantity, and the flags stockable, purchasable, sellable, batch controlled, serial controlled and active.
  6. Under E-Commerce set published, show stock on web, backorder, preorder, digital product, shipping class, long description, slug and SEO title, description and keywords.

#2. Enrich the saved product

  1. Reopen the product. The tabs are Specifications, UOM Conversions, Tax (Inward and Outward), Variants, Media Gallery, Tags, Related Products, Trading Partners (Vendors and Customers) and Digital Passport. These tabs need a saved product.
  2. Open the Product 360 link on a row (Product overview) for stock by warehouse, pricing and tax, and reorder information in one place.

#3. Use product groups as templates

  1. In Product groups define group-level Specifications, UOM Conversions, Inward Tax and Outward Tax on the group.
  2. Choose the apply action on a tab to copy the template onto every product in the group. Confirm the overwrite warning.

#4. Prices, barcodes and packaging

  1. Product prices holds price lines with type (Purchase, Sales, MRP, Wholesale, Dealer, Export), price, minimum quantity and effective dates.
  2. Product barcodes holds extra barcodes with type (EAN13, EAN8, UPC, CODE128, QR), value and a primary flag.
  3. Product packagings records the packaging level (Unit, Inner Pack, Case, Pallet) with its own barcode, weight and dimensions.
  4. Entity identifiers holds effective-dated identifiers shared across ERP records.

#5. Vendor and customer mappings

  1. Vendor products maps a product to a supplier with vendor SKU, vendor product name, price, lead time in days, minimum order quantity and a preferred flag.
  2. Customer products maps a product to a customer with customer SKU, name and price.

#6. Check readiness and publish

  1. Open Storefront readiness. Tabs filter by All, Ready to Publish, Needs Attention and Published; tiles show totals and the average score.
  2. Fix blocking issues on the product, then choose Publish. Choose Unpublish to remove it from the storefront.
How the score is built (10 checks, each issue costs 10 points)
KindChecks
Blocking (cannot publish)Missing storefront URL slug; no product image; selling price not set; not assigned to a category; product inactive or not sellable; sales channels exclude web, online or all
RecommendedAdd a short description; add specifications; add an SEO meta title; assign a brand

#Who can do what

The product module has no role or permission checks of its own beyond being signed in. Any signed-in user with the module can create, change and delete products, categories, brands and price lines, and there is no approval step for product changes.

About this guide

Status
Partially reviewed
Application
BSuit ERP
Audience
Product managers, merchandisers and master-data owners
Owner
BSuit documentation team
Reviewer
Not yet reviewed
Last verified
Never
Checked against
Generated from source revision a36c7a086 on 2026-10-02
Seen on a running system
Not yet
Help version
2026.0.0-preview
Guide ID
erp:article/guide/product-catalog
Need more help?If feedback above cannot be sent, email support and quote guide ID erp:article/guide/product-catalog.
Email support

Library operations: catalogue, circulation, reservations and fines

Set up circulation rules, add copies and members, then issue, return, renew, reserve and settle fines at the circulation desk.

On this page

Process at a glance

  1. Set the lending rulesLibrary administratorLoan days, item limits, renewals and fines are defined per member category and material.
  2. Add copiesCataloguerEach physical copy has a barcode, branch and status.
  3. Register membersLibrarianPatrons have a membership number, category and validity dates.
  4. Issue and returnCirculation deskLoans are opened and closed; overdue charges are raised on return.
  5. Manage reservationsCirculation deskReserved titles queue and are held for the next patron on return.
  6. Settle chargesLibrary administratorFines are paid or waived and appear in Payments.

#Purpose and scope

This chapter follows a book from the shelf to the member and back: the rules that govern lending, the desk screen where items are issued and returned, reservations, inter-branch transits and the fines that result. Cataloguing, acquisitions, serials, electronic resources and inter-library loan have their own screens and are not covered here.

#Before you start

  1. Branches and shelving locations exist (Branches); optionally group branches in Branch groups.
  2. Bibliographic records exist (Bib records) with a material type. A material type that is marked as non-circulating cannot be issued.
  3. Member categories exist (Patron categories); a category carries default loan days and item limit.
  4. Charge types for overdue, lost and damage charges are configured (Charge types). If a charge type is not configured, the charge is not raised.
  5. Closed days are entered in Closures so due dates roll past holidays.

#1. Define circulation rules

  1. Open Circulation rules and choose New.
  2. Optionally narrow the rule by patron category, material type, branch or branch group. A blank field means any.
  3. Enter Loan Days, Max Items, Max Renewals, Renewal Days, Fine per Day, Grace Days, Max Fine (0 means uncapped) and Priority. Tick or clear Reservations Allowed.

#2. Add copies and members

  1. In Copies add each physical copy against its title with a barcode, branch, optional shelving location, condition and status. Tick Reference only for a copy that must never be issued.
  2. In Patrons add the member with a membership number, category, validity dates and, if needed, a member type (external, student, employee, patient, doctor or system user). Tick Blocked and give a reason to stop a member from transacting.
Copy statuses
StatusMeaning
AvailableOn the shelf and can be issued
On loanIssued to a member
On hold shelfHeld for a member who reserved the title
In transitMoving between branches
LostMarked lost
DamagedFlagged damaged
In repairSent for repair
WithdrawnRemoved from circulation

#3. Issue, return and renew at the desk

  1. Open Circulation desk. Scan or type the membership number and press Enter (or Load). The patron card shows category, validity, whether the member is blocked and any amount owed.
  2. To issue, scan the copy barcode in Issue a copy and choose Issue. The due date is set from the rule and moved forward past any closure of the copy’s branch.
  3. To return, scan the barcode in Return a copy. No patron needs to be loaded, so a book drop can be processed directly.
  4. To renew, choose Renew against the loan in the On loan list.
  5. Read the Activity panel: each scan shows a green success or a red refusal with the reason.
Why the desk may refuse an issue
MessageCause
Membership is inactive / Patron is blocked / Membership expired / Membership starts on …The member is not in good standing.
This is a reference-only copy and cannot be issued.The copy is flagged reference only.
That copy is already on loan. / Copy is not available (status: …).Only Available and On hold shelf copies can be issued.
… does not circulate.The material type is non-circulating.
That copy is on the hold shelf for another patron.Only the member who reserved the copy can take it.
Borrowing limit reached (n/max items).The member already holds the maximum number of open loans.

#4. What happens on return

Returning a copy closes the loan. If it is overdue, BSuit raises an Overdue charge: Fine per Day multiplied by the chargeable days (after Grace Days and closed days), capped at Max Fine when that is set. If the next member in the reservation queue is waiting, the copy is held for them; if it belongs to another branch, or is wanted at another branch, a transit is created. Returning a copy that was not on loan is refused (“That copy was not on loan.”).

#5. Reservations

  1. Reserve from the Circulation desk (the Reserve button on a catalogue search result, with a patron loaded) or add a record in Reservations.
  2. A member can hold a title only once (“You already have a reservation on this title.”). A new reservation joins the queue at the next position.
  3. The reservation list shows Queue position, Status (pending, available, fulfilled and others), Placed and Expires.
  4. Members can reserve and cancel their own reservations in My Library.

#6. Lost and damaged copies

The API supports marking a copy lost, marking it found, and flagging it damaged or sending it for repair. Marking lost closes the open loan and raises a replacement charge when a LOST charge type is configured; damage raises a DAMAGE charge in the same way. Marking a copy found puts it back on the shelf but leaves any replacement charge in place: waive it if your policy refunds. The Circulation desk screen does not show lost or damaged buttons.

#7. Charges, payments and waivers

  1. Review fines and fees in Charges (date, patron, type, amount, balance, status). Staff can also add a charge by choosing a patron, charge type and amount.
  2. To collect, load the patron at the Circulation desk and choose Pay on the charge, or review the receipts in Payments.
  3. To forgive, choose Waive and enter the reason. The reason is added to the charge description.

#8. Offline desk actions

A kiosk or terminal that loses connectivity can post its captured actions in a batch once it reconnects. Offline sync is a read-only log showing the action, device, patron, item, time, status (pending, applied or failed) and result message, with counts at the top. There is no manual entry form on that page.

#Loans list

Loans lists all loans with barcode, title, patron, issue date, due date, renewals and status, and flags overdue ones. Use it to review overdues; routine issues and returns belong on the Circulation desk.

About this guide

Status
Partially reviewed
Application
BSuit ERP
Audience
Librarians, circulation desk staff and library administrators
Owner
BSuit documentation team
Reviewer
Not yet reviewed
Last verified
Never
Checked against
Generated from source revision a36c7a086 on 2026-10-02
Seen on a running system
Not yet
Help version
2026.0.0-preview
Guide ID
erp:article/guide/library-operations
Need more help?If feedback above cannot be sent, email support and quote guide ID erp:article/guide/library-operations.
Email support

HSE: permits to work, incidents and corrective actions to closure

Authorise hazardous work with a permit, record incidents, raise non-conformance reports, complete and verify corrective actions, and close the loop.

On this page

Process at a glance

  1. Authorise hazardous workRequester, approver, HSE officerA permit goes Draft, Submitted, Approved, Active and Closed.
  2. Record the incidentReporterThe incident is logged with date, severity and impact.
  3. Raise an NCRHSE officerA numbered non-conformance report is linked to the incident.
  4. Work the corrective actionsAction ownerActions move Open, In Progress, Done and Verified.
  5. Close the NCR and incidentHSE officerClosure is allowed only when nothing is left open.
  6. MonitorHSE managerOpen incidents, overdue actions, expiring permits and inspections due.

#Purpose and scope

This chapter follows the two HSE chains that BSuit enforces: a permit to work, which must be approved before hazardous work starts, and the incident closure chain (incident, non-conformance report, corrective actions). Risk assessments, risk categories, checklist templates and inspection runs live in the same module and are touched on briefly at the end.

#Before you start

  1. An approval workflow linked to the PERMIT-WORK record type. Without one, a permit cannot be submitted (“No active workflow is configured for record type ‘PERMIT-WORK’.”).
  2. Incident categories and severities are set up so incidents can be classified.
  3. The named HSE permissions are granted to the people who act: hse.permit.activate, hse.permit.close, hse.corrective_action.verify, hse.ncr.raise, hse.ncr.close and hse.incident.close. The seeded HSE Officer role holds all six; superusers pass as well.

#1. Permit to work

  1. Open Permits to work and add a permit: permit number, type (Hot Work, Confined Space, Working at Height, Electrical, Excavation or General), location, work description, valid from and valid to, hazards and precautions.
  2. Choose Submit. The permit moves from Draft to Submitted and starts the PERMIT-WORK approval workflow.
  3. The approver chooses Approve or Reject. Approval sets the status to Approved; rejection sets it to Revoked.
  4. A supervisor chooses Activate when the work actually starts. The status becomes Active.
  5. When the work is finished, choose Close. The status becomes Closed.
Permit statuses
StatusSet byNext step
DraftCreationSubmit; dates can still be edited
SubmittedSubmitApprover approves or rejects
ApprovedWorkflow approvalActivate
RevokedWorkflow rejectionRaise a new permit
ActiveActivateClose
ClosedCloseNone
ExpiredBackground sweep, when an Active permit passes its valid-toRaise a new permit

#2. Record an incident

  1. Open the Incident timeline. It lists every incident, newest first, and can be filtered by severity, status and near misses only. Use its link to the incident list to add a record.
  2. Enter title, incident date, location, status (Open or Investigating), category, severity, reporter and investigator.
  3. Tick Near Miss when nothing was injured or damaged. Record injuries, fatalities, property damage, root cause and a photo.

#3. Raise a non-conformance report

  1. Open the incident and go to the Closure chain tab (save the incident first).
  2. Choose Raise NCR. BSuit numbers it NCR-yyyy-nnnn, copies the description and root cause from the incident and links it to the incident.
  3. Severity defaults from the harm recorded: critical if there are fatalities, major if there are injuries, otherwise minor.

#4. Corrective actions

  1. Add corrective actions against the NCR (title, type, owner, due date).
  2. Track them on the Corrective actions board: drag a card between columns or use Move to. The columns are Open, In Progress, Done and Verified.
  3. In the incident’s Closure chain tab you can also choose Mark done on an action.
  4. When an action is Done, an authorised person chooses Verify. The verifier and time are recorded from the login.

#5. Close the NCR, then the incident

  1. In the Closure chain tab, choose Close NCR when all its corrective actions are Done or Verified.
  2. Choose Close incident when no NCR raised from it is still open. The closing user and time are recorded.
  3. To reopen, choose Reopen on the closed NCR or incident: both return to Investigating.
Closure gates
You try toIt is refused when
Close an NCRAny corrective action is still open (“Cannot close: n corrective action(s) are still open. Complete and verify them first.”)
Close an incidentAny NCR raised from it is still open (“Cannot close: n non-conformance report(s) raised from this incident are still open.”)
Verify an actionIt is not Done, or is already Verified

#6. Monitor

HSE dashboard shows open incidents by severity, overdue corrective actions, permits expiring within a window, and inspections due. Each panel links to its list.

#Related HSE records

Risk assessments score likelihood times impact on a 1 to 5 scale; the server calculates the score and level (1 to 4 low, 5 to 9 medium, 10 to 15 high, 16 to 25 critical) so a form cannot record a lower level. Checklist templates define inspections, checklist runs record them, and a failed item on a run can raise an NCR.

#Who can do what

Activating and closing permits, raising and closing NCRs, closing or reopening incidents and verifying corrective actions each need the matching named permission; without it the action fails with “You need the ‘…’ permission to do this.” Approving or rejecting a permit is done by the approver in the workflow. Superusers hold every permission.

About this guide

Status
Partially reviewed
Application
BSuit ERP
Audience
HSE officers, supervisors and site managers
Owner
BSuit documentation team
Reviewer
Not yet reviewed
Last verified
Never
Checked against
Generated from source revision a36c7a086 on 2026-10-02
Seen on a running system
Not yet
Help version
2026.0.0-preview
Guide ID
erp:article/guide/hse-incident-to-closure
Need more help?If feedback above cannot be sent, email support and quote guide ID erp:article/guide/hse-incident-to-closure.
Email support

Reports and analytics: build, review, publish and schedule reports

Build a report from a standard template or a data source, save it, move it through review and publication, schedule delivery by email, and watch metrics with KPI alerts.

On this page

Process at a glance

  1. Pick a standard report or a data sourceAnalystThe builder opens with a template or an empty report.
  2. Configure and runAnalystColumns, filters, grouping and sort produce a table, chart or matrix.
  3. Save, review and publishAnalyst, administratorA saved report goes draft, pending review, approved and published.
  4. Schedule deliveryAnalystThe report is generated and emailed daily, weekly or monthly.
  5. Watch the numbersManagerDashboard widgets, reusable metrics and KPI alerts.

#Purpose and scope

The MIS area is BSuit’s self-serve reporting layer. This chapter covers the report builder and the governed publication of saved reports, scheduled email delivery, and the supporting dashboard, metrics, alerts and Power BI screens. Financial statements that are produced in Finance are described in “Record to report”.

#Before you start

  1. Know your company scope: saving a report needs a company chosen in the builder, and the server refuses to save or run without one.
  2. Your role decides what you see on the Reports page. Superusers, and users whose role names contain admin, analyst or manager, see the authoring view (build and publish). Everyone else sees only published reports assigned to them.
  3. For scheduled reports and alerts, outbound email must be configured, and recipients must be valid email addresses.

#1. Start from a standard report or a data source

  1. Open Reports. The Standard reports section lists ready templates (for example Trial Balance, Balance Sheet, Profit & Loss, Receivables Aging, Sales Invoices, HSE Incidents and Library Loans). Choosing one opens the builder with that template loaded.
  2. To build your own, choose New report in the header and pick a Data Source in the builder.
  3. The Saved reports section below lists reports you have saved, with their publication status and last run.

#2. Configure and run in the builder

  1. In the Report builder choose the Data Source, then the Columns to show.
  2. Add Filters. Supported operators are equals, not equals, greater than, greater than or equal, less than, less than or equal, contains, in and between. Statement templates need their date parameters filled in before they can run.
  3. Use Group & Aggregate to summarise: sum, average, count, minimum, maximum, distinct count, median, 90th percentile and 95th percentile. Add Related data to bring in a linked source, and derived columns for a calculated field.
  4. Set Sort and Row Limit, then choose Run.
  5. Switch the preview between Table, Chart (bar, line, area or pie) and Matrix (pick a column dimension and a value measure).
  6. Choose Export CSV to download the current result.

#3. Save, review and publish

  1. In the builder choose Save. Use Save As to keep a copy under a new name.
  2. Back on Reports, choose Submit for review on a draft (or a rejected) report.
  3. An administrator chooses Approve or Reject, with an optional comment. A different person from the submitter must review.
  4. Choose Publish on an approved report. Choose Unpublish to take it back to draft.
  5. Choose Audience to list the roles and users who can run the published report.
  6. Use the history button to see the publication events and saved versions.
Saved report statuses
StatusHow it is reachedNext step
DraftA new or edited report, or after UnpublishSubmit for review
Pending reviewSubmit for reviewApprove or Reject (administrators)
RejectedRejectEdit and submit again
ApprovedApprovePublish
PublishedPublishUnpublish

#4. Schedule delivery

  1. Open Scheduled reports and add one. Under General choose a report type (Sales Summary, Profit & Loss, Balance Sheet, Inventory Aging, Receivables Aging, Payables Aging, Trial Balance, Monthwise Expected Expenses or Custom Query).
  2. Under Schedule choose Daily, Weekly (with the day) or Monthly (with the day of month, 1 to 28) and a time.
  3. Under Delivery choose PDF, Excel or CSV and enter at least one valid email address, separated by commas.
  4. Under Decision & Approval, give the report parameters as JSON (required except for Monthwise Expected Expenses), an optional condition, and the allowed action: generate and email the report, send a notification email, or create a workflow approval proposal. The proposal option needs a workflow record type code.
  5. Check the Last Run column after the first slot: it shows success or failed, and the time.

#5. Dashboards, metrics, alerts and Power BI

Supporting screens
ScreenUse
DashboardWidgets in groups such as Finance, Sales, Inventory, HR, Projects, System, report widgets and Power BI, arranged in presets such as Executive, Finance and Operations.
MetricsNamed, reusable measures: a code, a data source, a field, an aggregate (sum, average, count, minimum or maximum), an optional formula and a display format (number, currency or percent).
KPI alertsA threshold on a source, field and aggregate, with a comparison (>, ≥, <, ≤, =, ≠), a check interval in minutes (default 60) and email recipients.
Power BIRegistered Power BI reports shown embedded in BSuit.

#Who can do what

Any signed-in user can open the Reports page; what they see depends on role as described above. Approve and reject need an administrator. Publishing, setting the audience and submitting for review are available to authors. Running a report respects field-level restrictions: a filter, grouping or sort on a hidden field is refused.

About this guide

Status
Partially reviewed
Application
BSuit ERP
Audience
Analysts, managers and administrators
Owner
BSuit documentation team
Reviewer
Not yet reviewed
Last verified
Never
Checked against
Generated from source revision a36c7a086 on 2026-10-02
Seen on a running system
Not yet
Help version
2026.0.0-preview
Guide ID
erp:article/guide/reports-analytics
Need more help?If feedback above cannot be sent, email support and quote guide ID erp:article/guide/reports-analytics.
Email support

BSuit AI and AI Studio: set up, train, chat and extend

Connect an AI provider, feed it your data, control what the AI user may do, use chat with confirmed actions, and understand how AI Studio’s Developer tools relate to it.

On this page

Process at a glance

  1. Choose the providerAdministratorA local model or an external API provider is connected and tested.
  2. Collect and embed documentsAdministratorERP data is collected as documents and embedded for semantic search.
  3. Train the local model (optional)AdministratorModules are chosen, data initialised and a training run completed.
  4. Limit the AI userAdministratorCapability, risk limit and an action allow-list are set.
  5. Ask and confirmAny userAnswers about business data; any proposed action waits for Confirm.
  6. Extend BSuit with Developer toolsAdministratorCustom entities, forms, rules and change requests (AI Studio).

#Purpose and scope

BSuit AI is the assistant: provider settings, documents, training, an AI user identity, chat and insights. AI Studio is the installable module behind the Developer menu: custom entities, forms, business rules and change requests. In the app, BSuit AI appears as the Intelligence lane under the single AI Studio heading, but the two do different jobs. If AI Studio is not installed, BSuit AI stays reachable on its own.

#Before you start

  1. The BSuit AI module is installed for your company. If no configuration exists, the settings page tells you to install it to initialise settings.
  2. For an external provider you need its API base URL, API key and model name. The AI settings page has presets for common providers and a Test Connection button.
  3. Administrator access for settings, documents, training and the Developer menu.

#1. Connect a provider

  1. Open AI settings. At the top a status chip shows the active connection (for example Connected, Connection failed or API key required).
  2. On the AI Provider tab choose the mode: Local Model (the built-in BSuit-AI model, which requires training) or API Provider (an external API such as OpenAI, Anthropic or Ollama).
  3. For an API Provider, pick a preset or enter API base URL, API key, model, temperature, max tokens and system prompt, then choose Test Connection.
  4. On the RAG & Embeddings tab set whether RAG is enabled, the number of results (top K), and the embedding provider and model. Text-to-SQL is an advanced option there.
  5. On the Local Model tab set model size, sequence length, training epochs, batch size, learning rate, auto-collect interval and the generation limits.

#2. Collect and embed documents

  1. Open AI documents. Choose Collect Now to gather data from ERP modules; the toast reports how many new documents were collected.
  2. Filter by module or status (Pending, Embedded, Failed) and search the content. Each row shows the content preview, module, entity, token count and status.
  3. On the settings page, RAG & Embeddings tab, choose Embed Documents to embed all collected documents into the vector database so chat can search them semantically.

#3. Train the local model (optional)

  1. Open Training. On the Training tab select modules, review the record counts, and set epochs, batch size, learning rate and records per entity.
  2. Choose Initialize to collect the data. The run is shown as initialised; you can then Start Training or Discard it.
  3. While a run is in progress you see the epoch, loss, step and per-module progress. You can Pause (progress is saved), Resume, or Cancel (collected data is kept).
  4. The Plain Text tab imports custom text (policies, FAQs, product descriptions). The Documents tab uploads PDF, Word, Excel, TXT or CSV files, up to 50 MB each.
  5. Training history lists each run with its version, losses and start time; select runs to remove them.

#4. Set what the AI user may do

AI user controls the non-human identity the assistant uses to act. Both the signed-in human and this identity must permit an action.

AI user settings
SettingMeaning
EnabledSwitches the AI identity on or off. When off, no AI action can be prepared.
Display nameHow the identity is shown.
Capability level1 Observe, 2 Draft, 3 Propose, 4 Execute approved, 5 Autonomous low-risk. Level 1 is observe-only and cannot prepare actions.
Maximum action riskLevels 1 to 6. Actions above this level are refused.
Workflow required fromFrom this risk level up, the identity must be at capability level 4 or higher to run the action.
Action allow-listNo action is available until it is ticked. Each action shows its module and permission key.

#5. Chat and confirm actions

  1. Open Chat, choose New Chat and ask about your business data (invoices, products, employees, reports). Past conversations are listed on the left and can be deleted.
  2. If your message asks for an action, the assistant shows a proposal card. Nothing is written until you choose Confirm; Cancel discards it.
  3. On Confirm, BSuit executes the action server-side with your own permissions.

#6. AI Insights

The BSuit AI home shows the module’s pages and an AI Insights grid. Run any module’s insights to render a chart from your real data, and export all of them as one PDF.

#7. AI Studio: the Developer tools

AI Studio provides the Developer menu, visible to administrators only. If the menu is missing, the module is probably not installed for your company.

Developer pages
PageUse it to
Change requestsPackage structural changes, then release, apply or roll them back.
ApplicationsDefine low-code applications that group entities and screens.
EntitiesCreate custom entities and inspect built-in ones.
Form builderLay out and configure forms for custom and standard entities.
Business rulesAttach organisation-specific logic and validation to records.
Form actionsConfigure actions on forms.
NotificationsNotify users when a record changes.
Audit configSet per-entity audit policy and excluded fields.

#Who can do what

Anyone signed in can use chat and their own conversations. Settings, documents, training, the AI user, knowledge sync and the Developer menu are administrator tools. The AI actions feature can be switched off per company; when it is, the actions endpoints respond as not found.

About this guide

Status
Partially reviewed
Application
BSuit ERP
Audience
Administrators, developers and users of the AI assistant
Owner
BSuit documentation team
Reviewer
Not yet reviewed
Last verified
Never
Checked against
Generated from source revision a36c7a086 on 2026-10-02
Seen on a running system
Not yet
Help version
2026.0.0-preview
Guide ID
erp:article/guide/bsuit-ai-studio
Need more help?If feedback above cannot be sent, email support and quote guide ID erp:article/guide/bsuit-ai-studio.
Email support

Roles and access: how permissions work

How BSuit decides what each person can see and do, how access is requested and reviewed, and multi-factor sign-in.

On this page

#The model in one paragraph

A person has one or more roles; a role holds permissions; a permission is written module.record.action — for example finance.fiscalyear.edit. The standard actions are view, create, edit and delete. Vouchers use record_type.<code>.<action>, for example record_type.CASH-REC.create. A superuser account passes every check. Business actions such as approve, post, close or release are checked by their own rules, which are described in each process chapter.

#Where to manage access

Access screens
TaskScreen
Create and deactivate usersUsers
Create roles and assign permissionsUser roles
Browse all permissionsPermissions
Give people rolesRole assignment
See what one person can actually doEffective permissions
Request temporary accessAccess requests
Periodic recertificationAccess review
Who changed which permissionPermission audit

#Roles delivered with BSuit

Each module seeds its standard roles (for example Finance Manager, Warehouse Clerk, Technician, Maintenance Manager, HR Payroll Admin, Registrar, Bursar, Faculty, Doctor, Nurse). The Roles and permissions directory lists every role with what it can do: Roles and permissions. Some seeded roles are created empty and must be given permissions before use; the directory shows only roles that currently hold permissions.

#Requesting temporary access

  1. Open Identity › Access requests and choose New request.
  2. Pick the role, a duration between 1 and 720 hours, and write a justification (required).
  3. An administrator approves or denies it. Approval is refused if the role would create a segregation-of-duties conflict with roles you already hold.
  4. Approved access is time-bound and ends automatically.

#Access reviews

In an access review an administrator decides, for each person and role, to keep or revoke. Revoking removes the access immediately and the decision is recorded for audit.

#Multi-factor sign-in

  1. Open your own security page (Administration › My security).
  2. Scan the code with an authenticator app and enter the 6-digit code to confirm.
  3. Store the recovery codes safely; each works once.

#Troubleshooting access

Common access problems
SymptomLikely causeWhat to do
A menu item or button is missingYour roles lack the view or create permissionAsk an administrator to check Effective permissions for you.
"You do not have permission…" on saveMissing create/edit permission for that record or voucher typeRequest the specific role, or temporary access.
Approve or post is refused although you can editThese actions have their own rules (see the process chapter)Check the process chapter for who may approve or post.

About this guide

Status
Partially reviewed
Application
BSuit ERP
Audience
Administrators, managers and anyone requesting access
Owner
BSuit documentation team
Reviewer
Editorial review pending
Last verified
2026-09-25
Checked against
cb3691bbf
Seen on a running system
Not yet
Help version
2026.0.0-preview
Guide ID
erp:article/guide/roles-and-access

Known limits: Written from a line-by-line read of the implementation (every statement traced to source). Not yet walked through end to end by a trainer on a running system.

Need more help?If feedback above cannot be sent, email support and quote guide ID erp:article/guide/roles-and-access.
Email support

Permission Manager

Configure role access to master entities, transaction record types, fields, and row scopes.

On this page
Screenshot of the Permission Manager page
The Permission Manager page in BSuit.

#How permissions are organized

Master entities control reference data such as customers and products. Transaction permissions are assigned by Record Type, allowing separate access to invoices, journals, orders, and other business documents.

#Configure a role safely

  1. Select a role and review its current effective access.
  2. Grant only the actions required: view, create, edit, delete, post, approve, or other record-specific actions.
  3. Add field or row restrictions when users should see only part of an entity.
  4. Review separation-of-duties warnings before saving.
  5. Use the effective-permissions view to verify the final result.

#Why a list may be empty

Confirm the module is installed, the role is active, and the entity catalog has loaded. Your administrator account must also have permission to manage identity settings.

About this guide

Status
Partially reviewed
Application
BSuit ERP
Audience
Staff (internal users)
Owner
BSuit documentation team
Reviewer
Not yet reviewed
Last verified
Never
Checked against
Generated from source revision a36c7a086 on 2026-10-02
Seen on a running system
2026-09-21
Help version
2026.0.0-preview
Guide ID
erp:/identity/permissions
Need more help?If feedback above cannot be sent, email support and quote guide ID erp:/identity/permissions.
Email support

Request temporary access

Request time-bound access and understand approval, expiry, and separation-of-duties checks.

On this page
Screenshot of the Request temporary access page
The Request temporary access page in BSuit.

#Submit a request

  1. Choose an available business role.
  2. Explain the business reason for access.
  3. Select a duration no longer than required.
  4. Submit and monitor the request status.

#What happens after approval

Approved membership becomes effective for the approved period and expires automatically. Conflicting access can be blocked by separation-of-duties policy.

About this guide

Status
Partially reviewed
Application
BSuit ERP
Audience
Staff (internal users)
Owner
BSuit documentation team
Reviewer
Not yet reviewed
Last verified
Never
Checked against
Generated from source revision a36c7a086 on 2026-10-02
Seen on a running system
2026-09-21
Help version
2026.0.0-preview
Guide ID
erp:/identity/access-requests
Need more help?If feedback above cannot be sent, email support and quote guide ID erp:/identity/access-requests.
Email support

Glossary

Terms used across BSuit and this guide, in plain language.

#Terms

Glossary of BSuit terms
TermMeaning
Approval workflowThe chain of approvers a document goes through before it takes effect. Linked to a record type; approvers act from their approvals inbox.
Bill-wise (cash application)Settling specific invoices with a receipt or payment, so each invoice’s outstanding amount is known.
Budget commitmentBudget reserved when a requisition is approved, before money is spent.
Cost centre / profit centreDimensions used to report costs and income by department or unit.
Country packPayroll tax slabs and statutory deduction rules for a country, effective-dated.
Credit holdA block on raising new sales documents for a customer, set by collections or dunning.
Cycle countCounting part of the stock and posting the variances, instead of a full stock-take.
DraftSaved but not yet in effect; can be edited or deleted.
DunningAutomatic reminders to customers with overdue invoices, by level.
Effective permissionsEverything a person can do, combining all their roles.
Enrollment codeA one-time code that registers a terminal (till, warehouse or maintenance device) with BSuit.
FEFOFirst expiry, first out — picking the batch that expires soonest.
Fiscal periodA month (or other slice) of the fiscal year; posting is refused when it is closed.
GRN (goods receipt note)The record of goods received against a purchase order; accepting it increases stock.
GR controlThe ledger credited when goods are received and cleared when the supplier invoice is matched.
Guide IDThe stable identity of a Help guide: application plus page address.
Hidden rowA ledger row a voucher generates automatically (for example the bank side of a receipt). It is in the ledger but not shown on the voucher.
Impersonation (view as)A super administrator viewing BSuit as another user, read-only, for support.
Industry packAn optional bundle of ledgers, document types and starter data for a vertical. Different from a module.
Journal voucher (JV)A general accounting entry with balanced debits and credits.
KEDBKnown-error database: problems with a documented root cause and workaround.
ModuleA licensed functional area of BSuit (Finance, Procurement, Campus…), installed per organisation.
Party accountThe customer or supplier ledger on a voucher.
PostedRecorded in the general ledger (and stock, where applicable). Posted documents are corrected by cancelling, which creates a reversal.
Record typeThe configuration of a document or voucher type: numbering, approval, party, stock and posting behaviour.
Requisition (PR)An internal request to buy, approved before a purchase order.
RFQRequest for quotation sent to suppliers.
RTVReturn to vendor: sending goods back to a supplier.
Segregation of duties (SoD)Rules that stop one person holding conflicting roles.
SLAService-level agreement: response and resolution targets for tickets.
Soft close / hard closeLocks on a fiscal period. Both stop posting; hard close also stores a balance snapshot.
SuperuserAn account that passes every permission check. Keep these few.
Three-way matchComparing purchase order, goods receipt and supplier invoice quantities and prices.
Weighted average costThe default stock valuation method: total cost divided by total quantity.

About this guide

Status
Partially reviewed
Application
BSuit ERP
Audience
Everyone
Owner
BSuit documentation team
Reviewer
Not yet reviewed
Last verified
Never
Checked against
Generated from source revision a36c7a086 on 2026-10-02
Seen on a running system
Not yet
Help version
2026.0.0-preview
Guide ID
erp:article/guide/glossary
Need more help?If feedback above cannot be sent, email support and quote guide ID erp:article/guide/glossary.
Email support

Page, report and data reference

Where to find field-by-field detail for every screen, report, mobile screen and record type.

On this page

#How the reference is organised

Every screen of every BSuit application has its own page guide, listing its fields (with the records each reference field points to), the columns and actions seen on screen, who can use it, and — for reports — how the figures are calculated where that is documented. Every record type has a data reference listing every stored field.

#Browse

Reference directories
DirectoryContents
BSuit ERPAll ERP modules: masters, transactions, reports, settings and data reference
Vendor PortalSupplier pages
Campus PortalStudent, teacher and parent pages
MarketplaceStore, seller and jobs pages
Website & Tenant PortalPublic site and account portal
BSuit SmartMobile and terminal screens
Roles and permissionsEvery role and what it can do

About this guide

Status
Partially reviewed
Application
BSuit ERP
Audience
Everyone
Owner
BSuit documentation team
Reviewer
Not yet reviewed
Last verified
Never
Checked against
Generated from source revision a36c7a086 on 2026-10-02
Seen on a running system
Not yet
Help version
2026.0.0-preview
Guide ID
erp:article/guide/reference-index
Need more help?If feedback above cannot be sent, email support and quote guide ID erp:article/guide/reference-index.
Email support

Missing data, pages, or actions

Diagnose common access, company, filter, module, and workflow issues before escalating.

On this page

#Quick checks

  1. Confirm the correct company and database are selected.
  2. Clear list filters and broaden the date range.
  3. Check whether the module or capability is enabled.
  4. Ask an administrator to inspect your effective permissions and row scope.
  5. Refresh the page after a recent role or configuration change.

#When contacting support

Include the page address, company, approximate time, record identifier, expected result, actual result, and a screenshot without sensitive information.

About this guide

Status
Partially reviewed
Application
BSuit ERP
Audience
Staff (internal users)
Owner
BSuit documentation team
Reviewer
Not yet reviewed
Last verified
Never
Checked against
Generated from source revision a36c7a086 on 2026-10-02
Seen on a running system
Not yet
Help version
2026.0.0-preview
Guide ID
erp:article/troubleshooting/missing-data-or-actions
Need more help?If feedback above cannot be sent, email support and quote guide ID erp:article/troubleshooting/missing-data-or-actions.
Email support